How Often to Replace Reverse Osmosis Membrane

You’ve installed a reverse osmosis (RO) system to deliver clean, great-tasting water, and now you’re asking: how often to replace reverse osmosis membrane? Unlike pre-filters, which need regular swaps, the RO membrane is built to last years, but only when properly maintained. Most manufacturers suggest 2 to 5 years, yet relying solely on the calendar can mean either poor water quality or wasted money on premature replacements.
The real answer lies in performance, not time. A membrane can fail in 2 years with poor pre-filtration or last over 5 with ideal conditions. The key is measuring TDS rejection rate, monitoring flow output, and watching system behavior. This guide breaks down exactly when to replace your RO membrane using real-world data, diagnostic methods, and maintenance strategies so you’re never guessing.
You’ll learn how to test your system like a pro, extend membrane life with proper care, and avoid the number one cause of early failure: neglected pre-filters.
RO Membrane Lifespan: 2 to 5 Years
Most residential reverse osmosis membranes last 2 to 5 years, depending on water quality and maintenance habits. This range reflects real-world performance under varying conditions.
A well-maintained system with low TDS feed water and clean pre-filters often reaches the 5-year mark with minimal efficiency loss. In hard water areas or homes with high chlorine levels, membranes can degrade in just 24 months. High-volume users, such as aquarium owners or large families, may see reduced lifespans from constant demand.
Industrial or heavy-use systems follow a similar 3 to 5 year window, though continuous operation accelerates wear. Compact twist-in units sometimes require annual replacement due to design limitations rather than membrane failure, often signaling a need for a system upgrade.
Time alone shouldn’t dictate replacement. Use it as a checkpoint: inspect at 2 years, test performance annually, and replace by 5 years maximum, even if the system seems fine.
Test Membrane Health Using TDS Rejection
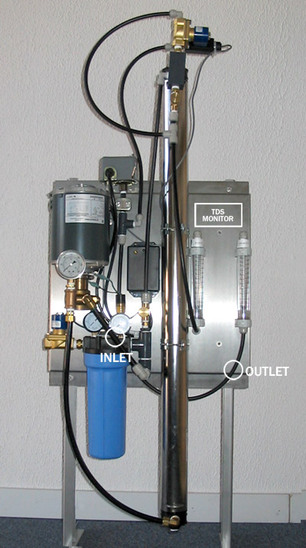
Measure Feed and Product Water TDS
The most accurate way to assess RO membrane condition is by measuring Total Dissolved Solids (TDS) in both the input (feed) and output (product) water.
Use a calibrated TDS meter:
– Feed water: Test your cold tap water before it enters the RO system.
– Product water: Test water from the RO faucet after the membrane.
Typical feed water levels include:
– City water: 300 to 550 ppm
– Well water: 30 to 20,000 ppm (varies widely)
– Low-mineral source: ~23 ppm
After filtration, a healthy membrane should produce water at 5 to 20 ppm for moderate feed (around 400 ppm), or under 10% of the feed reading.
Calculate Rejection Rate
Use this formula to determine membrane efficiency:
Rejection Rate = (1 − Product TDS ÷ Feed TDS) × 100
Performance thresholds:
– Above 90% rejection: Membrane is functioning well
– 80 to 85% rejection: Degradation has started; monitor closely
– Below 80% rejection: Replace the membrane immediately
Example:
Feed TDS = 145 ppm → Product TDS = 7 ppm
Rejection = (1 − 7/145) × 100 = 95.2% → Excellent
If product rises to 29 ppm:
Rejection = (1 − 29/145) × 100 = 80% → Time to replace.
Use the 5% Rule for Sensitive Applications
In reef aquariums or labs where ultra-pure water is critical, many use the 5% rule: replace the membrane if product TDS exceeds 5% of the feed TDS.
- Feed = 145 ppm → 5% = 7.25 ppm → Replace if output exceeds 7.25 ppm
This stricter standard ensures downstream components like DI resin aren’t overworked.
Signs Your RO Membrane Is Failing

Reduced Water Flow Rate
A noticeable drop in how fast the storage tank fills or dispenses water signals membrane fouling. Clogged pores from sediment, scale, or biofilm restrict flow.
Check:
– Has tank fill time increased significantly?
– Is faucet output slower than before?
Before blaming the membrane, rule out:
– Clogged sediment or carbon pre-filter
– Low tank pressure (below 7 to 8 PSI)
If those are fine and flow remains low, test TDS. Low rejection confirms membrane failure.
System Runs Non-Stop
If your RO system runs continuously or cycles constantly without shutting off, it can’t produce purified water fast enough to trigger the automatic shut-off valve.
Causes include:
– Severely fouled or failing membrane
– Leak in the system (check tubing and connections)
No leaks found? The membrane is likely the culprit and needs replacement.
Bad Taste or Cloudy Water
While taste issues often point to an expired carbon filter, salty or off-flavors after carbon replacement suggest the membrane is leaking contaminants.
Cloudiness may indicate:
– Biofilm growth
– Particulate breakthrough from a damaged membrane
Always test TDS when taste changes occur.
Increased Pressure Drop
Advanced users with inline pressure gauges may notice a rising pressure differential across the membrane housing. A significant increase indicates fouling and reduced permeability.
Key Factors That Shorten Membrane Life

Poor Pre-Filter Maintenance
Failing to replace sediment and carbon filters every 6 to 12 months is the top cause of early membrane failure.
- Clogged sediment filter → particles embed in membrane → irreversible fouling
- Saturated carbon filter → chlorine reaches membrane → chemical degradation
Even with a 5-year-rated membrane, skipping pre-filter changes can destroy it in 12 to 18 months.
Stick to this schedule:
– Sediment filter: Every 6 to 12 months (removes dirt, rust, silt)
– Carbon pre-filter: Every 6 to 12 months (eliminates chlorine, organics)
Hard Water and Scaling
High calcium and magnesium levels cause scale buildup on the membrane surface, blocking water passage.
Signs include:
– Gradual flow reduction
– Higher TDS over time
– Frequent cleaning needed
Solutions:
– Install a water softener upstream
– Use a scale inhibitor filter
– Flush system monthly in hard water areas
Chlorine and Chloramines
Standard polyamide RO membranes are vulnerable to oxidation. Chlorine and chloramines in city water destroy the membrane’s rejection layer.
Even brief exposure after carbon filter saturation can cause permanent damage.
Ensure your carbon filter is:
– Rated for chloramine removal (if your city uses it)
– Replaced on time, never stretched beyond 12 months
High Water Usage
Producing 50+ gallons per week, common in aquariums or large households, increases membrane workload.
More filtration cycles mean faster exhaustion of membrane capacity. Monitor TDS more frequently (every 3 to 6 months) if you’re a high-volume user.
Maximize Membrane Life With Maintenance
Sanitize the System Annually
Biofilm and bacteria can grow inside housings, tubing, and tanks, mimicking membrane failure.
Annual sanitization prevents this:
- Shut off feed water and drain the tank
- Remove pre-filters and membrane
- Add 2 to 3 tablespoons unscented bleach or 1 cup hydrogen peroxide to the first filter housing
- Reconnect tubing and turn water back on
- Run through 2 full fill-and-drain cycles
- Install new pre-filters and membrane
- Flush one final tank to remove sanitizer residue
Do this once a year, ideally during your annual filter change.
Check Storage Tank Pressure
Incorrect tank pressure causes poor flow and cycling issues.
Test and adjust annually:
– Drain tank completely
– Use a tire gauge on the Schrader valve
– Target 7 to 8 PSI for an empty tank
– Add air with a bike pump if low; release if over 10 PSI
A properly pressurized tank reduces strain on the membrane and improves efficiency.
Upgrade from Twist-In Systems
Proprietary twist-in membranes are convenient but less efficient and often require annual replacement.
Users report:
– Shorter membrane life
– Faster DI resin exhaustion
– Higher long-term costs
Upgrade to a standard 4- or 5-stage system with MaxCap-style housings for:
– Longer membrane life (4 to 5+ years)
– Better rejection rates
– Lower cost per gallon
Amortized cost drops from ~$50/year to $10 to $12/year with proper maintenance.
When to Replace: Decision Checklist
Use this checklist every 12 to 24 months:
- Test TDS rejection rate → If below 80%, replace membrane
- Check flow rate → If tank fills significantly slower, inspect pre-filters and tank pressure
- Inspect system operation → If running non-stop, test for leaks and membrane efficiency
- Review pre-filter history → If filters were overdue, membrane is likely damaged
- Assess water source → Hard water or high chlorine? More frequent replacement likely
- Hit the 5-year mark? → Replace even if performance seems okay to prevent sudden failure
Cost and Replacement Tips
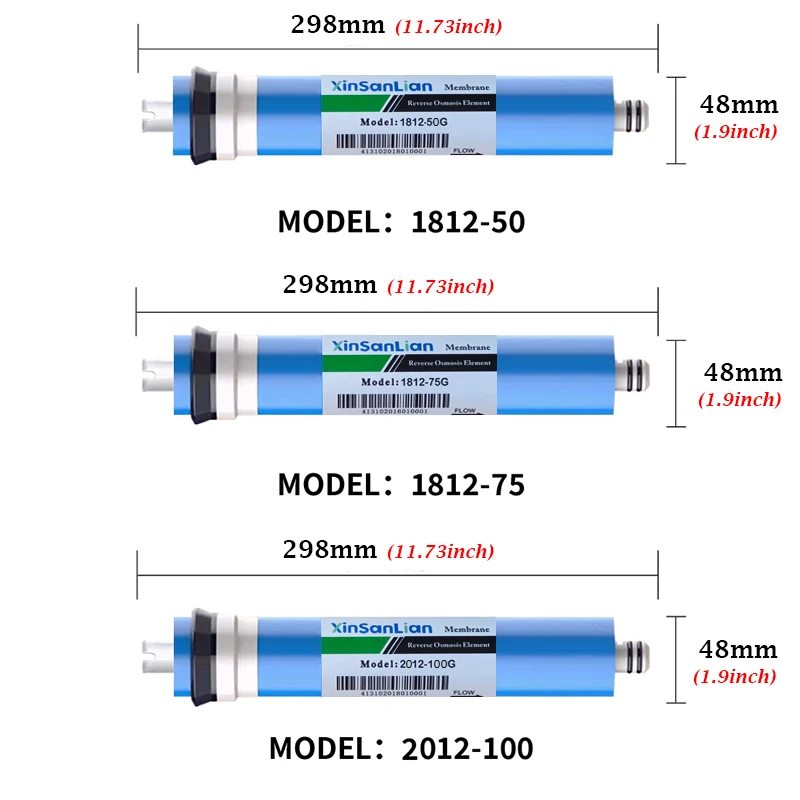
Membrane Pricing Overview
- 75 GPD Standard: ~$42, lifespan 4 to 5 years, cost/year $8 to $10
- 100 GPD Standard: ~$51, lifespan 4 to 5 years, cost/year $10 to $12
- Proprietary twist-in: ~$50, lifespan 1 to 2 years, cost/year $25 to $50
Upgrading to a standard system pays for itself in 2 to 3 years through longer membrane and DI resin life.
Replacement Best Practices
- Wear gloves when handling new membranes to avoid contamination
- Keep in packaging until installation to prevent drying
- Flush new membrane by discarding the first 2 to 3 tanks of water to remove preservatives
- Replace pre-filters at the same time to ensure clean input water
Frequently Asked Questions About RO Membrane Replacement
How do I know if my RO membrane needs replacing?
Test your TDS rejection rate. If it drops below 80%, replace immediately. Other signs include slow flow, continuous system running, and bad taste.
Can an RO membrane last 10 years?
Unlikely under normal residential use. Maximum realistic lifespan is around 5 years with excellent pre-filtration and low TDS feed water.
What happens if I don’t replace my RO membrane?
Water quality degrades, TDS rises, contaminants pass through, and you may notice bad taste, cloudiness, or reduced flow. The system also works harder, increasing wear.
Does hard water shorten RO membrane life?
Yes. Hard water causes scale buildup on the membrane surface, which blocks pores and reduces efficiency. Installing a water softener upstream helps extend membrane life.
How much does it cost to replace an RO membrane?
Standard membranes cost $42 to $51. Proprietary twist-in membranes cost around $50 but require more frequent replacement, making them more expensive long-term.
Should I replace pre-filters before the membrane?
Always replace pre-filters every 6 to 12 months. This protects the membrane from chlorine, sediment, and premature fouling. Skipping this step is the leading cause of early membrane failure.
Key Takeaways for Replacing Your RO Membrane
The answer to how often to replace reverse osmosis membrane isn’t a single number. It’s a strategy built on performance data, not just the calendar.
Test TDS annually and replace when rejection drops below 80%. Never skip pre-filter changes, as this is the leading cause of premature failure. Sanitize the system and check tank pressure yearly to prevent biofilm buildup and cycling issues. If you’re using a twist-in system, consider upgrading to a standard 4- or 5-stage setup for better longevity and value. Finally, replace the membrane by the 5-year mark even if performance seems fine, preventing sudden failures.
With proper care, your RO membrane can deliver years of reliable, high-purity water. Stay proactive, measure performance, and you’ll avoid both premature replacements and risky delays.