How to Change Whirlpool Water Filter
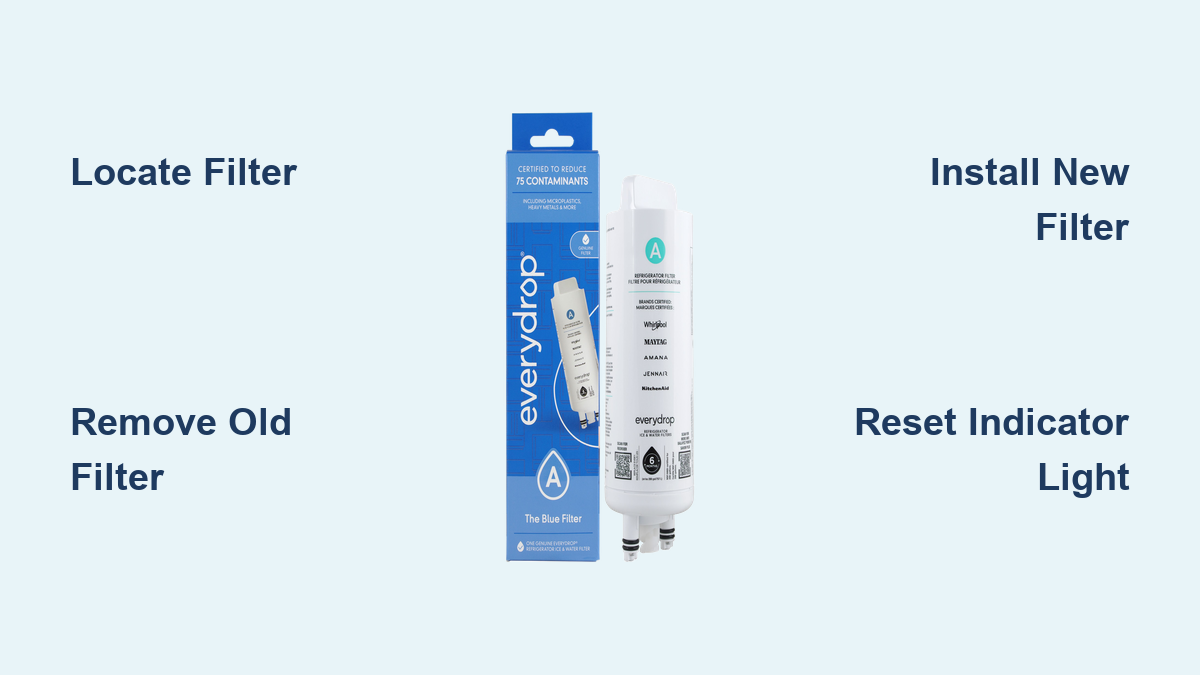
Is your Whirlpool refrigerator dispensing slow water or producing ice that tastes off? A clogged or expired water filter is the most common cause. Changing your Whirlpool water filter every six months keeps your water clean, fresh, and safe to drink. When the red indicator light appears on your control panel, it signals that a replacement is overdue. The good news? The entire process requires no tools and typically takes under a minute once you know your filter type. In this guide, you’ll learn exactly how to find your filter, remove the old cartridge, install a new one correctly, and reset the indicator light.
Whether your filter sits in the fridge’s upper corner, behind the base grille, or inside the freezer, we’ll walk you through every model-specific step. You’ll also discover how to flush the system properly and avoid common mistakes like misaligned filters or forgotten O-rings. Let’s get your Whirlpool running like new.
Locate Your Whirlpool Water Filter
Check the Upper Right Interior
Open the refrigerator door and inspect the upper right interior corner. Many Whirlpool models house the filter here behind a flip-up or pull-down cover. Look for a panel marked with an arrow or the word “Filter.” Gently lift or pull the cover without forcing it. This location is common for twist-lock and push-in filter styles. Confirm an actual cartridge sits behind the panel before proceeding.
Examine the Base Grille
If no filter appears inside, check the front base grille at the bottom of the unit. This toe-kick panel often pops out with a light push. Once removed, inspect both the left and right sides for a filter housing. Some models feature an eject button on the left side that releases the filter with a single press. Always verify your model’s layout using the model number before opening anything.
Inspect the Freezer Base
For select side-by-side models, the filter sits at the bottom of the freezer compartment. Pull open the small gray panel near the floor, and it will extend outward, revealing the filter housing. This design uses slanted prongs and a one-way fit. If you spot this gray access door, you likely need a W001 or Every Drop filter.
Identify Your Filter Type

Match the Model Number
Use your refrigerator’s model number, found on the interior wall or door frame, to confirm the correct replacement filter. Installing the wrong filter reduces performance and may void your warranty. Cross-reference the number with Whirlpool’s official compatibility chart. Common options include Whirlpool Filter 1, 2, 3, 4, and W001 (Every Drop), each with a unique installation method.
Recognize Installation Mechanisms
Filters fall into three main categories: push-in, twist-lock, and eject-button. Push-in filters slide straight into the housing with an upward arrow. Twist-lock models require turning left to remove and right to lock. Eject-button versions release with a press and snap back when installed. Some models also require you to reuse the cap from the old filter. Knowing your mechanism prevents installation errors.
Remove the Old Whirlpool Water Filter
Use the Eject Button (Left Base Models)
For filters located on the left side of the base grille, press the eject button firmly. The old filter will pop out slightly. Grasp it and pull it the rest of the way. A small drip is normal, so keep a towel handy. If the button doesn’t release the filter, ensure the grille is fully open and check for debris blocking the mechanism.
Twist and Pull (Interior Models)
For upper right interior twist-lock filters, pull the filter down slightly and turn it counterclockwise. Once unlocked, slide it out. Some models require you to open a small lever or tab before turning. If you feel resistance, double-check the rotation direction. Forcing it can damage the housing threads.
Slide Out (Push-In Models)
For push-in style filters, simply pull the cartridge straight out without twisting. If it resists, wiggle gently while pulling. Never use pliers, as this can damage the O-rings or housing. After removal, inspect the slot for leftover debris or old O-rings that could block the new filter.
Install the New Filter
Align the Arrow Correctly
Every Whirlpool filter features an arrow indicating water flow direction. For interior and base filters, the arrow usually points upward. For left-side base models, it points left. For freezer-base models, it points left when the housing is fully extended. Installing the filter backward blocks water flow entirely. Verify the arrow direction before inserting.
Insert and Lock in Place
For push-in types, slide the new filter straight in until it stops. For twist-locks, insert it straight, then turn clockwise until it clicks. For eject-button models, push the filter in until the button pops back out. You should feel a solid click confirming the lock. If no click occurs, realign and try again. Avoid over-tightening.
Reuse the Cap When Required
On side-by-side models, the cap from the old filter must be reused. Remove it before discarding the old cartridge, then attach it to the new filter by aligning the ridges and turning clockwise. Replacement filters typically do not include a new cap. Skipping this step prevents proper sealing and causes leaks.
Flush the System After Installation

Run Four Gallons of Water
After installation, flush the system by dispensing 4 gallons (15 liters) of water through the dispenser. Use a large pitcher to catch the flow. Expect sputtering, air bubbles, or dark water at first; this is normal as loose carbon and trapped air exit the lines. Continue until water flows smoothly and runs clear. For freezer-base models, flush about 1 liter (5–6 mugs) instead.
Prevent Air Locks
Trapped air causes sputtering and slow flow. Clear it by dispensing water in 1-minute intervals with short breaks between cycles. This allows air to escape gradually. Avoid running the dispenser continuously for too long, as this can overheat the motor. The full flushing process takes roughly 2–3 minutes.
Clear Residual Carbon Particles
The first few glasses may contain harmless carbon dust. Run the dispenser for an extra 30–60 seconds after the water clears to flush any remaining particles from the line. This step improves taste and prevents clogs in the ice maker.
Reset the Filter Indicator Light

Press and Hold the Reset Button
Most Whirlpool models feature a “Filter Reset” button on the control panel. Press and hold it for 3 seconds. The red light should change to blue or turn off, confirming the cycle has reset. If no dedicated button exists, look for a water icon or filter symbol that doubles as the reset control.
Use the Dual Button Method (Freezer Models)
On certain models with the filter in the freezer base, press and hold both the “Water Filter” and “Ice Maker” buttons simultaneously for 3 seconds. The indicator will flash, then go dark. This dual-button method is common on older or specific side-by-side units. Consult your owner’s manual if you’re unsure which method applies.
Confirm Automatic Reset
Some newer models reset automatically after a few minutes of normal use. Wait 5–10 minutes after flushing to see if the light turns off on its own. If it stays red, perform a manual reset. A persistent red light after replacement may indicate improper installation or a defective filter.
Troubleshoot Common Filter Issues
Filter Won’t Insert
If the new filter won’t slide in, do not force it. Check the arrow direction and ensure it matches the housing guide. Rotate the filter slightly until the notches align with the grooves. For twist-locks, confirm the slot is clear. For eject models, verify the button is fully retracted before inserting.
No Click or Lock Sound
If the filter doesn’t click into place, push it further in; some models require an extra inch of pressure. For twist-locks, turn fully clockwise and listen for the audible lock. If it still feels loose, remove the filter and inspect for cracked O-rings or debris in the housing. A failed lock leads to leaks and poor filtration.
Water Is Leaking
Leaking usually means O-rings are missing or still covered. Before installing, remove all protective covers from the O-rings and confirm they’re seated properly. For cap-style models, ensure the cap is locked clockwise. Also verify the filter is fully inserted and locked. A small drip after replacement is normal, but steady leaks are not.
Indicator Light Won’t Reset
If the light stays red, verify the correct reset method for your specific model. Some require dual buttons, others a single hold. Ensure you press and hold for a full 3 seconds. Restart the process after flushing. If the light still won’t reset, unplug the refrigerator for 1 minute and try again.
Maintain Optimal Filter Performance
Replace Every Six Months
Stick to the 6-month replacement schedule, even if your water tastes fine. Over time, filters lose effectiveness and can harbor bacteria. Set a calendar reminder or enroll in a subscription service for automatic deliveries. Delaying replacement risks poor water quality and added strain on the dispenser.
Respond to the Red Light Promptly
The red indicator light is your main alert that replacement is due. Don’t ignore it. Extended use of an expired filter reduces water flow, affects ice production, and may allow contaminants through. Reset the light only after installing and flushing a new filter.
Inspect O-Rings Every Time
Each time you change the filter, inspect the O-rings on the new cartridge. They should be soft, intact, and free of any packaging material. Damaged or missing O-rings cause leaks. Store spare filters in a cool, dry place to preserve rubber integrity.
Avoid Decorative Panel Confusion
Some panels near the fridge door or base look like filter access points but are purely decorative. Only open panels with clear labels, arrows, or visible mechanisms. Forcing closed panels can break clips or housings. When in doubt, consult your model’s manual online.
Frequently Asked Questions About Changing a Whirlpool Water Filter
How often should I change my Whirlpool water filter?
Whirlpool recommends replacing the water filter every six months to maintain clean water and optimal flow. Some models display a red indicator light when replacement is due. You can also enroll in a subscription service for automatic deliveries every three or six months.
Where is the water filter located in my Whirlpool refrigerator?
Whirlpool filters are typically found in three locations: the upper right interior corner, the base grille at the bottom front, or the bottom of the freezer behind a gray panel. Check your model’s manual using the serial number to confirm the exact location.
Do I need to turn off the water before changing the filter?
No, you do not need to shut off the water valves. Whirlpool filters are designed for quick replacement without tools. Expect a small drip when removing the old filter, so keep a towel nearby.
Why is water sputtering after I install a new filter?
Sputtering is normal and caused by trapped air in the water lines. It typically stops after flushing 4 gallons of water through the dispenser. If sputtering continues, check that the filter is fully locked and the arrow points in the correct direction.
What happens if I install the wrong filter?
Installing the wrong filter can reduce performance, allow contaminants through, and potentially void your warranty. Always match the filter model to your refrigerator’s model number using Whirlpool’s official compatibility chart.
How do I reset the filter light on my Whirlpool fridge?
Most models require you to press and hold the “Filter Reset” button for 3 seconds until the red light turns off or changes to blue. Some freezer-base models require holding both the “Water Filter” and “Ice Maker” buttons simultaneously for 3 seconds.
Key Takeaways for Changing Your Whirlpool Water Filter
Changing your Whirlpool water filter is a quick, tool-free task that ensures clean, great-tasting water and ice. Start by identifying your filter type using the model number, then locate the housing in the upper interior, base grille, or freezer base. Remove the old cartridge using the appropriate method (eject button, twist, or pull), align the arrow on the new filter, and lock it into place. Don’t forget to reuse the cap on side-by-side models and inspect the O-rings before installation.
After installing the new filter, flush 4 gallons of water through the dispenser to clear air and carbon dust, then reset the indicator light by holding the reset button for 3 seconds. Stick to the 6-month replacement schedule and respond promptly to the red light to keep your refrigerator performing at its best. With these steps, you’ll never struggle with a Whirlpool filter change again.