How to Clean Reverse Osmosis Faucet
If your reverse osmosis faucet is dispensing water that smells musty, tastes off, or shows visible residue, the problem runs deeper than a simple filter swap. Bacteria, mold, and biofilm can colonize the faucet path, tubing, and storage tank, all of which filters alone cannot reach. Ignoring these warning signs allows contamination to spread and can compromise both water quality and system performance.
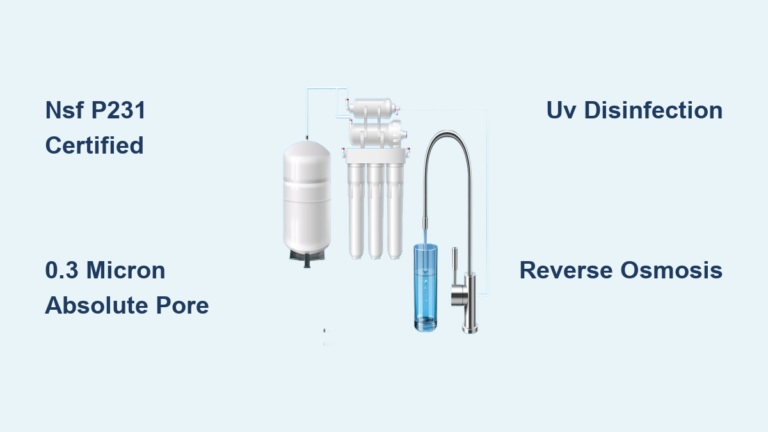
Cleaning the reverse osmosis faucet is actually a full system sanitization process that targets every wet component. This guide walks you through the exact steps to safely disinfect your faucet and entire RO system using either a professional sanitizer or household bleach. You will also learn how to spot early warning signs, avoid common mistakes, and keep your system running at peak performance.
Signs Your RO Faucet Needs Cleaning

Foul Odors or Strange Tastes
Musty, rotten, or sulfur-like smells in your filtered water typically indicate bacterial growth inside the faucet spout, tubing, or storage tank. Even with brand-new filters, stagnant water or extended idle periods allow biofilm to develop. A “rotten egg” odor often points to sulfate-reducing bacteria, especially after vacations or long stretches without use.
Visible Mold or Residue
Inspect under the faucet handle and around the base for mold spots, slimy buildup, or dark specks. While some mold on the dirty (feed) side of the RO membrane is normal, any growth near the faucet or in the drinking water stream demands immediate sanitization.
Cloudy or Discolored Water
Persistent cloudiness lasting more than a minute, or gray or black particles in the water, often signals carbon fines from new filters. If flushing does not clear the issue, degraded components or microbial contamination may be the cause. Milky water that clears quickly is usually just trapped air and is not a concern.
Prepare for Cleaning Safely
Shut Off Water and Depressurize
Turn off the feed water valve under the sink by rotating it 90 degrees. Open the RO faucet and let water run until flow stops completely, which drains pressure and empties the storage tank. Close the faucet once draining finishes to keep debris from entering the lines.
Gather Tools and Supplies
You will need:
– Replacement sediment, carbon, and post-carbon filters
– A new RO membrane (do not reuse the old one)
– Food-grade silicone grease for O-rings
– Soft brush or toothbrush
– Disposable gloves
– Funnel or measuring cup
– SaniSystem packet or 2–3 tablespoons unscented household bleach (5.5–6% sodium hypochlorite)
– Optional: drain line shut-off valve for trapping sanitizer
Keep new filters sealed in their packaging until installation to prevent contamination.
Clean the Faucet and Exterior Surfaces
Wipe and Scrub the Faucet
Start by cleaning the outside even if the main issue is internal. Spray a mild cleaner or soapy water on the faucet body, handle, and base. Scrub crevices with a soft brush where dust and moisture collect. Let the cleaner sit for 5 minutes if mold is visible, then rinse thoroughly with a damp cloth and dry completely.
Inspect the Spout for Blockages
Remove the aerator at the tip of the spout if present. Soak it in warm vinegar for 10 minutes to dissolve mineral deposits. Use a paperclip or small wire to clear any obstructions in the spout opening. Rinse and reattach to restore proper flow and eliminate hidden buildup.
Sanitize the RO System (Including Faucet Path)
Remove Old Filters and Membrane
Unscrew the sediment, carbon, and post-carbon filter housings using a housing wrench or by hand for quick-change models. Discard all old filters. Disconnect the tubing from the RO membrane housing and use needle-nose pliers to pull out the old membrane. Replace it with a new one after sanitization. Leave all housings empty except the first stage, which will hold the sanitizer.
Apply Sanitizer to the System
Pour the sanitizing solution into the open first-stage housing:
– SaniSystem: Add one full packet
– Bleach: Add 2–3 tablespoons (30–45 ml)
Screw the housing back on tightly. Do not install filters or the membrane yet.
Trap Sanitizer in the System
Cut the black drain tube at a 90-degree angle with a razor blade. Insert a manual shut-off valve and close it after the system begins draining. This forces sanitizer backward through the membrane housing and into the storage tank, saturating the faucet path, tubing, and tank. Let the system pressurize for 5–10 minutes.
Allow Soak Time for Full Disinfection
Wait for Proper Contact Duration
The sanitizer must dwell inside the system to kill bacteria and biofilm:
– SaniSystem: 1–5 minutes
– Bleach: Minimum 30 minutes
Keep the RO faucet closed during this time to maintain pressure and ensure all internal passages stay saturated. Never mix bleach with ammonia or acidic cleaners, as toxic fumes can result.
Flush the System Completely
Drain and Rinse Three Times
- Open the RO faucet and drain line valve.
- Let water run for at least 5 minutes or until no chemical smell remains.
- Turn off the water supply and drain the storage tank completely through the faucet.
- Repeat this drain-refill cycle two more times to remove all sanitizer residue.
This triple-flush process is essential, especially when using bleach, to eliminate any lingering taste or odor.
Reinstall Filters and Finalize Setup
Install New Filters and Membrane
Before inserting new components, inspect O-rings for nicks or flattening. Apply a thin layer of food-grade silicone grease and seat them properly in their grooves. Insert the new sediment, carbon, and post-carbon filters, then slide the new RO membrane into the housing and reattach the cap securely without overtightening.
Reconnect and Check for Leaks
Turn the water supply back on and watch all housing connections for leaks. Tighten slightly if needed, but avoid cracking the plastic. Let the system refill the tank for 2–3 hours, then check again for drips or moisture under the sink.
Perform Triple Flush for New Membrane

Remove Preservative Solution
New RO membranes contain a glycerin-based preservative that must be flushed:
1. Let the tank fill completely.
2. Drain the entire tank through the faucet.
3. Repeat this fill-and-drain cycle two more times.
After the third flush, the water should be odorless and safe to drink.
Maintain Optimal Faucet and System Health

Check Tank Air Pressure Annually
An under-pressurized storage tank causes slow flow and short draw volume. Test pressure when the tank is empty using a bicycle tire gauge on the Schrader valve. Target 5–7 PSI, with 7 PSI being standard. Add air with a bike pump if low, or release pressure by pressing the valve pin if too high.
Follow a Regular Maintenance Schedule
- Filters: Replace every 6 months
- RO Membrane: Replace every 2–3 years
- Sanitization: Perform annually or with every filter change if water quality is questionable
- Faucet Cleaning: Wipe down monthly; sanitize with the system
High sediment, hard water, or long idle periods may require more frequent attention.
Troubleshoot Common Post-Cleaning Issues
Persistent Chemical Smell
If bleach odor remains, continue flushing. Run 2–3 additional full tank cycles. Make sure the drain line valve used during cleaning is removed or fully open, because trapped pockets of concentrated solution can linger in the tank.
Gurgling or Sputtering
Air pockets are normal after servicing. Open the faucet and let water run until flow becomes steady, usually within 30–60 seconds.
Leaks at Filter Housings
Turn off water and depressurize. Check O-rings for debris or misalignment. Clean the groove, re-lubricate, and hand-tighten plus a quarter turn. Over-tightening is a leading cause of leaks and cracked housings.
Cloudy or Particulate-Laden Water
Gray or black specks are usually carbon fines from new filters. Flush until water clears. If cloudiness persists, repeat sanitization, as biofilm may remain in the faucet or tank.
Frequently Asked Questions About Cleaning a Reverse Osmosis Faucet
How often should I sanitize my reverse osmosis system?
Sanitize your RO system at least once per year, or whenever you replace the filters (every 6–12 months). If you notice foul odors, visible mold, or have just returned from a long vacation, sanitize immediately.
Can I use vinegar to clean my RO faucet?
Vinegar works well for removing mineral deposits from the aerator and exterior surfaces, but it is not strong enough to kill bacteria and biofilm inside the system. Use a proper sanitizer like SaniSystem or diluted bleach for full disinfection.
Is bleach safe for reverse osmosis membranes?
Standard bleach can damage thin-film composite membranes if not flushed thoroughly. Either remove the membrane before using bleach, or choose SaniSystem, which is non-oxidizing and safer for membrane components.
Why does my RO water smell bad even after changing filters?
Bad smells after a filter change usually indicate bacterial growth inside the faucet, tubing, or storage tank. Filters alone cannot sanitize these wet surfaces. A full system sanitization is required to eliminate the source of the odor.
How long does the sanitization process take?
The active work takes about 30–60 minutes, but the full process including dwell time, flushing, and three tank refill cycles can span 6–8 hours due to waiting for the storage tank to refill between flushes.
What pressure should my RO storage tank be set to?
Check the air pressure when the tank is empty. The target is 5–7 PSI, with 7 PSI being the industry standard. Use a bicycle tire gauge on the Schrader valve to test and adjust.
Key Takeaways for Cleaning Your Reverse Osmosis Faucet
Cleaning a reverse osmosis faucet is not a standalone task. It is part of a complete system sanitization that protects water quality and extends equipment life. The most critical steps include shutting off water and depressurizing before disassembly, using the correct sanitizer with proper dwell time, trapping sanitizer in the drain line to reach the tank, and performing three full tank flushes to remove all residue.
Your next step is to schedule an annual sanitization alongside your filter replacement. Set a reminder, gather your supplies, and set aside a few hours to complete the process. With consistent maintenance, your RO system will deliver clean, great-tasting water for years to come.