How to Use a Reverse Osmosis System

If your tap water leaves spots on dishes, carries a metallic taste, or you simply want protection from contaminants like lead and PFAS, a reverse osmosis system delivers thorough purification. But owning one is only half the job. Learning how to use a reverse osmosis system properly determines whether you get years of clean water or constant frustration. These systems involve multiple filtration stages, a storage tank, and scheduled maintenance that many owners overlook.
This guide walks you through every phase of RO ownership, from initial installation and flushing to daily operation, filter replacement, and performance testing. You will learn how to prime your system correctly, interpret faucet signals, manage wastewater, and avoid the most common mistake homeowners make: neglecting pre-filter changes until the membrane fails. By the end, you will know exactly what to do each month, each year, and every few years to keep your water pure and your system running efficiently.
Set Up the System for First-Time Use
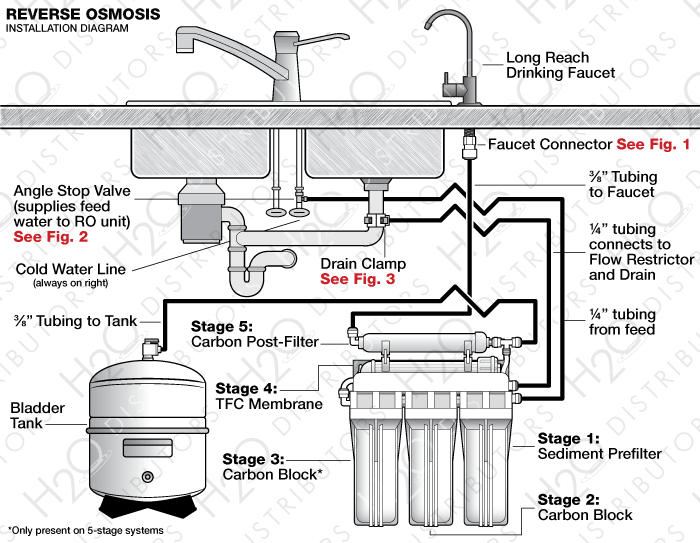
Correct installation sets the stage for everything that follows. A poorly mounted system can leak, restrict flow, or damage the membrane before you ever fill a glass.
Mount Components Under the Sink
Choose a location with at least 15.5 inches of clearance from the floor so you can remove filter housings during future changes. Mount the filter assembly bracket vertically on the cabinet wall using a level, then secure it with screws. Position the storage tank nearby, ideally directly beneath the faucet, to minimize tubing length and reduce pressure loss.
Install the Dedicated Faucet
Drill a 7/8-inch hole in the sink deck or use an existing sprayer hole. Insert the RO faucet shank through the opening and tighten the mounting nut underneath by hand first, then finish with a wrench to avoid cracking the surface. A secure faucet prevents wobbling and leaks during daily use.
Connect Water Supply and Drain Lines
Shut off the cold water supply under the sink. Install an adapter tee or saddle valve onto the cold water line, wrapping threaded connections with three layers of Teflon tape applied counter-clockwise. Connect the feed line (typically orange or green) to this valve. Attach the black drain line to a saddle clamp on the vertical section of the drain pipe above the P-trap. Press all tubing firmly into quick-connect fittings until you hear a click.
Flush and Prime the System
Flushing removes carbon fines and manufacturing residue from new filters. Skipping this step produces black or gray water and can clog the membrane prematurely.
Restore Water and Open the Tank Valve
Turn on the main water supply and open the storage tank shut-off valve. The system will begin filling slowly, a process that can take one to two hours depending on your household pressure. Listen for hissing or dripping near connections during this initial fill, as these sounds often reveal loose fittings.
Run Water Until It Runs Clear
Open the RO faucet and let water flow continuously. The first few gallons will likely appear dark due to carbon particles from the new pre- and post-filters. Keep the faucet open until water runs completely clear, usually within 20 to 30 minutes. Do not consume this initial water.
Drain and Refill the Tank
Once the water clears, close the faucet and allow the tank to fill completely. Then open the faucet again and drain the entire tank. This second purge removes any residual particles that settled during pressurization. Close the faucet and let the tank refill one final time. Your system is now ready for regular use.
Operate the Faucet for Daily Use
Proper daily habits extend system life and maintain water quality. Most issues stem from how owners interact with the faucet.
Dispense Water in Short Intervals
Avoid leaving the faucet running for extended periods. RO systems produce water slowly, typically between 10 and 75 gallons per day depending on the model. Heavy use empties the tank quickly, and refilling takes one to two hours. If your household needs large volumes, consider a high-capacity or tankless RO system.
Recognize Normal Flow Sounds
When you open the faucet, expect a steady stream that may taper slightly as tank pressure drops. Gurgling is normal as air moves through the lines. However, sputtering or irregular spurting often signals low tank pressure or a damaged bladder, both common after long storage or infrequent use.
Address Slow Flow or Dripping
If water trickles out or the faucet drips after closing, check these components in order:
• Clogged post-filter
• Low tank pressure
• Partially closed shut-off valves
• Debris in the faucet aerator
Clean or replace the affected part. Persistent dripping usually requires replacing the faucet cartridge.
Replace Filters and Membrane on Schedule
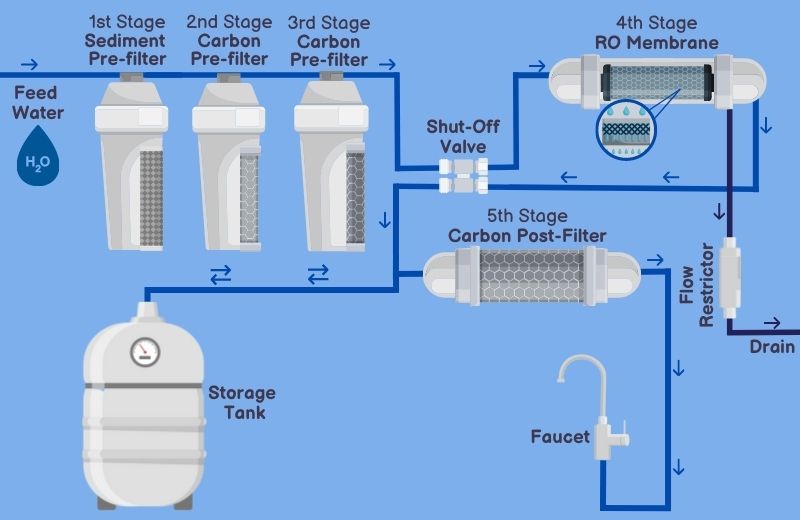
Neglecting filter changes is the leading cause of premature membrane failure. A clogged pre-filter starves the membrane of water, while a worn carbon filter lets chlorine through and damages the membrane permanently.
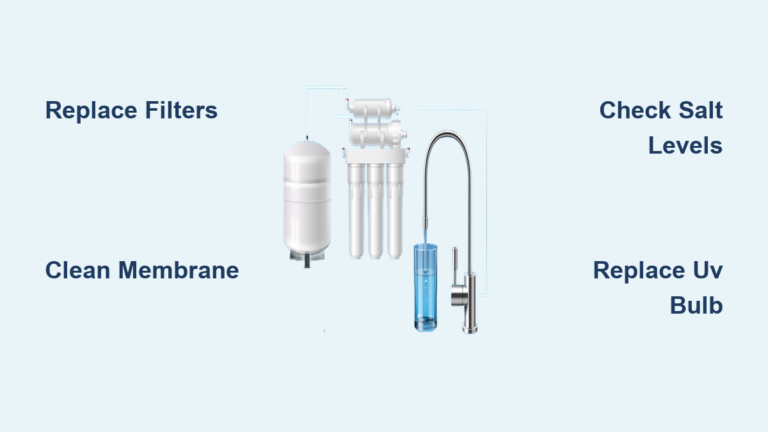
Change Pre-Filters Every Six Months
Replace the sediment filter and carbon pre-filter every six months without exception. The sediment filter traps rust, silt, and dirt that would clog the membrane. The carbon pre-filter removes chlorine, which destroys thin-film composite membranes even at trace levels. If your water is particularly dirty or you use the system heavily, inspect filters every three months and replace them sooner if they appear dark or restricted.
Replace the Post-Filter Annually
The activated carbon post-filter polishes water just before it reaches the faucet, removing any stale tastes or odors that develop in stored water. Replace it every 6 to 12 months to maintain fresh flavor and prevent bacterial buildup.
Inspect the Membrane Every Two to Five Years
The RO membrane typically lasts 2 to 5 years depending on water quality and usage. Watch for these warning signs:
• Noticeable drop in water production
• Metallic or salty taste in output
• Increased wastewater ratio
• TDS readings above 50 ppm in permeate water
Test your permeate monthly with a handheld TDS meter. A sudden rise indicates membrane wear or failure that requires immediate replacement.
Manage Wastewater and Efficiency
RO systems produce reject water, a concentrated stream of contaminants flushed to the drain. Understanding this process helps you reduce waste and lower your water bill.
Know Your System’s Recovery Ratio
Traditional RO units generate 3 to 4 gallons of wastewater per gallon of purified water. WaterSense-labeled models are far more efficient, producing no more than 2.3 gallons of waste per gallon of product. Check your system’s specifications to understand its recovery rate and identify opportunities for improvement.
Avoid High Recovery in Hard Water
Running your system at recovery rates above 50% increases scaling risk, a process where minerals like calcium carbonate precipitate onto the membrane surface. If you have hard water, install a water softener upstream or use an antiscalant to protect the membrane from mineral damage.
Consider Recycling Brine Water
Some homeowners divert reject water to outdoor irrigation for non-edible plants or to toilet flushing. Ensure the water contains no softener discharge or high sodium levels before reuse, as these can harm soil and plants.
Troubleshoot Common Problems
Even well-maintained systems occasionally develop issues. Quick diagnosis prevents minor problems from becoming expensive repairs.
No Water from the Faucet
Work through this checklist:
1. Is the tank valve fully open?
2. Is the cold water supply turned on?
3. Are the pre-filters clogged?
4. Is the storage tank empty or under-pressurized?
Test tank pressure with a gauge. With the tank empty, it should read 7 to 10 psi. Add air if below 7 psi, or drain and repressurize if above 10 psi.
Low Water Production
Common causes include:
• Low feed water pressure (below 40 psi)
• Cold water temperature (below 50°F)
• Clogged pre-filters
• Fouled or aged membrane
Install a booster pump if municipal pressure is weak. In winter, insulate under-sink plumbing to maintain consistent flow.
Bad Taste or Odor
If water tastes sour or musty, take these steps:
• Replace the post-filter immediately
• Sanitize the storage tank and distribution lines
• Flush the system for 30 minutes
Bacterial growth in stagnant tanks is a frequent cause, especially if the system sits unused for weeks.
Enhance Performance with Optional Add-Ons
Several upgrades can improve taste, safety, and convenience depending on your water quality and household needs.
Add a Remineralization Filter
RO water is extremely pure but lacks beneficial minerals like calcium and magnesium. A remineralization cartridge adds these back, balancing pH and improving flavor. This upgrade is ideal for coffee enthusiasts or anyone who finds RO water tastes flat.
Install a UV Sterilizer
For households using well water or those concerned about microbial contamination, a UV light installed after the storage tank kills bacteria and viruses. This provides an extra layer of protection beyond what the membrane alone offers.
Use Smart Monitoring Systems
Modern RO systems include digital monitors that track filter life, water usage, and potential leaks. Some connect to smartphone apps that send alerts when maintenance is due or when a leak is detected. These tools simplify upkeep and prevent water damage.
Test Water Quality Regularly
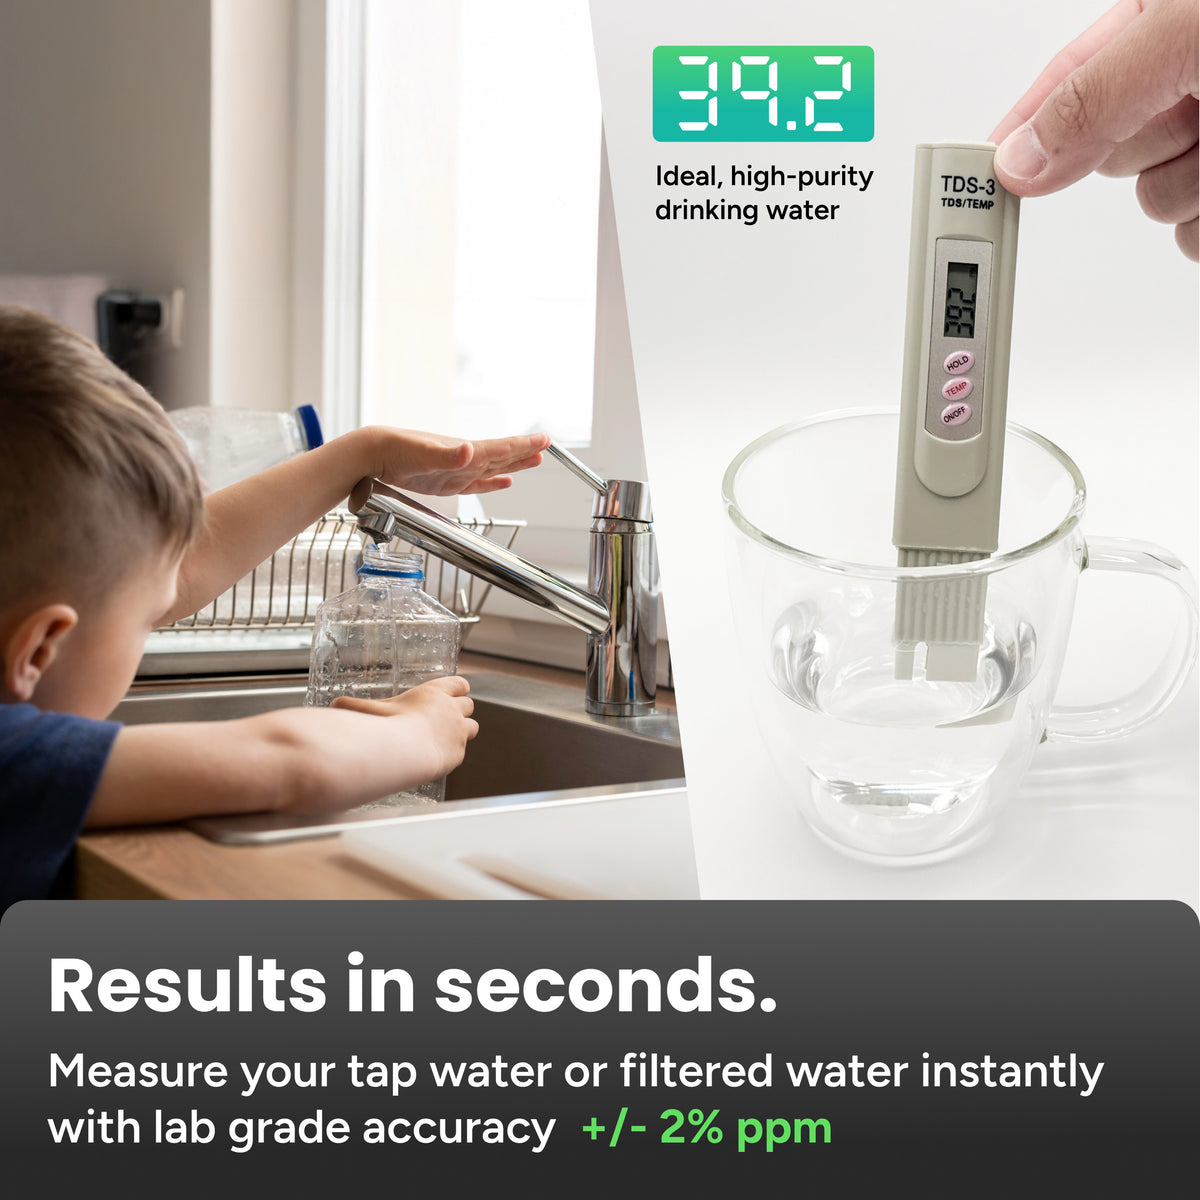
Do not assume your system is working just because water flows from the faucet. Regular testing confirms performance and catches problems early.
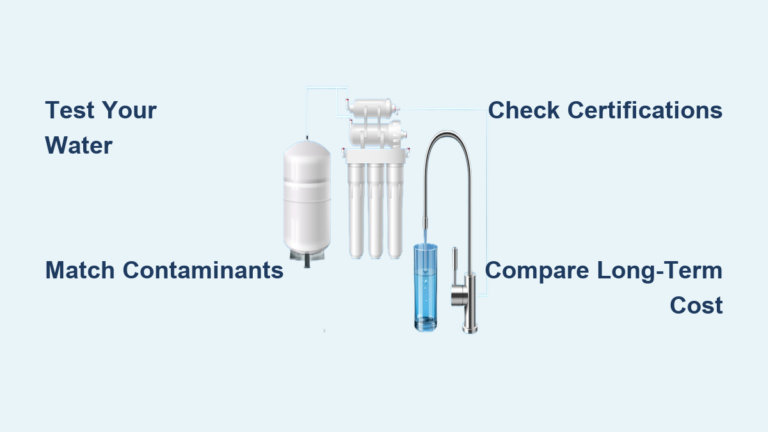
Test with a TDS Meter Monthly
A handheld TDS meter costs under $20 and provides instant feedback. Test both your tap water and RO output. A healthy system should reduce TDS by 95% to 99%. For example:
• Tap water: 300 ppm
• RO water: 3 to 15 ppm
Readings above 50 ppm in permeate suggest membrane degradation or system malfunction.
Schedule Annual Laboratory Testing
Send a water sample to a certified lab once per year for comprehensive analysis. Request testing for:
• Lead
• Nitrates
• Arsenic
• PFAS
• Bacteria
This step is especially important for well water users or anyone living near industrial sites.
Inspect for Leaks and Corrosion
Check tubing, connections, and the drain saddle monthly for dampness, mold, or corrosion. RO water is aggressive due to its low mineral content and can leach metals from copper plumbing. Use PEX or stainless steel for post-RO lines to avoid contamination.
Frequently Asked Questions About Reverse Osmosis Systems
How often should I replace the filters in my reverse osmosis system?
Replace sediment and carbon pre-filters every six months. Change the carbon post-filter every 6 to 12 months. The RO membrane typically lasts 2 to 5 years depending on water quality and maintenance consistency.
Why does my RO water taste flat or acidic?
RO removes dissolved minerals that contribute to flavor, leaving water tasting flat or slightly acidic. Installing a remineralization cartridge adds calcium and magnesium back, improving taste and balancing pH.
Is the wastewater from an RO system harmful?
No. Reject water contains the same contaminants as your tap water, just at higher concentrations. It is safe to discharge to the drain. Some homeowners recycle it for irrigation of non-edible plants.
Can I install a reverse osmosis system myself?
Yes, most point-of-use under-sink systems are designed for DIY installation if you have basic plumbing skills. You will need to drill a faucet hole, make water supply connections, and install a drain saddle. Professional installation averages around $2,200 for complex setups.
How do I know if my RO membrane needs replacement?
Watch for four key signs: noticeable drop in water production, metallic or salty taste, increased wastewater ratio, and TDS readings above 50 ppm in permeate water. Monthly TDS testing provides the clearest early warning.
What is the white powder on my new RO faucets or fittings?
This is typically mineral residue from manufacturing or Teflon tape debris. It is harmless and rinses away easily. If you see persistent white buildup on the faucet itself, it may indicate hard water spotting and can be cleaned with vinegar.
Key Takeaways for Using Your Reverse Osmosis System Effectively
Mastering how to use a reverse osmosis system comes down to three core habits: replace filters on schedule, flush the system properly after installation, and test water quality monthly with a TDS meter. These simple steps prevent 90% of common RO problems and extend membrane life well beyond the minimum two-year mark.
Your next step is simple: mark your calendar for pre-filter replacement six months from today, purchase a TDS meter if you do not already own one, and schedule your first annual lab test. With these habits in place, your RO system will deliver clean, safe, great-tasting water for 10 to 15 years or more.