How to Flush RO Membrane: Quick Steps
If your reverse osmosis system is producing water slower than usual, your TDS readings keep climbing, or your DI resin burns out faster every month, the problem almost certainly traces back to one neglected task: flushing the RO membrane. This single maintenance step protects your membrane from scaling, prevents biofilm buildup, and stops contaminants from reaching downstream components. Skip it, and you risk premature membrane failure costing $200–$300 per replacement.
This guide breaks down exactly how to flush an RO membrane for every scenario you’ll encounter. You’ll learn the proper procedures for new installations, daily use, deep cleaning, and system-specific configurations, plus the critical mistakes that destroy membranes and waste resin.
Understand Why Flushing Protects Your RO Membrane
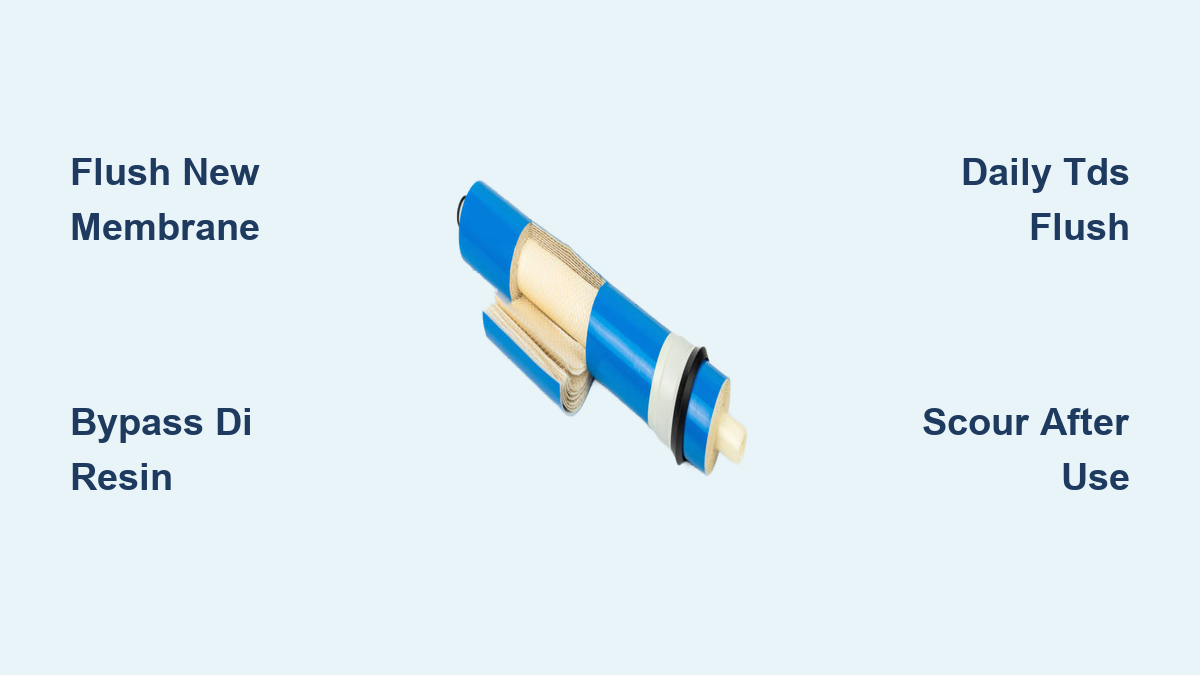
Flushing works by increasing cross-flow velocity across the membrane surface. During normal operation, a flow restrictor maintains pressure so water passes through the membrane while contaminants exit through the waste line. When you bypass that restrictor, high-volume water surges through the housing, scouring away particles, scale, and biological growth before they harden into permanent damage.
This process prevents the four most common causes of membrane failure: mineral scaling, sediment accumulation, bacterial colonization, and TDS creep (where dissolved solids migrate across the membrane during idle periods). Regular flushing also protects your DI resin from sudden contaminant overload, extending its usable life significantly.
Flush New Carbon Filters Before Installing the Membrane

Before water ever touches your RO membrane, new carbon filters must be flushed completely. Carbon filters contain fine black particles called “carbon fines” that will permanently clog membrane pores within hours if not removed.
Remove Carbon Fines Completely
Follow these steps to flush your carbon filter:
- Disconnect the tubing at the carbon filter outlet (before the RO membrane inlet).
- Route the outlet tubing directly to a drain.
- Slowly open the water supply valve.
- Let water run until the effluent is completely clear, with no cloudiness or black tint.
- Reconnect the line to the RO membrane inlet.
This process requires at least 10 minutes or 10 gallons, depending on your water pressure. For chloramine-removal systems using catalytic carbon, flush the middle stage through a three-way ball valve directly to waste, preventing fines from reaching downstream filters.
Skipping this step risks immediate membrane clogging, reduced flow from day one, and higher TDS readings throughout the system’s life.
Flush New RO Membranes to Remove Preservatives
New RO membranes ship preserved in a chemical solution (typically sodium bisulfite) that prevents microbial growth during storage. This preservative must be flushed out before use, and it must never pass through your DI resin.
Bypass DI Resin During the Initial Flush
Running preservative-laden water through DI resin will exhaust its ion-exchange capacity instantly, wasting $50–$100 in resin. Follow these steps:
- Install the new membrane into the housing.
- Disconnect or bypass the DI canister using a bypass plug or closed DI valve.
- Run the system in normal production mode with the waste line connected and restrictor in place.
- Discard the first 5 to 10 gallons of product water.
- Reconnect the DI stage once water runs clean and preservative-free.
This flush removes manufacturing chemicals and ensures safe water for downstream use.
Execute Daily Operational Flush Cycles
Routine flushing keeps your membrane clean between uses. Two types matter: TDS creep flushes (quick rinses) and scour flushes (deeper cleaning).
Perform a TDS Creep Flush Before Each Use
TDS creep happens when dissolved solids migrate across the membrane during idle periods. The first water produced after sitting has elevated TDS, sometimes 50+ ppm, before stabilizing. A quick flush eliminates this problem.
- Open the flush valve or bypass the restrictor.
- Let water run for 1–2 minutes until TDS drops to baseline (use a meter if available).
- Close the flush valve, open the DI valve, and begin production.
This simple step prevents DI resin overload and ensures pure water from the first gallon.
Run a Scour Flush After Every Job
After producing water, contaminants remain concentrated in the membrane housing. Left sitting, they harden into scale or feed bacterial growth. A scour flush removes these residues.
- Bypass the flow restrictor.
- Let high-volume water flush out residual contaminants for 3–5 minutes.
- Close the flush valve and shut down the system.
Commercial users should perform this after every job. Residential users should do it daily if the system sees frequent use.
Match Flush Duration to Your Specific Goal
Different situations require different flush lengths. Use this reference:
| Flush Type | Duration | Purpose |
|---|---|---|
| TDS Creep Flush | 1–2 minutes | Clear stagnant, high-TDS water after idle periods |
| Post-Use Flush | 3–5 minutes | Remove contaminants after each job |
| Deep Clean Flush | 30 minutes | Scour scale, sediment, and biofilm monthly |
| New Carbon Flush | 10 minutes or 10 gallons | Remove carbon fines before membrane exposure |
| New Membrane Flush | 5–10 gallons | Rinse out preservatives |
Timing matters. Too short leaves contaminants behind. Too long wastes water. When possible, use real-time TDS monitoring and flush only until readings stabilize.
Install a Dedicated Flush Valve for Easy Maintenance
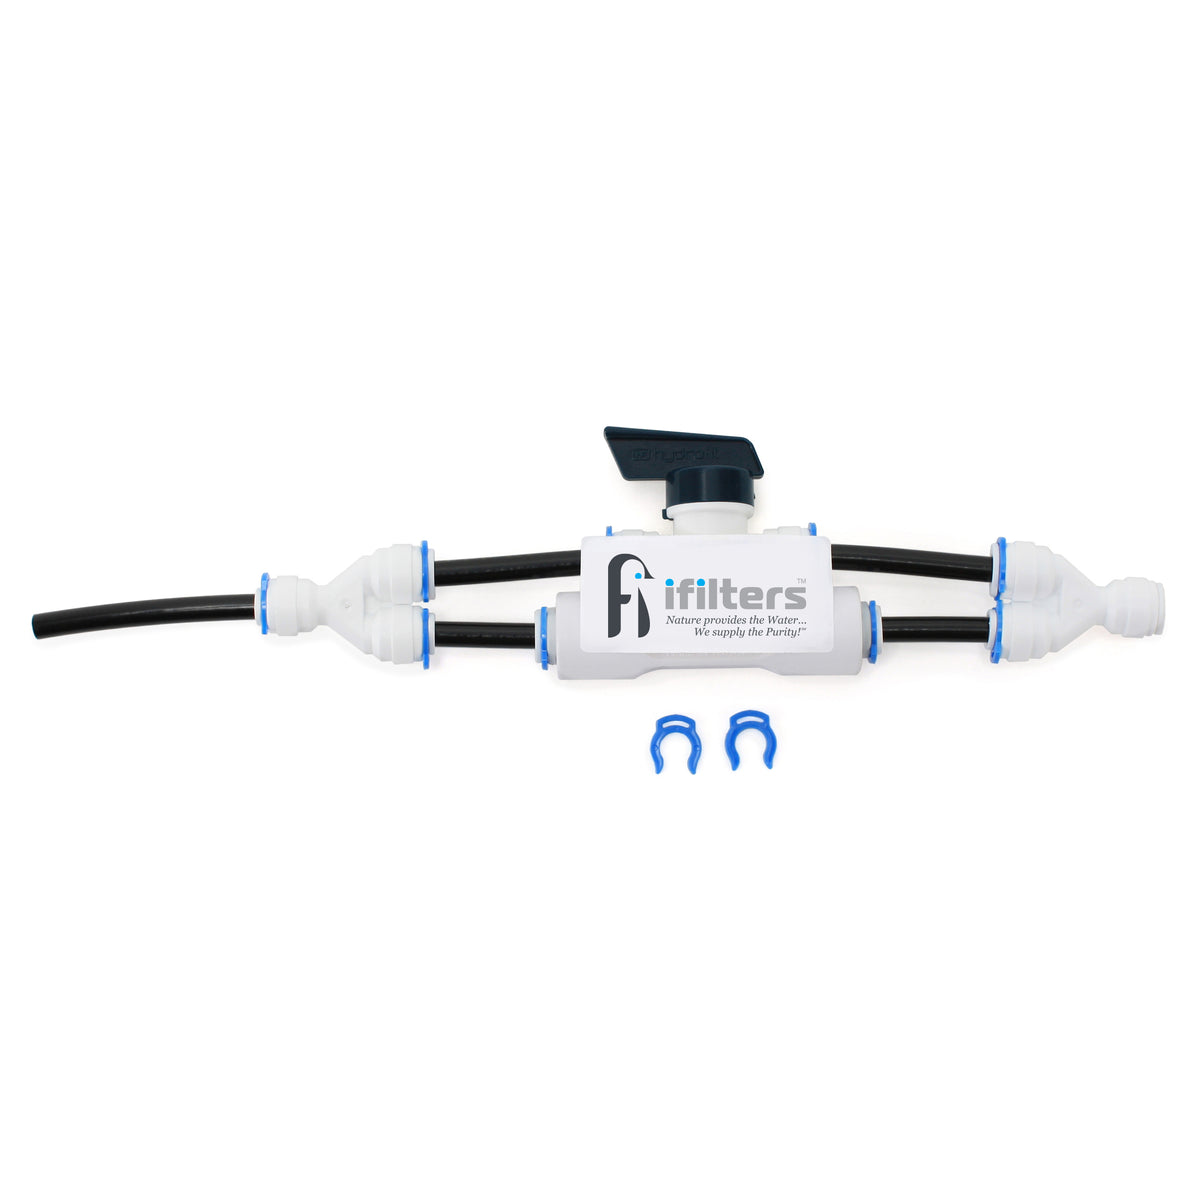
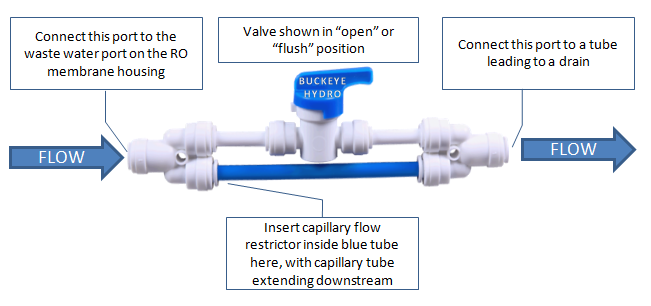
The most reliable flushing method uses a manual flush valve installed on the waste line. This eliminates the need to disconnect fittings repeatedly.
Choose the Right Valve Configuration
For 75 GPD systems with internal restrictors, remove the restrictor from the waste line and install it into a flush kit fitting. Connect the kit between the membrane outlet and drain.
For 150+ GPD systems with external restrictors, cut the waste line and install the flush kit inline. This setup lets you toggle between “Restrict” (normal operation) and “Bypass” (flush mode) without touching tubing.
Operate the Flush Valve
- Close the DI valve.
- Open the flush valve fully.
- Let water run for the required duration.
- Close the flush valve.
- Resume normal operation.
This tool-free approach is ideal for frequent flushing and reduces wear on quick-connect fittings.
Bypass the Flow Restrictor Manually When No Valve Exists

If your system lacks a flush valve, you can manually remove the flow restrictor to achieve the same effect.
Disconnect and Remove the Restrictor
- Turn off the water supply.
- Disconnect the waste line from the membrane housing.
- Remove the small plastic flow restrictor (usually white or colored).
- Reconnect the tubing directly to the housing without the restrictor.
- Turn the water back on and flush for the desired duration.
- Turn off water, reinsert the restrictor, and reconnect the line.
Frequent disconnection wears out quick-connect fittings. If you flush often, retrofitting a flush valve is a worthwhile investment.
Follow System-Specific Procedures for ProTool and LiquaGen Setups
Specialized RODI carts have unique configurations that require specific approaches.
Use the ProTool Flush Valve
ProTool carts feature a dedicated RO flush valve located after the membrane housing. To flush:
- Turn OFF the DI valve.
- Open the RO flush valve to 100%.
- Run for 3–5 minutes to clear metallics, sediment, and organics.
- Close the flush valve and resume production.
Carts without this valve trap contaminants and force users to manually disconnect lines to simulate proper flushing.
Configure LiquaGen-Style Systems
LiquaGen setups vary by membrane capacity:
- 75 GPD systems use internal restrictors. Install a flush kit with a removable plug.
- 150+ GPD systems use external restrictors. Install the flush kit inline.
Always verify your flow path and confirm DI is bypassed during any flush cycle.
Avoid Critical Flushing Mistakes That Damage Systems
Even with correct procedures, common errors can destroy membranes and waste expensive components.
Never Flush with DI Resin in Line
Flushing water carries maximum contaminant loads. Running this dirty water through DI resin exhausts it within minutes. Always close the DI valve, use a bypass plug, or physically disconnect the DI canister before flushing. If your system lacks a DI bypass, install one; it’s a $10 fix that saves hundreds in resin replacement costs.
Maintain Proper Water Pressure
RO membranes need optimal pressure to function and flush effectively. Keep inlet pressure between 40–80 PSI, never exceeding 80 PSI (higher pressures risk leaks and membrane damage). For low-pressure sources below 50 PSI, install a booster pump before the membrane to reach 90–100 PSI at the inlet. This improves both production efficiency and flush effectiveness.
Recognize When Your Membrane Needs Flushing
Don’t wait for complete failure. Watch for these warning signs:
- Reduced flow rate: Water takes longer to fill containers than usual.
- High TDS readings: Your meter shows elevated readings, especially at startup.
- Rapid DI exhaustion: You’re replacing resin more frequently than normal.
Any of these signals mean your membrane is fouling and needs immediate flushing.
Optimize Flushing with Advanced Techniques
Beyond basic procedures, these strategies maximize efficiency and extend membrane life.
Monitor TDS in Real Time
Install dual inline TDS meters on both feed and product lines. During a flush, watch the product TDS drop and stop flushing when it stabilizes, often within 3–3.5 minutes rather than arbitrary 30-minute cycles.
Automate with Smart Controllers
Consider a TDS-controlled auto-shutoff valve that triggers flushes on startup, shuts off the system if TDS exceeds safe thresholds, and prevents high-TDS water from reaching your DI resin. This reduces manual effort and protects consumables.
Prevent Leaks and Vibration
Secure your RO unit firmly with back-mounting screws. Vibration can stir up sediment inside the housing, requiring extra flushing. Install water leak detectors, especially when using booster pumps or automated systems.
Frequently Asked Questions About How to Flush RO Membrane
How often should I flush my RO membrane?
Flush after every use for commercial applications, daily for frequent residential use, or at minimum once monthly for occasional use. Always perform a quick 1–2 minute flush before each use to clear TDS creep.
Can I flush my RO membrane without a flush valve?
Yes. Turn off the water supply, disconnect the waste line, remove the flow restrictor, reconnect the tubing without it, and run water for the desired duration. Reverse the process when finished. This method works but wears out fittings over time.
Why does my DI resin burn out so quickly?
You’re likely flushing with the DI canister in line, or your membrane is fouled and passing excess contaminants. Always bypass DI during flushing and address membrane scaling promptly.
What happens if I never flush my RO membrane?
Contaminants accumulate and harden into scale, flow rates drop, TDS rises, and the membrane fails prematurely, often within months instead of years. You’ll also burn through DI resin rapidly due to increased contaminant loading.
Is a 30-minute flush really necessary?
Deep clean flushes of 30 minutes are recommended monthly or after long inactivity to remove scale and biofilm. For routine TDS creep removal, 1–5 minutes is sufficient. Monitor with a TDS meter to determine when readings stabilize.
Do new RO membranes need special flushing?
Yes. New membranes contain preservative chemicals that must be flushed out before use. Bypass the DI resin and discard the first 5–10 gallons of product water to remove sodium bisulfite and other storage preservatives.
Key Takeaways for Flushing Your RO Membrane
Flushing is the single most effective maintenance action for RO system health. Flush new carbon filters for 10 minutes before exposing the membrane, and flush new membranes for 5–10 gallons while bypassing DI resin. Perform a quick 1–2 minute flush before each use to eliminate TDS creep, and a 3–5 minute scour flush after each job to remove accumulated contaminants. Monthly deep cleans of 30 minutes prevent scaling and biofilm buildup.
Always bypass the DI resin during flushing, maintain inlet pressure between 40–80 PSI, and watch for reduced flow or rising TDS as signals that flushing is overdue. Install a dedicated flush valve if your system lacks one; the $10 investment pays for itself many times over in extended membrane life and reduced resin replacement.
Start by checking your current system for a flush valve. If none exists, consider installing one before your next maintenance cycle. Your membrane, your DI resin, and your wallet will thank you.