How Long Should Reverse Osmosis Drain?
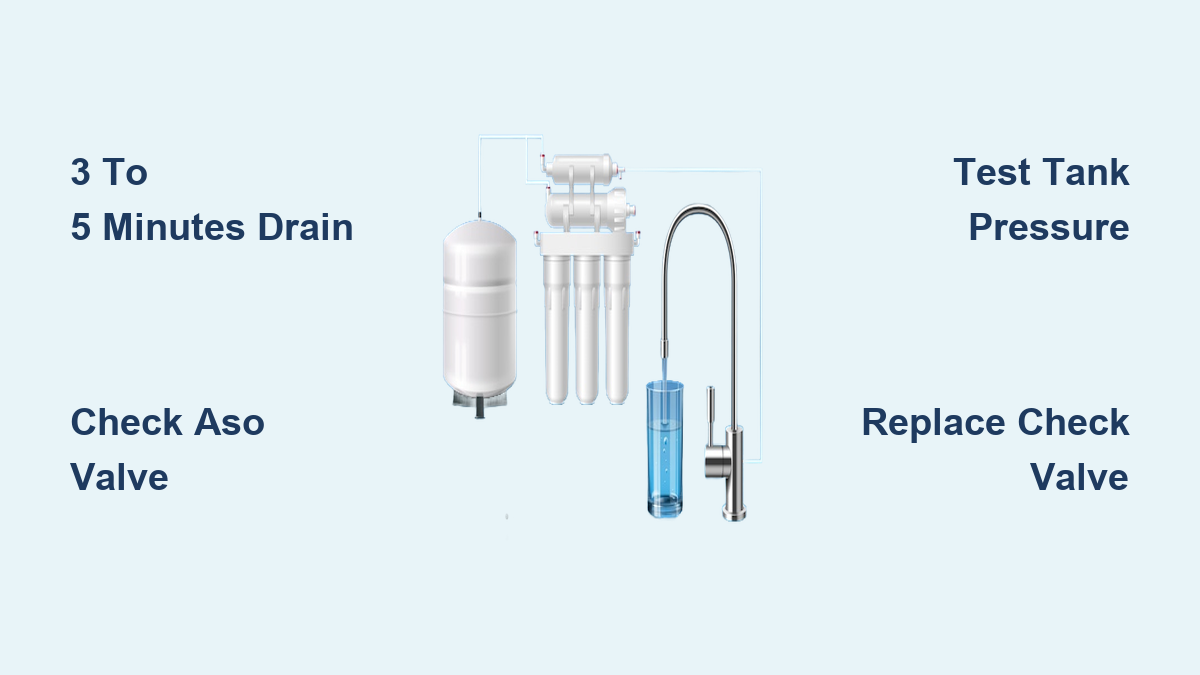
You turn on the RO faucet, fill a glass, and walk away. Later you hear it still humming. Then you notice the drain line is still trickling water. Now you’re wondering whether this is normal or a sign of trouble. The core question, how long should reverse osmosis drain, has a clear answer: only 3 to 5 minutes after dispensing water, then it should stop completely.
A properly working RO system sends wastewater to the drain only while refilling the storage tank. Once the tank fills, the Automatic Shut-Off valve stops all flow, including drainage. If water keeps running to the drain past this point, your system is wasting water and likely has a failing component.
In this guide, you’ll learn:
– Normal versus abnormal reverse osmosis drain time
– How to diagnose continuous drainage issues
– Step-by-step fixes for the most common failures
– Maintenance habits that prevent future problems
Let’s break down exactly when your RO system should drain, and what to do when it won’t stop.
Normal Reverse Osmosis Drain Time

3 to 5 Minutes Is the Standard Window
After you draw water from the RO faucet, the system automatically kicks on to refill the storage tank. During this refill phase, wastewater flows to the drain to flush contaminants off the membrane surface. This process is normal and should last 3 to 5 minutes for typical household use, like filling a few glasses.
Once the tank reaches capacity, back-pressure triggers the Automatic Shut-Off valve to close the feed water line. At that exact moment, both purified water production and drain flow stop completely.
✅ Normal behavior: Drain runs briefly after use, then stops
❌ Problem sign: Drain continues for more than 10 minutes or runs nonstop
Factors That Affect Drain Duration
Several variables influence how long your reverse osmosis drain cycle lasts:
- Amount of water used: Draining lasts longer if you nearly emptied the tank
- Feed water pressure: Below 40 PSI slows production and extends drain time
- Membrane condition: A clogged or aged membrane reduces efficiency
- Filter age: Clogged pre-filters restrict flow and delay refills
Even under less-than-ideal conditions, drainage should never exceed 10 to 15 minutes. Persistent flow beyond that window indicates a fault that needs attention.
Water Waste Ratio Breakdown
4:1 to 5:1 Is Typical for Standard Systems
Reverse osmosis systems are inherently inefficient by design. For every 1 gallon of purified water produced, 4 to 5 gallons go down the drain. This ratio ensures contaminants don’t accumulate on the membrane surface.
So if your household uses 2 gallons of RO water per day, expect roughly 8 to 10 gallons to be sent to the drain. That level of waste is normal during active cycles.
⚠️ This waste occurs only during active filtration, not continuously
Newer “low-waste” or “permeate pump” models can achieve 2:1 or even 1:1 ratios. However, most standard systems still operate at 4:1 or higher.
Key Components That Stop the Drain
Automatic Shut-Off Valve Function
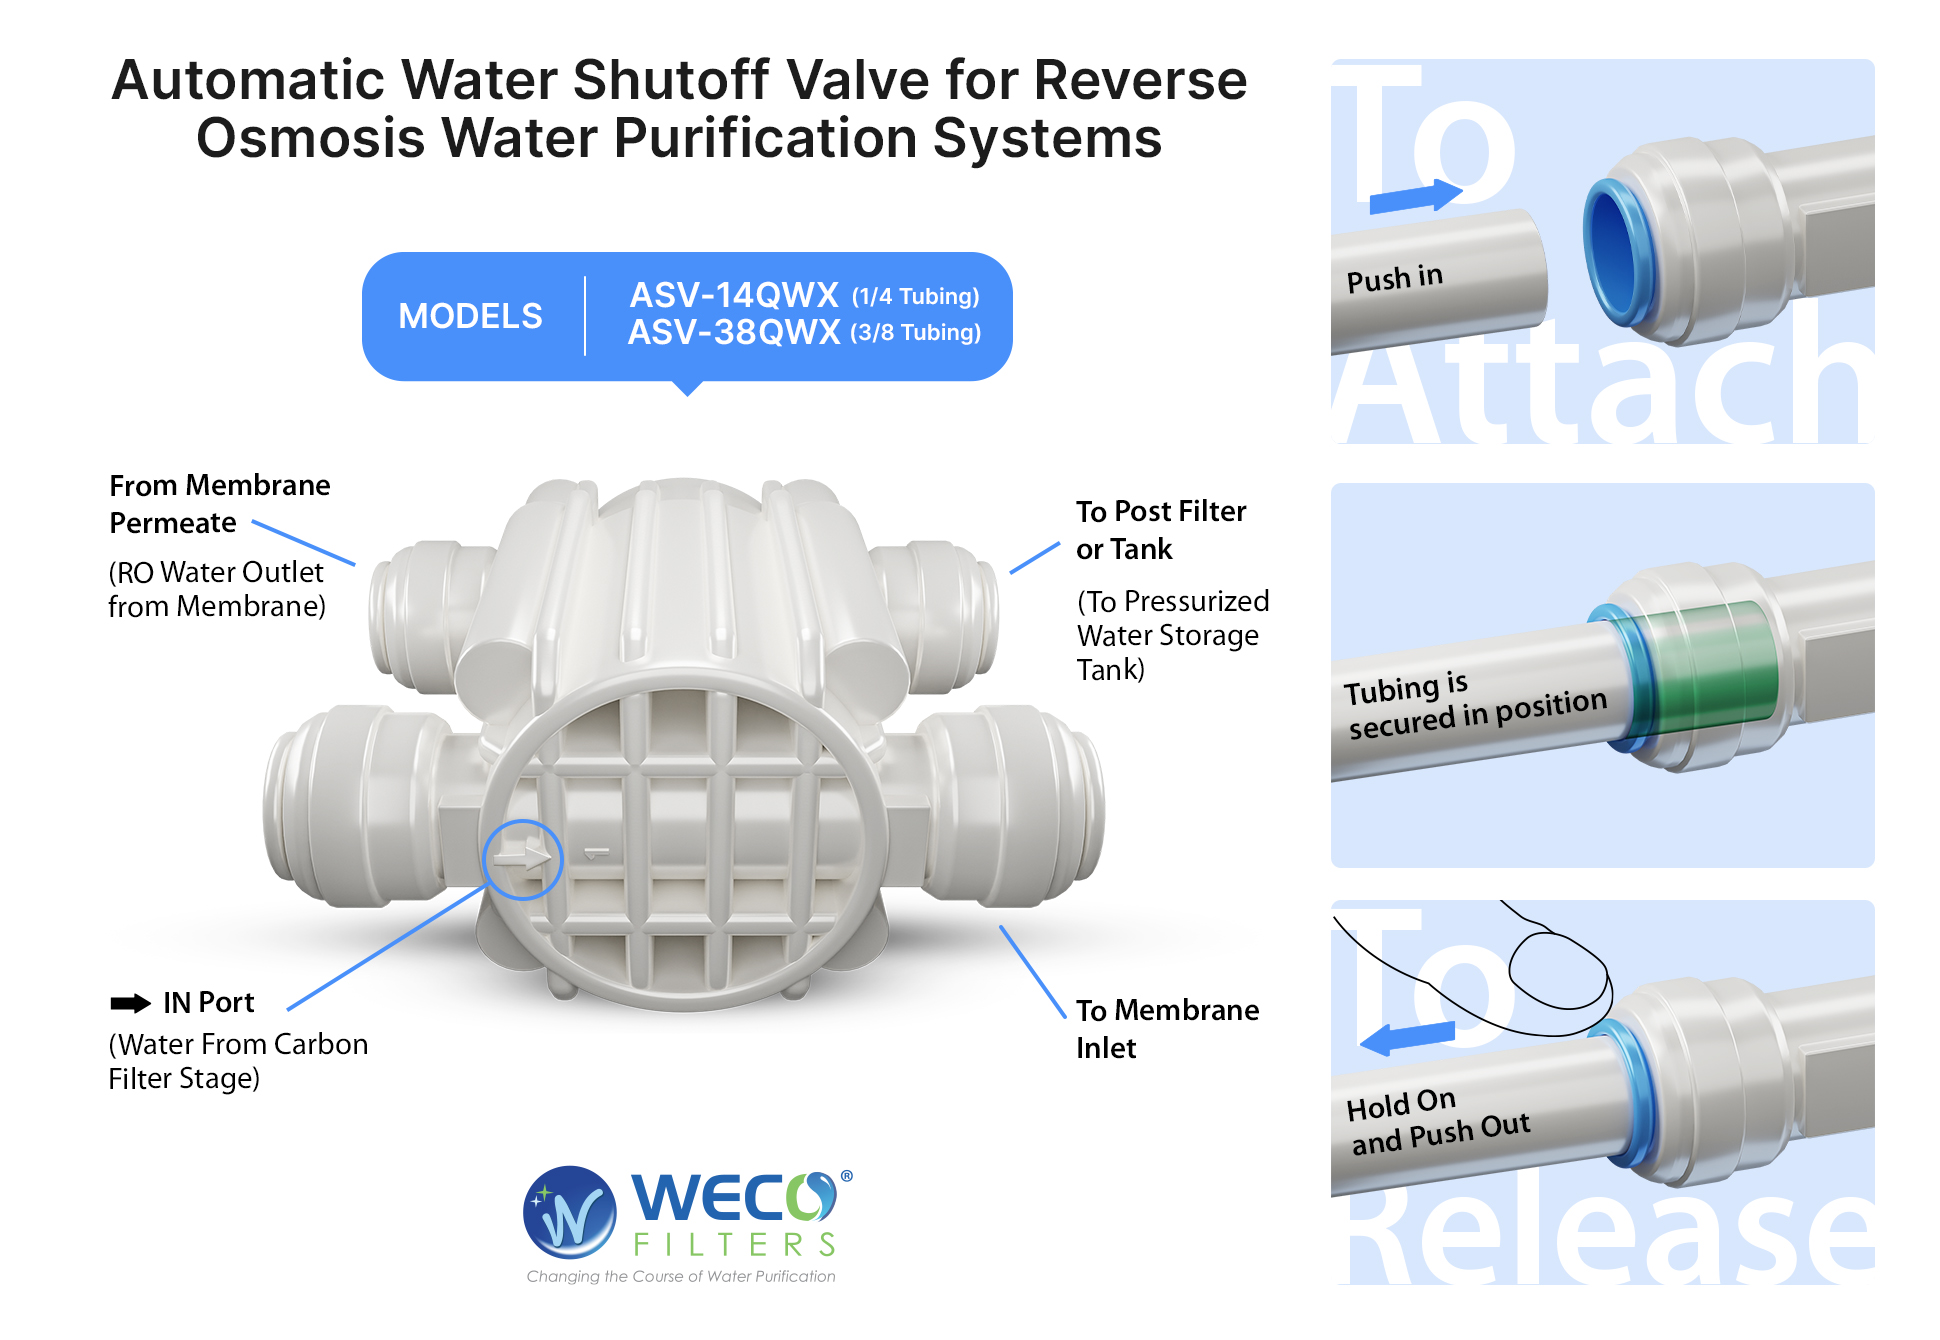
The ASO valve is the main gatekeeper that halts drainage when the tank reaches capacity.
- Location: Near the membrane housing, usually white and round
- How it works: Compares pressure from the storage tank and drain line
- Shut-off trigger: When tank pressure reaches roughly two-thirds of incoming water pressure, the ASO closes the feed line
If the ASO fails open, the system runs nonstop, sending clean and wastewater down the drain endlessly.
Check Valve Prevents Backflow
Mounted on the membrane outlet, the check valve ensures purified water flows in only one direction: into the tank.
- Failure symptom: Allows pressurized tank water to leak backward through the membrane
- Result: The ASO senses low pressure and keeps the system running
- Outcome: Continuous drain flow, even with a full tank
This failure is often mistaken for an ASO problem, but testing reveals the true culprit.
Flow Restrictor Maintains Pressure
The flow restrictor, usually located in the drain line, limits wastewater speed.
- Purpose: Creates back-pressure across the membrane for effective filtration
- Effect on drain: Controls how fast water leaves the system
- Malfunction: If clogged or missing, pressure balance is lost, causing over-run or under-performance
Most restrictors are fixed and non-adjustable. Replacement is required if damaged.
Diagnose Continuous Drainage Problems
Step 1: Confirm There’s Actually a Problem
Before assuming failure, verify the system isn’t simply in the middle of refilling.
Quick Test: Simulate a Full Tank
- Close the tank valve (turn the handle perpendicular to the yellow tube)
- Open the RO faucet and let it run until no water comes out
- Wait 5 to 10 minutes
- Observe the drain line
✅ Normal: Drain stops within minutes
❌ Fault: Water continues to flow
If water still drains, the system doesn’t recognize the tank as full, which indicates a valve failure.
Step 2: Identify the Failed Component
Now determine whether the ASO valve or check valve is to blame.
Isolation Test Procedure
- Shut off the feed water supply
- Open the tank valve (if previously closed)
- Open the RO faucet to release pressure
- Disconnect the drain line from the saddle or adapter
- Watch for flow from the drain line
🔹 Water flows out after feed is off? → Check valve failure
🔹 No flow after feed is off? → ASO valve failure
Why this works:
– With feed water off, no new water should enter the system
– If water still exits the drain, it’s coming back from the pressurized tank, only possible with a failed check valve
– If no water flows but the system ran before, the ASO didn’t shut off under pressure
Replace the faulty valve accordingly.
Check Storage Tank Pressure

7 PSI Is the Gold Standard
Improper tank pressure is a leading cause of extended reverse osmosis drain time.
An RO storage tank uses an internal air bladder to push water out. When empty, the pre-charge pressure should be exactly 7 PSI.
How to Test and Adjust
- Shut off feed water
- Open the RO faucet and drain all water until flow stops
- Use a tire pressure gauge on the air valve (top or bottom of tank)
- Adjust as needed:
– Below 7 PSI? Add air with a bike pump or compressor
– Above 7 PSI? Press the valve stem to release air in short bursts
🛠️ Always test pressure when the tank is completely empty
How Pressure Affects Drain Time
If tank pressure exceeds 7 PSI when filled:
– The ASO sees “full” too soon
– The tank holds less water than its actual capacity
– The system cycles frequently, increasing drain events
If pressure is too low:
– The tank can’t push water out efficiently
– The system overfills trying to reach shut-off pressure
– Drain runs longer than 10 minutes
Correcting tank pressure often resolves slow or prolonged drainage without replacing any parts.
Fix Common Drain Issues
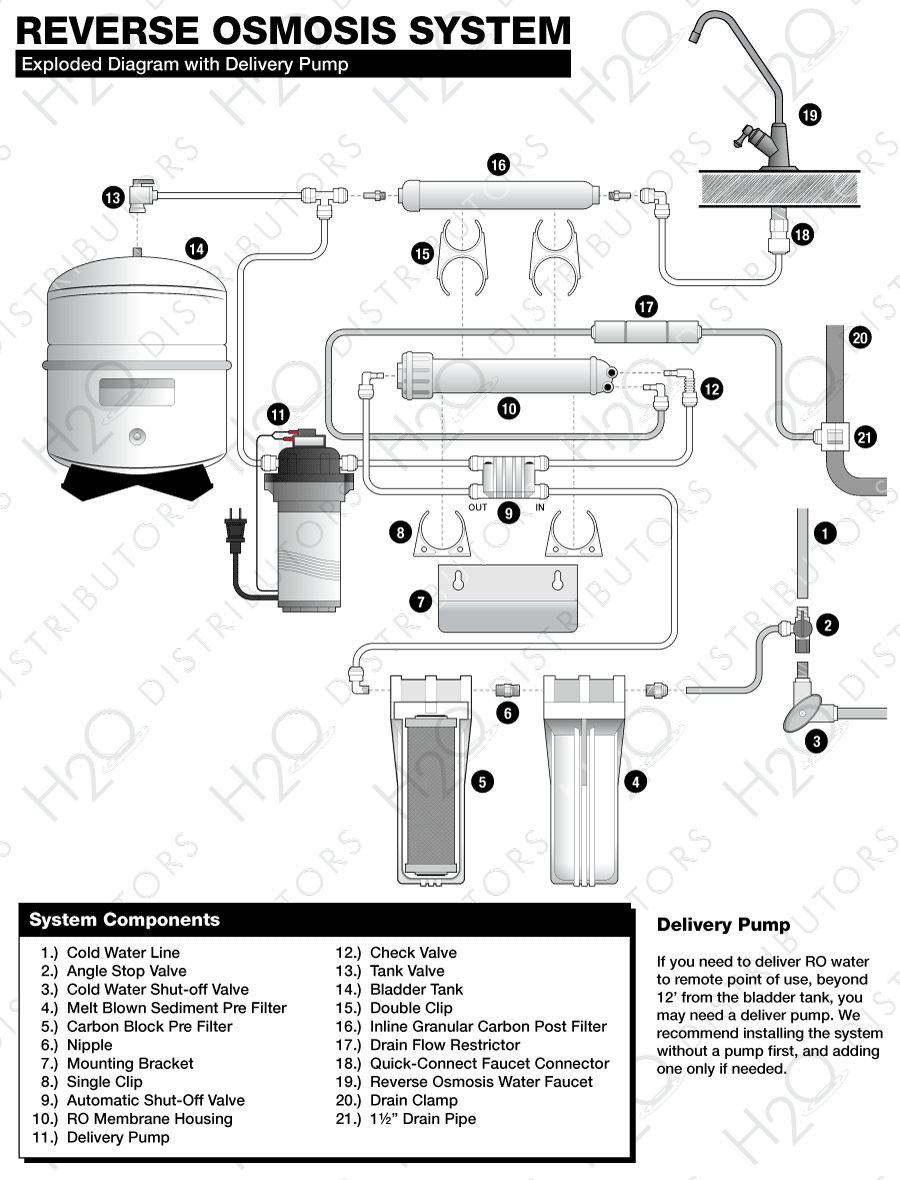
Replace a Faulty Automatic Shut-Off Valve
If diagnostics confirm ASO failure:
- Turn off feed water and close the tank valve
- Relieve pressure by opening the RO faucet
- Disconnect tubing from the ASO (label connections if needed)
- Install the new ASO valve (match port configuration)
- Reconnect lines and restore water
Test by opening the faucet and observing whether the drain stops after refill.
💡 Pro tip: Replace ASO valves every 3 to 5 years as preventive maintenance
Install a New Check Valve
A failed check valve leads to silent water waste.
- Shut off the system and relieve pressure
- Locate the check valve (on the product water line from the membrane)
- Cut or disconnect tubing on both sides
- Insert the new check valve, ensuring the arrow points toward the tank
- Reconnect and test
After replacement, perform the isolation test again to confirm no backflow.
❗ Never install backward; flow direction matters
Clean or Replace the Flow Restrictor
Some systems have inline restrictors; others build them into the membrane housing.
- Remove the restrictor (may require cutting tubing or unscrewing)
- Soak in vinegar for 15 minutes to dissolve mineral deposits
- Flush with water and inspect for blockage
- Reinstall or replace
If unsure of size, take the old one to a plumbing supplier. Common sizes include 0.75, 1.0, and 1.5 gallons per day.
Prevent Problems With Routine Maintenance
Stick to the Replacement Schedule
Ignoring filter changes stresses the entire system and extends drain cycles.
| Component | Replace Every | Why It Matters |
|---|---|---|
| Sediment and Carbon Filters | 6 to 12 months | Prevent clogs, protect membrane |
| RO Membrane | 2 to 3 years (up to 5) | Maintain efficiency, reduce drain time |
| Check Valve and ASO Valve | 3 to 5 years | Avoid continuous drainage |
| Storage Tank | 5 to 7 years | Bladder degrades over time |
Old membranes lose rejection rate and slow production, leading to longer drain cycles.
Monitor Feed Water Pressure
Low pressure equals long drains.
Use a water pressure gauge on a nearby faucet, such as a garden hose spigot:
- Below 40 PSI? The system won’t produce enough permeate to trigger the ASO
- Solution: Install a booster pump or fix low household pressure
The ideal range is 45 to 80 PSI.
⚙️ Systems with permeate pumps or advanced controls may tolerate lower pressure
Sanitize the System Annually
Bacteria and biofilm can clog the membrane and restrict flow.
Sanitization steps:
1. Shut off feed water
2. Remove filters
3. Insert a chlorinated cleaning cartridge or use a food-grade hydrogen peroxide solution
4. Run the system for 15 to 30 minutes
5. Flush thoroughly before reinstalling filters
This prevents fouling that contributes to slow cycles and extended drainage.
Remineralization and Water Quality
RO Water Lacks Beneficial Minerals
Reverse osmosis removes up to 99.9% of dissolved solids, including beneficial calcium, magnesium, and potassium.
While safe to drink, demineralized water:
– Tastes flat or slightly acidic
– May leach minerals from pipes or appliances
– Isn’t ideal for long-term daily consumption without supplementation
Add Minerals Back In
Two effective solutions address this concern:
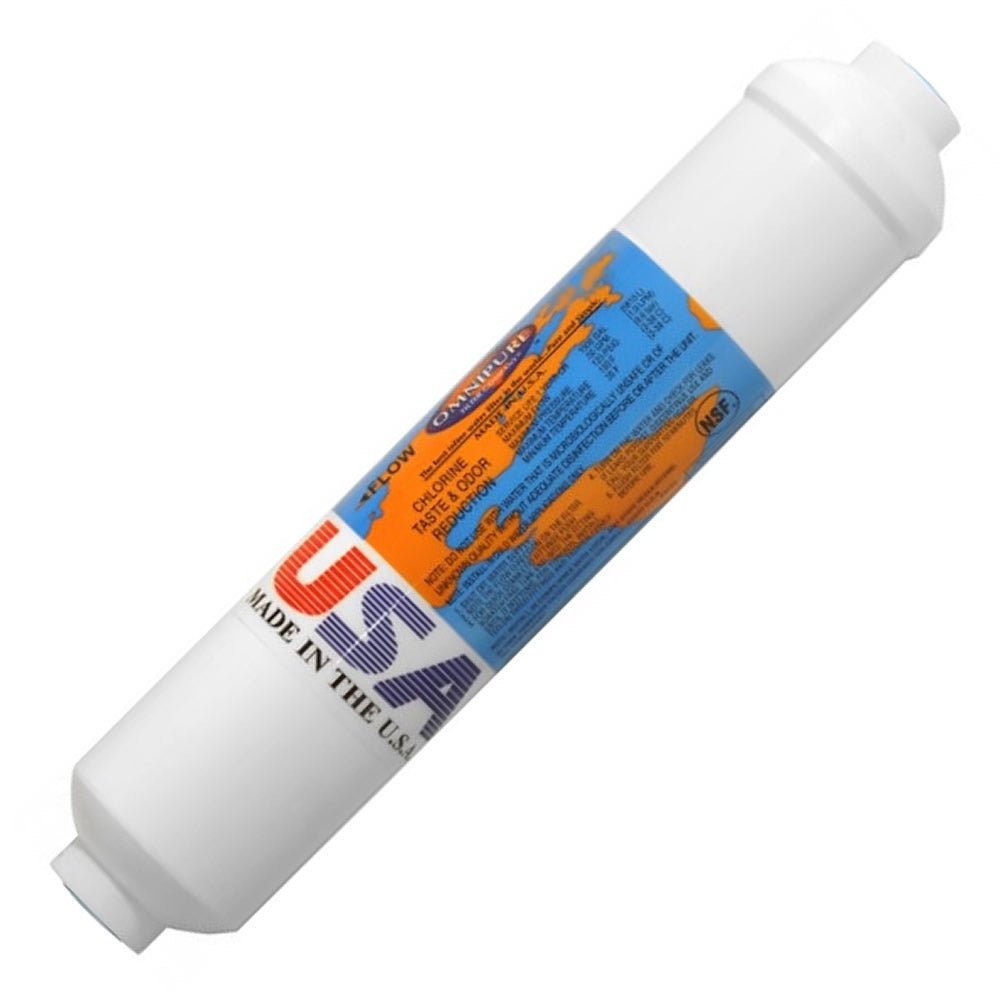
1. Inline Remineralization Filter
- Installs after the RO membrane
- Uses calcite or coral calcium media
- Raises pH and adds trace minerals
- Improves taste and stability
2. Mineral Drops or Alkaline Pitchers
- Add to water after dispensing
- Affordable and flexible
- Allows control over mineral content
🏥 Note: “Pharmacy-grade” RO systems (like the Pharmatap Fillmaster FMF-940) produce ultra-pure water suitable for labs, but aren’t recommended for regular drinking without remineralization
Frequently Asked Questions About Reverse Osmosis Drain Time
How long should reverse osmosis drain after each use?
A properly functioning system should drain for 3 to 5 minutes after dispensing water, then stop completely once the storage tank refills. Any drainage lasting longer than 10 minutes suggests a problem.
Why does my RO system drain continuously?
Continuous drainage typically points to a failed Automatic Shut-Off valve or check valve. Low feed water pressure (below 40 PSI) or a clogged membrane can also cause this issue. Run the isolation test to identify the exact culprit.
Can high tank pressure cause long drain times?
Yes. If the storage tank pressure exceeds 7 PSI, the system may shut off prematurely, cycle frequently, or struggle to reach proper shut-off pressure. Always check and adjust tank pressure when the tank is empty.
How much water does an RO system waste?
Standard systems operate at a 4:1 to 5:1 ratio, meaning 4 to 5 gallons of wastewater for every gallon of purified water. Newer low-waste models with permeate pumps can reduce this to 2:1 or even 1:1.
When should I replace the RO membrane?
Replace the membrane every 2 to 3 years, or up to 5 years in ideal conditions. Older membranes lose efficiency, slow production, and extend drain cycles. If your system takes longer than 10 minutes to refill, the membrane is likely due for replacement.
Is it normal for the drain to make noise?
Some sound during active filtration is normal. However, loud gurgling, hissing, or continuous noise after the tank fills indicates an air gap issue, drain saddle clog, or valve failure worth investigating.
Key Takeaways for Managing Reverse Osmosis Drain Time
Understanding how long reverse osmosis should drain puts you in control of your system’s health. The standard window is 3 to 5 minutes after each use, with drainage stopping completely once the tank fills. Anything beyond 10 minutes signals a problem worth diagnosing.
The most common culprits are failed ASO valves, broken check valves, incorrect tank pressure, and aging membranes. The isolation test described above reliably identifies which component is at fault, and most fixes are straightforward replacements that don’t require a plumber.
Your next step: check your storage tank pressure today. If it’s not at 7 PSI, adjust it and observe whether drain times normalize. This single five-minute task resolves more drainage issues than any other maintenance action and costs nothing to perform.