How to Pressurize Reverse Osmosis Tank
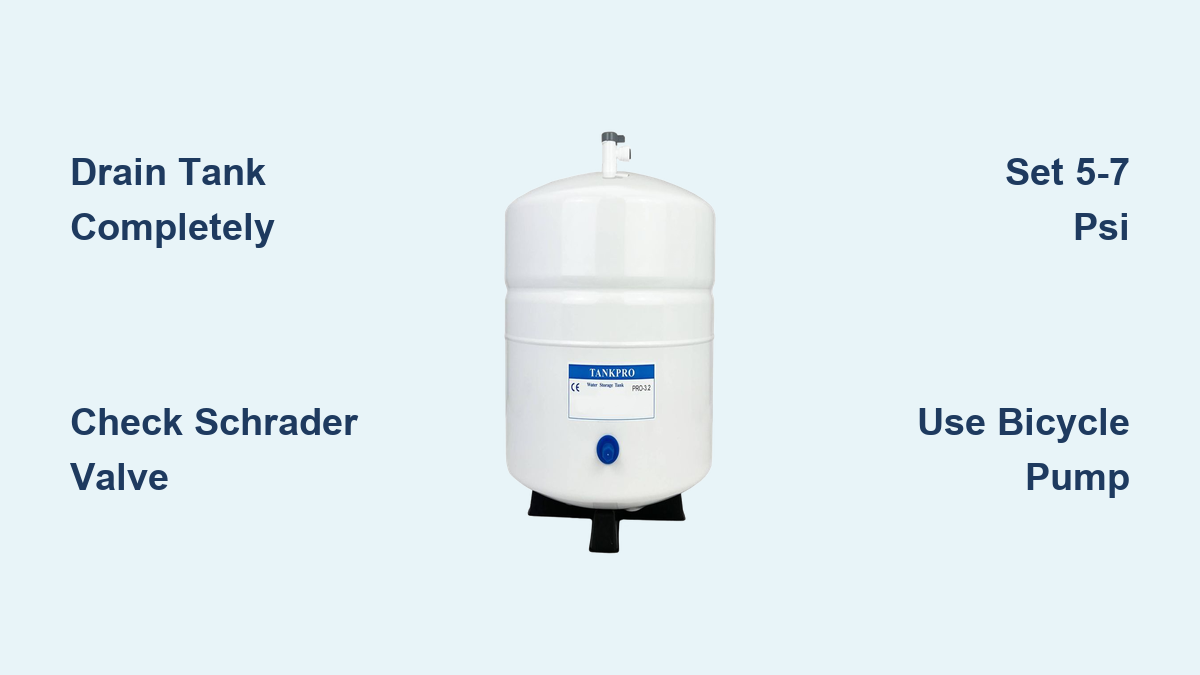
Is your reverse osmosis faucet delivering only a slow trickle of water? You are not alone; this is one of the most common complaints homeowners have with their RO systems. More often than not, the culprit is a storage tank that has lost its internal air pressure. When the bladder inside the tank deflates, it cannot push purified water out efficiently. The good news is that learning how to pressurize a reverse osmosis tank is a straightforward DIY task that takes under an hour with basic tools.
In this guide, you will learn how to diagnose low tank pressure, safely recharge your RO tank, and keep your system running at peak performance for years to come.
Diagnose Low Tank Pressure

Check for Slow Flow and Low Output
The most obvious sign your RO tank needs attention is slow water flow. If your faucet delivers a strong stream for the first cup but then drops to a dribble, the tank’s air bladder likely lacks sufficient pressure. Another red flag is reduced volume; if your system delivers less than half a gallon per cycle after sitting idle for hours, pressure loss is probable. A healthy 4.4-gallon RO tank typically provides about 2.5 gallons of usable water. If your output is significantly lower, it is time to investigate.
Test the Schrader Valve
The Schrader valve, located under the blue cap on top of the tank, is your diagnostic gateway. With the system off, press the valve’s center pin and observe what happens:
- Air escapes only: Pressure is low, but the bladder is intact. Safe to recharge.
- Water sprays out: The bladder is ruptured. The tank must be replaced.
- Air escapes when water runs: A ruptured bladder is pushing air into the water line. Replace the tank.
Rule Out Other Causes
Do not assume the tank is the problem. Slow flow can also stem from clogged filters or a failing membrane. Check these components before proceeding:
- Pre-filters (sediment and carbon): Replace every 6–12 months.
- RO membrane: Replace every 2–3 years.
- TDS levels: High total dissolved solids indicate membrane failure, not pressure issues.
If your filters and membrane are in good condition, and the Schrader valve releases only air, you are ready to pressurize.
Essential Tools and Safety Rules
Gather Required Equipment
You only need a few items to complete this job:
- Tire pressure gauge: Standard or digital, accurate to 1 PSI.
- Bicycle or hand pump: For controlled air injection.
- Bucket: To catch residual water.
- Wrench (optional): If fittings are tight.
Avoid using high-pressure air compressors. They can burst the bladder instantly and cause serious damage.
Follow Critical Safety Warnings
Never pressurize a full or partially full tank. Compressing air against water creates incompressible force that can damage the bladder. Always drain the tank completely first.
Never exceed 7–8 PSI on an empty tank. Over-pressurization stresses the bladder and can prevent water from entering the system.
Never use shop air tanks directly. Even at low settings, they deliver too much volume too fast. A hand pump gives you full control over the process.
Set the Correct Air Pressure
Know the Target PSI Range
The ideal pressure for most residential RO tanks is 5 to 7 PSI when empty. Some models, such as Home Master 3.2-gallon tanks, specify 7.5 PSI. Always check your manufacturer’s recommendation before proceeding.
Avoid outdated advice suggesting “5–7 PSI below incoming pressure.” That rule applies to expansion tanks in heating systems, not RO storage tanks. Setting your RO tank to 50+ PSI will stop it from filling altogether.
Understand Pressure Consequences
Getting the pressure right matters for both performance and longevity:
- Below 5 PSI: Water flows slowly or not at all. Usable capacity drops sharply.
- Above 8 PSI: The bladder and membrane suffer stress. The system may shut off before the tank fills.
- Full tank pressure: Should reach approximately 30 PSI (varies with incoming pressure), signaling the tank is full and ready to dispense.
Step-by-Step Pressurization Guide
Shut Off Water and Drain Lines
- Close the angle stop valve under the sink by turning the handle 90 degrees to block water flow.
- If your system has a T-valve on the red supply line, close it as well.
- Open the RO faucet and let water run until it stops completely. This releases line pressure.
- Keep the faucet open throughout the entire process to allow air and water to escape during recharging.
Empty the Storage Tank Completely
- Let the tank drain naturally through the faucet. This may take 5–10 minutes.
- Once flow stops, gently shake the tank to dislodge “dead water” trapped in the bladder folds.
- Wait for any remaining water to drip out. Repeat shaking until no more water emerges.
- Verify emptiness by lifting the tank. It should feel light and soft. If it feels heavy, more water remains.
For easier access, disconnect the tank using the push-pull fitting and service it in a comfortable location.
Check and Adjust Air Pressure
- Remove the blue cap from the Schrader valve on top of the tank.
- Attach the pressure gauge and read the current PSI. It is likely near zero.
- Connect the bicycle pump to the valve. Keep the faucet open.
- Pump in short bursts. As you add air, water may drip from the faucet. This means the bladder is expanding and pushing out residual water.
- Continue pumping until no more water comes out. This confirms the bladder is fully expanded and empty.
Fine-Tune to Target PSI
- Stop pumping and check the gauge.
- If below 5–6 PSI, add air in small increments.
- If above 7–8 PSI, press the valve’s center pin briefly to release air.
- Repeat until you achieve 6–7 PSI or your model’s specified range.
- Once stable, remove the pump and replace the blue cap immediately to prevent air leakage.
Restore and Test the System
Reconnect and Refill the Tank
- Reattach the tank to the RO system if disconnected. Ensure the push-pull fitting clicks securely into place.
- Close the RO faucet.
- Open the angle stop and T-valve to restore water supply.
- Let the system refill. A standard 4.4-gallon tank takes 1 to 4 hours to fill, depending on membrane size and water pressure.
Verify Performance
- After the fill cycle, open the faucet. You should see strong, steady flow.
- Fill a glass. Flow should remain consistent, not taper off after the first cup.
- Run a TDS test on the first glass to confirm the membrane is functioning properly.
- If flow is still weak, recheck pressure and inspect for kinked lines or clogged filters.
Troubleshoot Common Post-Service Issues

Water Leaks from Air Valve
If water sprays when you press the Schrader valve, the bladder is ruptured. No amount of recharging will fix this. You must replace the entire tank. Look for signs of swelling or bulging as additional indicators.
Tank Won’t Fill After Repressurizing
If the tank stays empty or fills slowly, the pressure may be set too high. If it exceeds incoming water pressure, water cannot enter the tank. Reduce to 6–7 PSI and wait. If the tank still does not fill, inspect pre-filters or the membrane for blockages.
Pressure Drops Within Weeks
If you are re-pressurizing monthly, the bladder is degrading or the Schrader valve core is leaking. Replace the valve core first (costs $2–$5) using a valve core tool. If pressure still drops, the bladder material has failed and the tank needs replacement.
Maintain Long-Term Performance

Follow a Preventive Maintenance Schedule
To avoid annual surprises, stick to this routine:
- Every 6–12 months:
- Replace sediment and carbon pre-filters
- Replace post-filter
- Repressurize the tank
- Every 2–3 years:
- Replace RO membrane
- Every 5–7 years:
- Replace storage tank (bladders degrade over time)
Upgrade for Less Maintenance
Consider switching to a tankless RO system. These use high-flow membranes to deliver water on demand, eliminating the storage tank and all associated pressure issues.
Pros: No repressurizing, compact design, continuous flow.
Cons: Slight delay in delivery, may require higher water pressure.
Boost Efficiency with Add-Ons
- Permeate pump: Uses drain water energy to push purified water into the tank. Increases efficiency by up to 400%, reduces wastewater, and improves fill speed without electricity.
- Booster pump: If your home’s water pressure is below 40 PSI, an electric booster pump ensures the RO membrane operates effectively.
Frequently Asked Questions About Pressurizing a Reverse Osmosis Tank
What PSI should a reverse osmosis tank be set at?
A standard residential RO tank should be set between 5 and 7 PSI when empty. Some models, like the Home Master 3.2-gallon tank, specify 7.5 PSI. Always check your manufacturer’s guidelines for the exact target.
How often should I repressurize my RO tank?
Repressurize your tank once a year or whenever you replace the pre-filters, post-filters, or RO membrane. Checking pressure every 6–12 months helps catch issues early.
Can I use an air compressor to pressurize my RO tank?
No. Air compressors deliver too much volume too quickly and can rupture the bladder instantly. Always use a bicycle pump or hand pump for controlled, low-volume air insertion.
What happens if I over-pressurize my RO tank?
Over-pressurization above 7–8 PSI stresses the bladder and membrane. It can also prevent water from entering the tank, causing the system to shut off prematurely before filling.
How do I know if my RO tank bladder is ruptured?
Press the Schrader valve stem. If water sprays out instead of air, the bladder is ruptured and the tank must be replaced. A heavy, waterlogged feel when shaking the tank is another sign of bladder failure.
How long does it take for an RO tank to refill after repressurizing?
A standard 4.4-gallon tank takes 1 to 4 hours to fill completely, depending on membrane capacity and incoming water pressure. A 2.8-gallon tank typically fills in 2–4 hours.
Key Takeaways for Pressurizing Your Reverse Osmosis Tank
Pressurizing your RO tank is a quick, essential maintenance task that restores strong flow and prevents system strain. The target pressure is 5–7 PSI on an empty tank, achieved with a bicycle pump and standard tire gauge. Always drain the tank completely before adding air, and never exceed 8 PSI to avoid damaging the bladder.
Your next step is simple: gather your tools, check your tank pressure today, and schedule annual repressurization alongside your filter changes. With this small effort, you will keep your purified water flowing smoothly and extend the life of your entire RO system for years to come.