How to Install Water Purifier at Home
Municipal tap water may look clean, but it often carries chlorine, sediment, lead, volatile organic compounds, and even microplastics that affect taste, health, and appliance performance. A properly installed water purifier removes up to 99.9% of these contaminants, protects your plumbing, and cuts your reliance on bottled water for good.
This guide walks you through every step of installing a water purifier at home, from choosing the right system to troubleshooting leaks and maintaining peak performance. Whether you pick an under-sink filter, a whole-house unit, or a reverse osmosis system, you can complete most installations in under two hours with basic tools and zero plumbing experience.
Select the Right Water Purifier for Your Home
Match the System to Your Water Quality
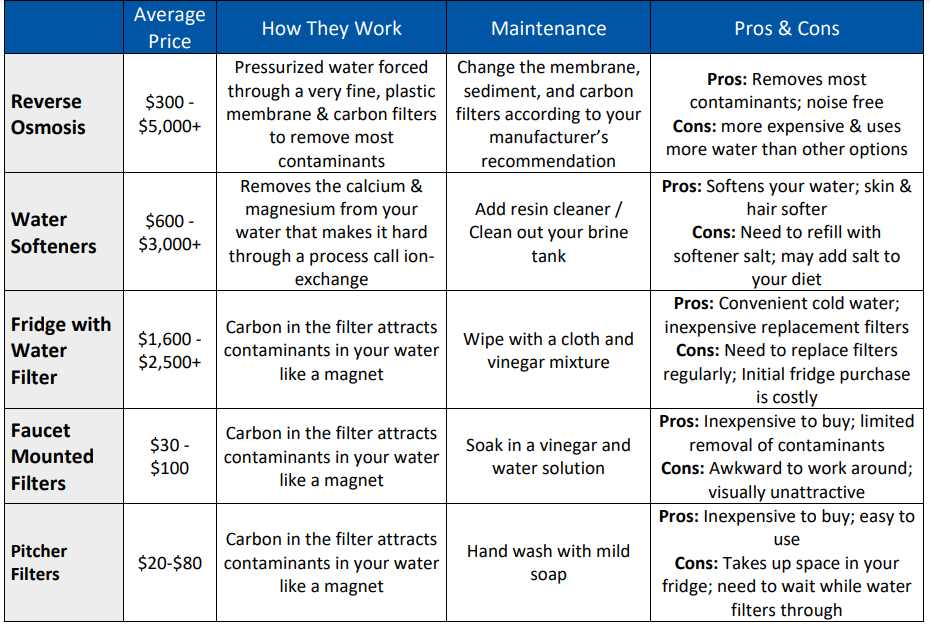
Different purifiers solve different problems. Start by identifying what you want to remove from your water.
- Under-sink filters: Best for clean drinking and cooking water. Removes lead, chlorine, and VOCs with zero water waste.
- Whole-house systems: Treats every tap, shower, and appliance. Ideal for hard water or homes with aging pipes.
- Reverse osmosis (RO): Delivers the highest purity by stripping out dissolved solids, fluoride, and nitrates. Uses 4–7 gallons of wastewater per gallon produced.
- Inline filters: Compact units for refrigerators, ice makers, or bathroom sinks. Simple to install and replace.
Identify Your Specific Contaminants
Test your water or review your local utility report to pinpoint problems before buying.
- Chlorine taste or odor: Carbon block filter
- Sediment, rust, or cloudiness: Sediment pre-filter
- Lead or heavy metals: KDF + carbon combo or RO
- Fluoride or high TDS: Reverse osmosis
- Well water: Multi-stage system with sediment, carbon, and possibly UV
Renters should choose under-sink models with diverter valves or countertop units that need no drilling. Homeowners with high water volume benefit from whole-house systems with refillable carbon tanks.
Gather Tools and Prepare Your Workspace
Essential Tools Checklist
Collect these items before you begin:
- Two adjustable wrenches
- Pipe cutter or hacksaw (for whole-house systems)
- Drill with 7/8″ hole saw and spade bits
- Screwdriver set
- Measuring tape and marker
- Bucket and towels
- Teflon tape (thread seal tape)
- Food-grade silicone lubricant (for RO O-rings)
Most systems include mounting brackets, fittings, and tubing. Verify the package contents against the manual before starting.
Shut Off Water and Relieve Pressure
- Close the cold water angle stop valve under the sink for under-sink units, or the main water valve near the meter for whole-house systems.
- Open the kitchen faucet and let water run until it stops. Leave the faucet open during installation to prevent pressure buildup.
- Keep tools dry and away from outlets or appliances like dishwashers.
Clear out cabinet space or prepare the basement or utility area. A clean, dry workspace prevents contamination and makes the job smoother.
Install an Under-Sink Water Filter
Mount the Filter Bracket
Choose a stable spot on the cabinet wall or side panel with enough clearance for future filter changes. Use the bracket as a template to mark screw holes, drill pilot holes, and secure with screws. Make sure the mount is level and strong enough to hold the full filter housing once filled with water.
Position the bracket so 3/8″ supply lines reach both the inlet and outlet without bending or kinking.
Connect the Inlet and Outlet Lines
- Place a towel under the angle stop valve and disconnect the existing cold water hose going to the faucet.
- Wrap 3 layers of Teflon tape clockwise around the valve threads.
- Connect the filter’s inlet line (marked “IN”) to the angle stop valve. Tighten with a wrench, but do not overtighten.
- Attach the outlet line (marked “OUT”) to the faucet’s water supply inlet.
If using a diverter valve, install it first on the angle stop, then connect the filter lines.
Test for Leaks and Flush the System
Hang the filter cartridge on the bracket and slowly turn the water back on. Watch all joints for drips. If a leak appears, shut off the water, disconnect, reapply Teflon tape, and reconnect.
Once leak-free, open the faucet and let water run for 30 seconds to 5 minutes to flush out carbon fines and trapped air. Initial water may look dark, which is normal. After flushing, taste and odor should improve immediately. Label the filter with the installation date for easy tracking.
Set Up a Reverse Osmosis System
Drill the Dedicated Faucet Hole
RO systems need a separate faucet. Choose a spot on the sink deck or countertop near the main faucet. Mark a 7/8-inch diameter hole and drill through using a hole saw or spade bit. Confirm clearance underneath with a straw to avoid hitting plumbing or electrical lines.
Insert the faucet body from above and secure with the mounting nut from below. Hand-tighten, then use a wrench for a quarter-turn more.
Install the Drain Saddle
Locate the vertical section of the sink’s P-trap drain pipe. Drill a small hole (usually 1/4″ or 3/8″) into the pipe. Slide the drain saddle over the hole and tighten the screws to create a watertight seal. This allows wastewater from the RO unit to flow into the drain.
Connect Feed Water, Filters, and Tank
- Cut the cold water line under the sink and install the small shut-off valve from the RO kit. Wrap threads with Teflon tape before connecting.
- Attach the orange tubing from the shut-off valve to the RO unit’s “Inlet” port. Push firmly until it clicks.
- Insert sediment and carbon filters into their housings.
- Lubricate the RO membrane O-rings with food-grade silicone, slide the membrane into the housing end-first, and reassemble.
- Connect the blue tubing from the RO unit’s “Tank” port to the storage tank valve.
- Connect the black tubing from the “Drain” port to the drain saddle. Ensure a downward slope for gravity flow.
Flush and Fill the System
Open the tank valve and slowly turn on the feed water shut-off. Open the RO faucet; water will sputter as air escapes. Let water run for about 1 minute or until clear. Close the faucet and allow the tank to fill (takes 2–4 hours). After filling, drain the entire tank to flush residual particles and sanitize the system.
Install a Whole-House Filtration System
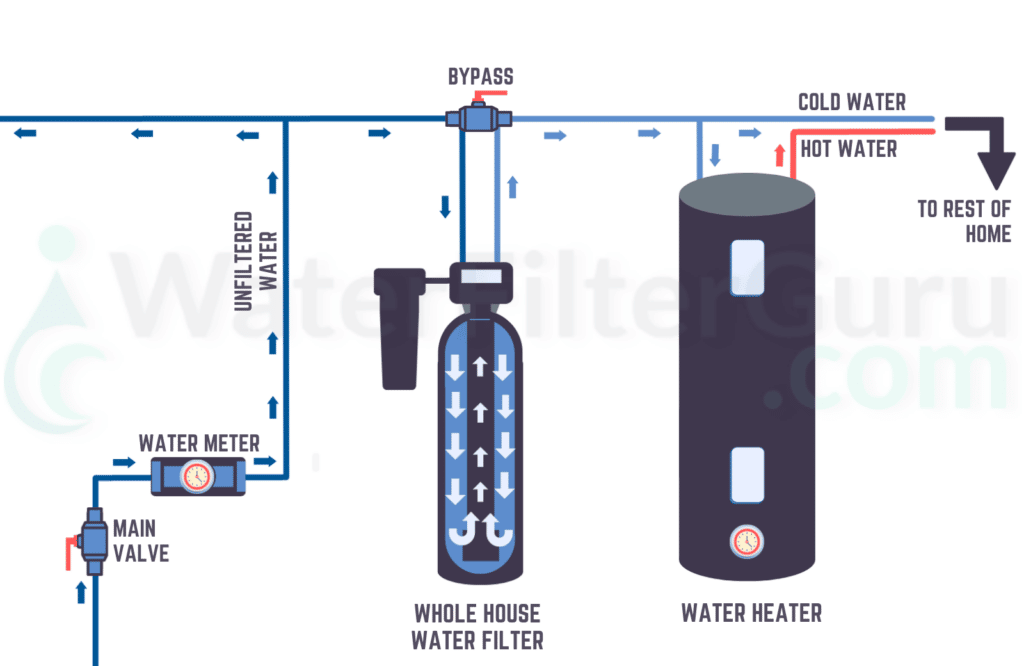
Mount the Filter on a Stable Base
Whole-house units are heavy and need secure mounting. In basements or garages, attach an 18″ x 18″ plywood backing to masonry walls using concrete screws. This provides a stable, vibration-dampening surface. Secure the filter brackets to the plywood and hang the pre-filter and main filter housings.
Cut the Main Water Line
Shut off the main water supply and open multiple faucets to drain the system. Use a pipe cutter to remove a section of the main line where the filter will go. Make clean, square cuts to ensure proper fitting. If soldering copper adapters, do so away from the filter units to avoid heat damage.
Assemble Components with a Bypass Loop
Install components in this order:
- Main shutoff valve (before the pre-filter)
- Pre-filter housing (sediment)
- Main filter housing (GAC or carbon block)
- House-side shutoff valve (after the main filter)
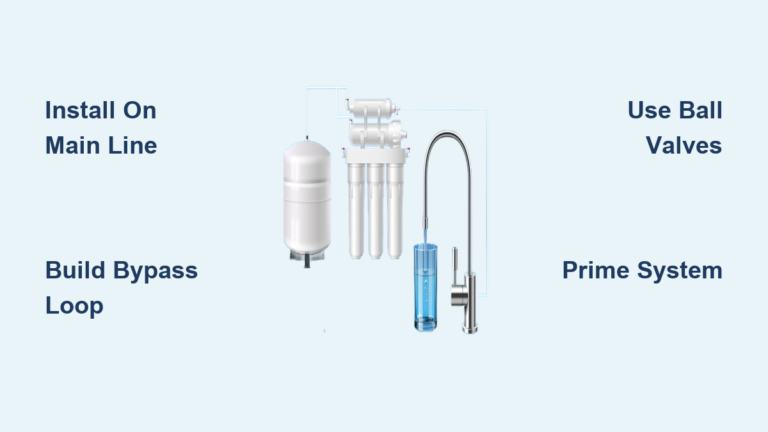
Add a bypass loop using T-fittings and a ball valve. During normal use, the bypass valve stays closed and system valves stay open. During maintenance, open the bypass valve and close the system valves to keep water flowing while you change filters.
Connect the Drain and Test Flow
If the system has a backflush feature, connect a drain line from the filter’s port to a floor drain or sump using flexible tubing with a downward slope. Apply Teflon tape to all threaded joints.
Slowly open the main water supply and check for leaks. Once sealed, open the system valves, close the bypass, and flush water through an outdoor spigot for several minutes to remove air and carbon dust.
Install an Inline Water Filter
Choose Your Appliance Target
Inline filters work well for refrigerator water lines, ice makers, bathroom sinks, humidifiers, or steam cleaners. Shut off water to the appliance or the main line if no local valve exists.
Mount and Connect the Filter
- Secure the mounting bracket to a cabinet wall or floor.
- Cut the water line feeding the appliance.
- Connect the inlet (marked) to the water supply and the outlet to the appliance line. Use Teflon tape on threaded fittings.
- Restore water and check for leaks. Run the appliance for 1–2 minutes to flush the filter.
Label the unit with the install date and plan to replace it every 2.5 years or at 10,000 gallons, whichever comes first.
Troubleshoot Common Installation Issues

Fix Leaks at Connections
Leaks usually come from loose fittings or missing thread sealant. Tighten slightly with a wrench. If the leak persists, disconnect, dry the threads, apply 3 wraps of Teflon tape, and reconnect. Never force fittings, as cross-threading causes permanent damage. For push-fit tubing, ensure the cut is clean and the tubing is pushed fully into the port until it clicks.
Restore Low Water Pressure
Common causes include a clogged sediment filter, kinked tubing, or closed valves. Replace the sediment pre-filter if clogged, straighten all lines, and confirm all shutoffs are open. For RO systems, check the tank pressure when empty; it should read 7–8 psi. Add air with a bike pump if needed.
Eliminate Bad Taste or Odor
If water tastes stale or chemical-like, replace the expired carbon filter and flush the system for 5–10 minutes. A plastic taste in new RO systems is normal for the first few flushes and dissipates quickly. Use a TDS meter for RO systems; readings above 50 ppm mean the membrane may need replacement.
Silence Noisy RO Systems
Hissing or gurgling during filling is usually harmless. Persistent noise can signal air in the lines, a kinked drain line, or high water pressure. Flush the system, check for kinks in the drain saddle, and install a pressure-reducing valve if pressure exceeds 80 psi.
Maintain and Optimize Long-Term Performance

Follow a Filter Replacement Schedule
Replace components on time to prevent bacterial growth and maintain flow:
| Component | Frequency | Replacement Signs |
|---|---|---|
| Sediment pre-filter | 6–12 months | Brown color, low pressure |
| Carbon block | 6–12 months | Chlorine taste returns |
| RO membrane | 2–3 years | Slow fill, high TDS |
| Whole-house carbon | 5 years or 10,000+ gallons | Taste degradation |
| Inline filter | ~2.5 years | Based on capacity |
Write the install date on the filter housing with a marker and set phone reminders for replacements.
Refill Whole-House Carbon Canisters
Instead of buying new stainless steel housings (which cost $100+), disassemble and refill with fresh granular activated carbon (~$20). This saves money and reduces waste. Clean the housing thoroughly before refilling.
Upgrade Plumbing for Better Results
In older homes with galvanized steel pipes, filtered water can pick up rust downstream. Replace the last 10–20 feet of plumbing before the filter with copper or PEX to eliminate recontamination.
Test Water Annually
Use affordable DIY kits to test for nitrates, lead, hardness, and bacteria. Adjust filtration media based on results, such as adding a phosphate injector for scale prevention or a UV sterilizer for microbial safety.
Frequently Asked Questions About Installing a Water Purifier at Home
Do I need a professional to install a water purifier?
Most under-sink and inline systems are DIY-friendly and take 1–2 hours with basic tools. Whole-house and RO systems are intermediate to advanced projects. If you are uncomfortable cutting pipes or soldering copper, hire a plumber.
How long does it take to install a water purifier at home?
Under-sink filters typically take 30 minutes to 1 hour. Inline filters take about 15–30 minutes. RO systems take 2–3 hours including tank filling time. Whole-house installations can take 3–6 hours depending on pipe material and complexity.
Where is the best place to install a water purifier?
Under-sink units go in the kitchen cabinet near the cold water line. Whole-house systems install on the main water line where it enters the home, usually in the basement, garage, or utility room. RO units need under-sink space plus a dedicated faucet hole and drain access.
How much does it cost to install a water purifier?
Under-sink and inline systems range from $50–$300 for DIY installation. RO systems cost $200–$600. Whole-house systems range from $500–$5,000, with an average DIY cost around $2,000 including materials.
Can renters install a water purifier without damaging the property?
Yes. Choose under-sink models with diverter valves or countertop units that require no drilling. These options connect to the existing faucet without permanent plumbing changes.
How often should I replace the filters?
Sediment and carbon filters need replacement every 6–12 months. RO membranes last 2–3 years. Whole-house carbon canisters last up to 5 years. Inline filters last about 2.5 years or 10,000 gallons. Label each filter with the install date to stay on track.
Key Takeaways for Installing Your Home Water Purifier
Installing a water purifier at home is a smart investment in health, convenience, and long-term savings. Start by matching the system to your water quality issues, gather the right tools, and follow the step-by-step process for your chosen purifier type. Test for leaks, flush thoroughly, and label each filter with the install date to stay ahead of replacements.
Your next step: pick the system that fits your water concerns, order the necessary tools, and set aside a weekend morning. Within a few hours, you’ll have clean, great-tasting water straight from your tap and peace of mind for years to come.