How to Plumb a Reverse Osmosis System
Installing a reverse osmosis system under your sink is one of the smartest upgrades you can make for your home’s drinking water. These systems strip out up to 99% of contaminants, including lead, fluoride, arsenic, and chlorine, delivering bottled-water quality straight from your tap. Learning how to plumb a reverse osmosis system the right way prevents leaks, maximizes filter life, and saves you from costly callbacks. This guide covers every phase, from picking the perfect spot and drilling the faucet hole to making tubing connections, flushing the system, and keeping it running like new.
Choose the Right Installation Location
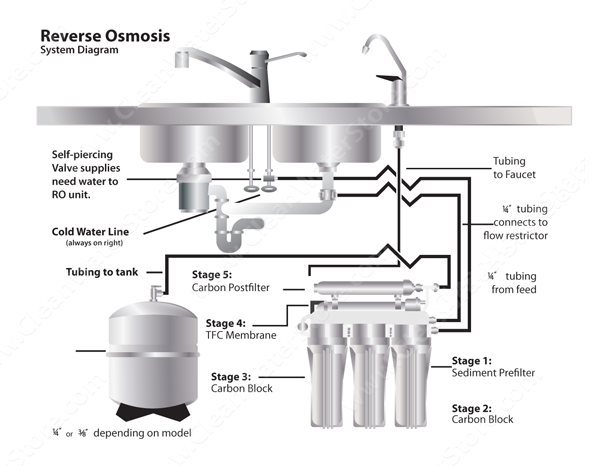
Smart placement sets the foundation for a trouble-free RO system. Most homeowners tuck the unit under the kitchen sink for easy access to cold water, a drain line, and the dedicated faucet. If cabinet space is cramped, a basement, utility closet, or garage can work, provided you respect a few key distance and temperature limits.
Measure Cabinet and Tank Clearance
Before you drill anything, grab a tape measure. The RO manifold needs roughly 15.5 inches of vertical clearance below the filter housings so you can swap cartridges without yanking the whole unit out. The storage tank looks compact but tips the scales at over 30 pounds when full, so set it on a sturdy shelf or the cabinet floor. Mount the manifold at least 2 inches off the floor if attaching to a cabinet wall to protect against moisture damage.
Confirm Water Pressure and Quality
RO membranes demand 40–80 psi of feed pressure to perform properly. Below 45 psi, production slows to a crawl and the automatic shut-off valve may never close, sending water straight down the drain 24/7. Test your home’s pressure with a gauge on an outdoor spigot. Well water systems often fall below this threshold, making a booster pump a worthwhile add-on.
Water quality matters just as much. Hardness above 4 gpg or iron above 0.3 ppm will shorten membrane life dramatically. Install a water softener upstream if your test results come back high.
Plan Tubing Runs and Faucet Access
Keep the storage tank within 10 feet of the faucet for strong flow. Runs longer than 12 feet to remote appliances like icemakers usually require a delivery pump. Look for an existing hole, such as a retired soap dispenser, for the dedicated faucet. If you need to drill, avoid granite or quartz countertops unless you have professional-grade tools and experience.
Install the Dedicated RO Faucet
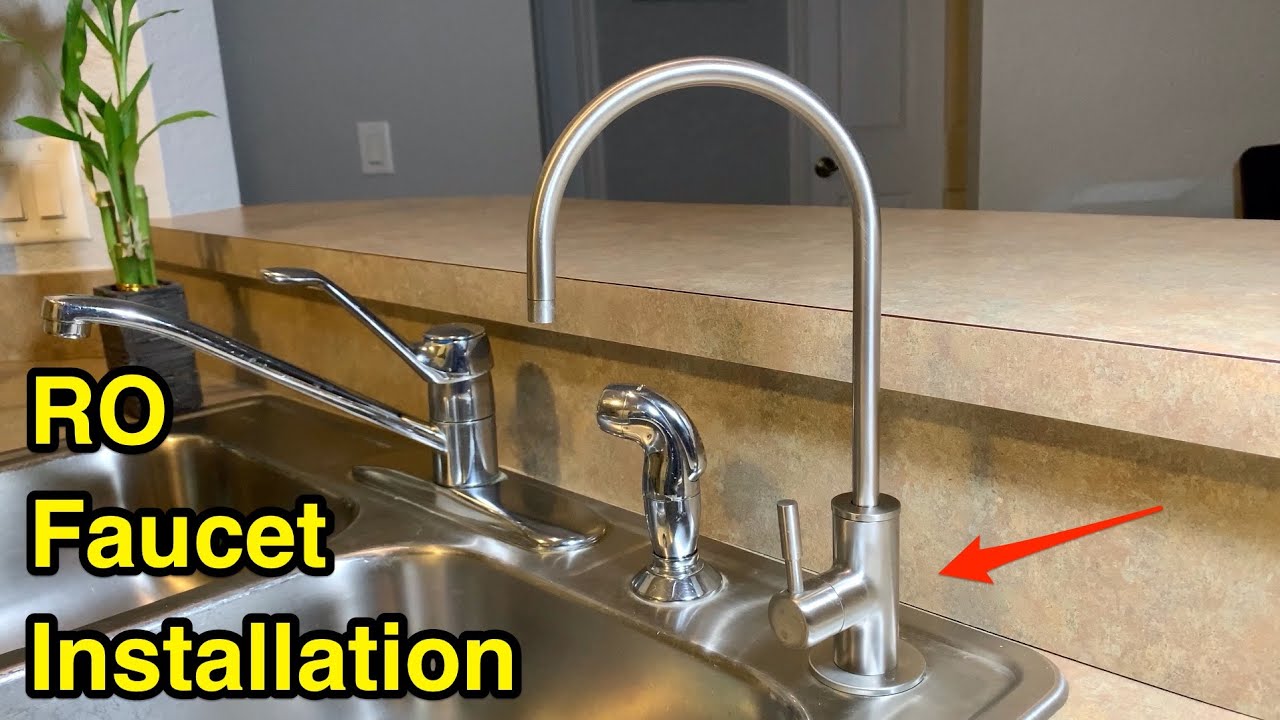
The dedicated faucet delivers your purified water and must be mounted before you connect the rest of the system. Standard models fit a 1/2-inch hole, while air gap faucets (required by some local codes) need a wider 1-1/4-inch opening.
Select and Drill the Faucet Hole
Pick a flat, stable spot with at least 2 inches of clear surface. Mark the center, then drill with a 7/8-inch hole saw for standard faucets or 1-1/4-inch for air gap models. On stainless steel sinks, punch a pilot hole first to keep the bit from wandering. Porcelain or enamel surfaces need a diamond grit or Relton cutter, and you should keep the area wet to prevent cracking. For granite or quartz, hire a pro; one wrong move can shatter the countertop.
Mount and Secure the Faucet
Disassemble the faucet hardware and slide the chrome base plate and rubber washer onto the shank from above. Feed the shank down through the hole, then add the lock washer and hex nut underneath. Hold the faucet steady from above while you snug up the nut with a wrench. Over-tightening can crack the sink, so firm but gentle is the rule.
Connect the Faucet Tubing
Attach the quick-connect fitting to the faucet base. For models with captive teeth, push the 1/4-inch tubing in until it seats, then turn counterclockwise to lock it. Route the line loosely toward the RO unit for now. Don’t cut or connect it yet.
Connect to the Cold Water Supply
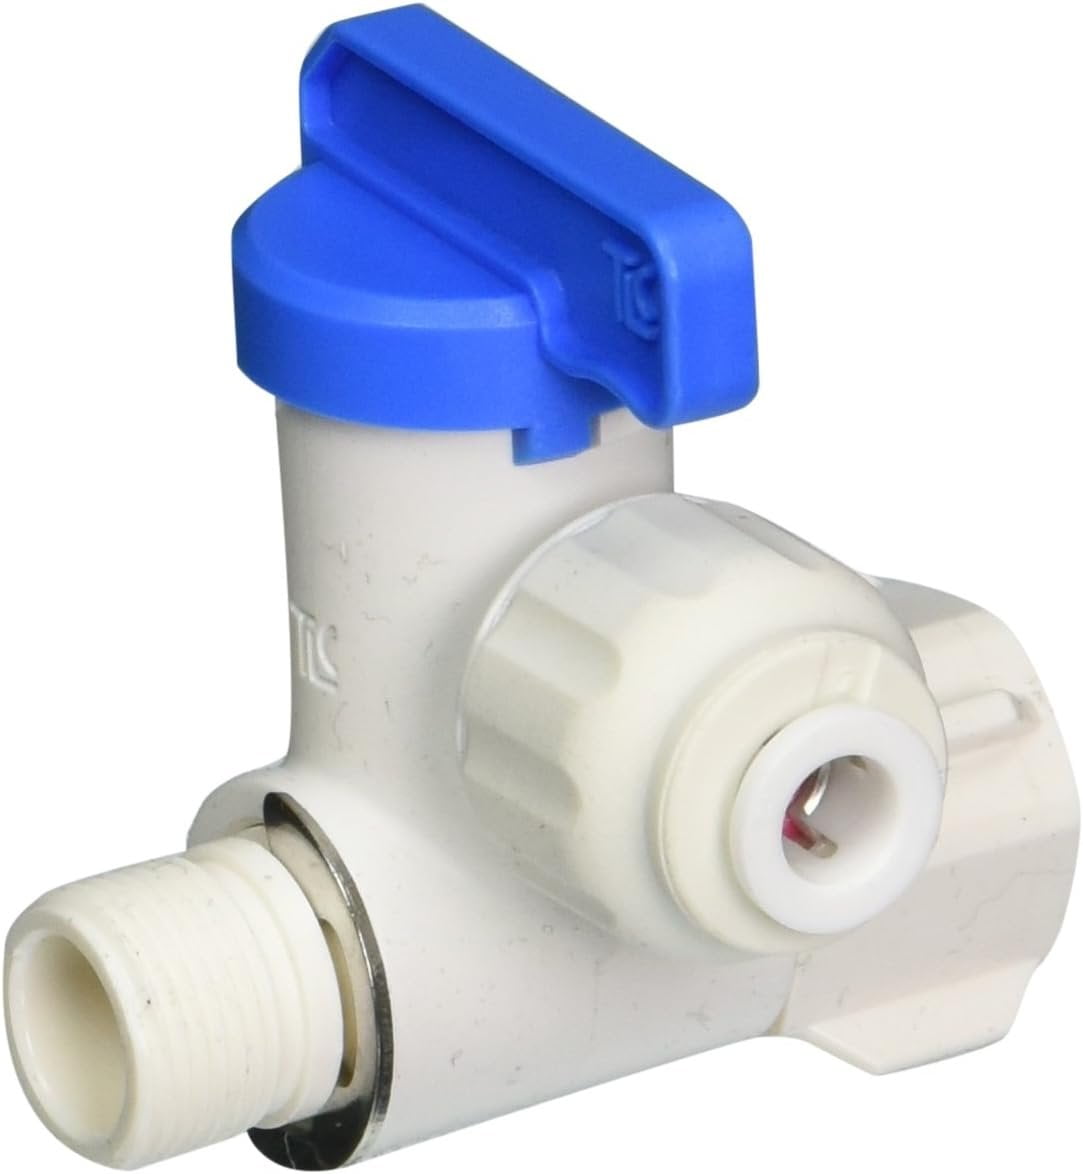
Your RO system needs a clean, pressurized cold water feed. Three connection methods exist, but the angle stop valve adapter is the safest and most reliable option for most homeowners.
Use an Angle Stop Valve Adapter
Shut off the cold water under the sink and open the faucet to bleed off pressure. Disconnect the riser tube from the shutoff valve. Wrap 3–5 layers of Teflon tape clockwise around the adapter threads. Screw the adapter onto the shutoff valve by hand, then snug it slightly with a wrench. Reconnect the original riser to the top port, then run a 1/4-inch feed line from the side port to the RO unit’s inlet. This method avoids piercing pipes and keeps your full shutoff capability intact.
Install a Self-Piercing Saddle Valve (If Necessary)
Only use this on solid copper, CPVC, or flexible tubing. Never clamp it onto braided or ribbed lines. Shut off the water, position the valve on the pipe, and turn the handle clockwise until the lance pierces the line. Tighten the seal nuts, then open the valve by reversing the handle. Connect tubing to the outlet.
Warning: Saddle valves can develop slow leaks over time and are banned in some jurisdictions. Use them only when no better option exists.
Avoid Faucet-Adapter Ball Valves
These adapters screw under the faucet but choke flow and can interfere with normal sink operation. Reserve them as a last resort for extremely tight spaces.
Attach the Drain Saddle

The drain line carries wastewater to your sink’s tailpiece. A drain saddle creates a secure, code-compliant connection without cutting into the drainpipe.
Position the Saddle Correctly
Install the saddle on the 1-5/8-inch OD drainpipe, above the P-trap. Installing below the trap risks sewer gas backing up into your drinking water. Keep it away from the garbage disposal to avoid clogs from food debris.
Drill and Secure the Saddle
Mark the spot and drill a 1/4-inch hole through one side of the pipe. Peel the adhesive backing from the gasket and stick it to the saddle’s fitting half. Wrap both halves around the pipe, align the holes, and tighten the bolts evenly. Snug is enough; over-tightening cracks plastic pipes.
Connect the Drain Tubing
Attach the 1/4-inch drain line from the RO unit (with the flow restrictor still in place) to the saddle. The flow restrictor is a small cylinder that maintains membrane pressure and must never be removed.
Mount the RO Unit and Tank
With water and drain connections ready, it’s time to secure the hardware.
Secure the RO Unit
Mark the mounting holes on the cabinet sidewall, keeping the unit level and at least 2 inches off the floor. Drive in screws and slide the bracket slots over them. If the wall feels flimsy, mount the unit vertically against the cabinet side instead. Keep filter housings accessible for future swaps.
Place the Storage Tank
Set the tank within 10 feet of the faucet. It can stand upright or lay on its side, as long as the Schrader valve on top stays accessible for pressure checks. Make sure the floor or shelf can handle 30+ pounds.
Install Filters and RO Membrane

Now you’re ready to load the filtration stages. Wash your hands or slip on gloves; filters ship in sterile packaging.
Insert Sediment and Carbon Filters
Unscrew the filter housings with the included wrench. Drop the 5-micron sediment filter into the first housing. Orientation rarely matters. Insert the carbon block filters into the next stages the same way, unless the label specifies otherwise.
Load the RO Membrane Correctly
Pull the membrane from its packaging and find the end with the small rubber O-ring. That end goes in first. Push firmly until the membrane seats at the bottom of the housing. Lubricate the O-ring with silicone if the manufacturer included any. Screw the housing back on, making sure the O-ring seats cleanly to prevent leaks.
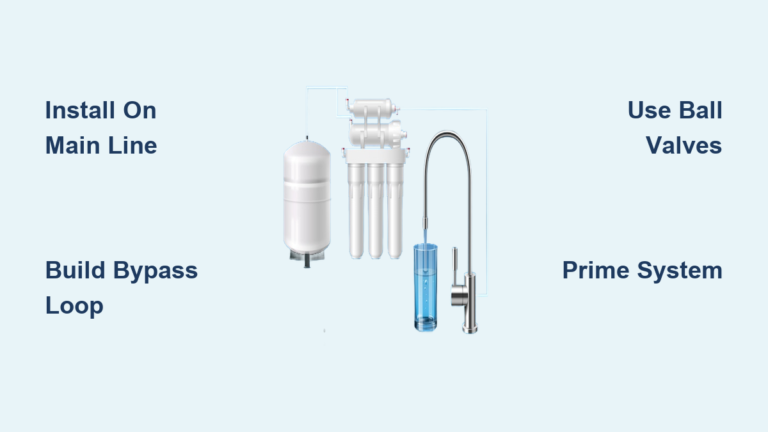
Connect All Tubing Lines
Now link the system’s plumbing: feed, drain, tank, and faucet.
Hook Up the Feed Line
Connect the 1/4-inch tubing from the angle stop adapter to the RO unit’s inlet (often labeled “Feed” or color-coded). Push until it clicks. A gentle tug confirms it’s locked.
Attach the Drain and Flow Restrictor
Connect the drain line from the membrane housing to the drain saddle. The flow restrictor must stay in-line. It regulates wastewater and keeps membrane pressure where it needs to be.
Link Tank and Faucet Lines
Connect one tube from the RO unit’s “Product” or “Tank” port to the storage tank valve. Then connect the final line from the unit to the dedicated faucet. Push each tube fully into the quick-connect fittings until you feel them seat.
Route Tubing Neatly
Follow the contours of your cabinet. Avoid sharp bends or kinks that choke flow. Use the included clips to secure lines and keep them away from hot pipes or moving parts.
Start Up and Flush the System
Never drink the first water from a new RO system. It contains carbon fines and manufacturing residues.
Pressurize and Check for Leaks
Open the cold water supply valve. Immediately inspect every connection, especially filter housings and the drain saddle, for drips. Tighten fittings or reseat tubing as needed.
Fill and Drain the Tank
Open the tank valve. Open the RO faucet to purge air from the lines. Once water flows steadily, close the faucet and let the tank fill. This takes 2–3 hours depending on your pressure.
Perform the Initial Flush
Drain the entire tank and discard the water. It’s full of carbon dust. Let the tank refill, then drain and discard again. After the third cycle, the water is safe to drink.
Maintain and Sanitize Annually
A little routine care keeps your RO system performing at its peak for years.
Replace Filters on Schedule
Swap sediment and carbon pre-filters every 6–12 months. Replace the post-filter every 12–18 months. Change the RO membrane every 2–3 years, depending on your water quality and usage.
Sanitize the System
Once a year, or whenever you change filters, sanitize to kill bacteria.
- Shut off water and the tank valve. Open the faucet to drain.
- Remove filters and the membrane.
- Mix 1 tsp unscented bleach into 1 gallon of water.
- Pour 1 cup into each empty housing.
- Reassemble without filters.
- Open valves and let solution flow through the faucet.
- Close the faucet and let it sit for 30 minutes.
- Drain, rinse housings, and reinstall filters.
- Flush 2 full tank cycles before drinking.
Check Tank Air Pressure
Drain the tank completely. Press a tire gauge onto the Schrader valve on top. Pressure should read 7–8 psi. Add air with a bike pump if low; release air if it’s too high. Wrong pressure causes poor flow or bladder failure.
Troubleshoot Common Issues
Even a well-installed system can act up. Here’s how to diagnose and fix the most frequent problems.
Fix Constant Drain Flow
If water runs nonstop to the drain, check for these culprits:
- Low feed pressure (<40 psi): Install a booster pump.
- Failed automatic shut-off valve: Replace the ASO valve.
- High tank pressure: Adjust to 7–8 psi.
Restore Slow Water Production
Common causes include:
- Clogged pre-filters: Replace sediment and carbon filters.
- Fouled RO membrane: Replace if output stays low despite good pressure.
- Cold water: RO output drops in winter; this is normal.
Stop Leaks at Fittings
If water drips, try these fixes:
- Tube not seated: Push it in until it clicks.
- Cracked fitting: Replace it. Don’t over-tighten plastic.
- Missing Teflon tape: Reapply on threaded joints.
Eliminate Bad Taste or Odor
Old filters or stagnant water cause off-flavors. Replace filters and flush the tank. If you just sanitized, make sure all bleach is rinsed out.
Restore No Water Flow
Check these basics:
- Closed valves: Open the feed and tank valves.
- Frozen lines: Inspect in cold environments.
- Kinked drain line: Straighten it. Never remove the flow restrictor.
Connect to Icemakers and Aquariums
RO systems can do more than fill your glass.
Hook Up a Refrigerator Icemaker
Install a T-fitting in the faucet line and add a shut-off valve. Run 1/4-inch tubing to the fridge, keeping the run under 12 feet or adding a delivery pump. Avoid connecting to existing copper lines to prevent corrosion. Shut off the icemaker valve before servicing the RO system.
Use for Aquariums
RO water is perfect for fish tanks, especially saltwater setups. It strips out minerals, chlorine, and high pH. Skip the remineralization stage if you’re adjusting water chemistry manually. The core stages (pre-filters, membrane, post-filter, and tank) are all you need.
Frequently Asked Questions About Reverse Osmosis Installation
Do I need a booster pump for my RO system?
You need a booster pump if your feed water pressure stays below 45 psi consistently. Low pressure slows production and can prevent the automatic shut-off valve from closing, wasting water around the clock.
Can I install a reverse osmosis system without drilling a new hole?
Yes, if you have an existing unused hole, like a retired soap dispenser or sprayer, you can usually mount the dedicated faucet there. The hole needs to be 1/2-inch for standard faucets or 1-1/4-inch for air gap models.
How long does it take to fill the storage tank the first time?
The initial fill takes 2–3 hours depending on your feed water pressure and temperature. You’ll need to drain and refill the tank 2–3 times before the water is safe to drink, so plan on a full day of flushing.
Where should I install the drain saddle?
Install the drain saddle on the 1-1/2-inch OD drainpipe above the P-trap. Never install below the trap, as this risks sewer gas backflow into your drinking water. Keep it away from the garbage disposal to prevent clogs.
How often should I replace RO filters?
Replace sediment and carbon pre-filters every 6–12 months. Swap the post-filter every 12–18 months. Change the RO membrane every 2–3 years, depending on your water quality and household usage.
Is it safe to drink reverse osmosis water long-term?
Yes, RO water is safe and removes up to 99% of contaminants. Some systems include a remineralization stage to add back beneficial minerals like calcium and magnesium for taste. If yours doesn’t, you can get those minerals from a balanced diet.
Key Takeaways for Plumbing Your Reverse Osmosis System
Plumbing a reverse osmosis system is a DIY-friendly project that pays off in cleaner, safer drinking water for years to come. Focus on three critical steps: choose a location with adequate clearance and pressure, install the faucet and drain saddle correctly to prevent leaks, and flush the system thoroughly before drinking any water. Stick to the maintenance schedule, sanitize annually, and check tank pressure to keep performance high. Whether you’re upgrading your kitchen tap or supplying an aquarium, a well-installed RO system delivers purity you can count on. Grab your tools, follow this guide, and enjoy better water starting today.