Fix Common Reverse Osmosis Problems
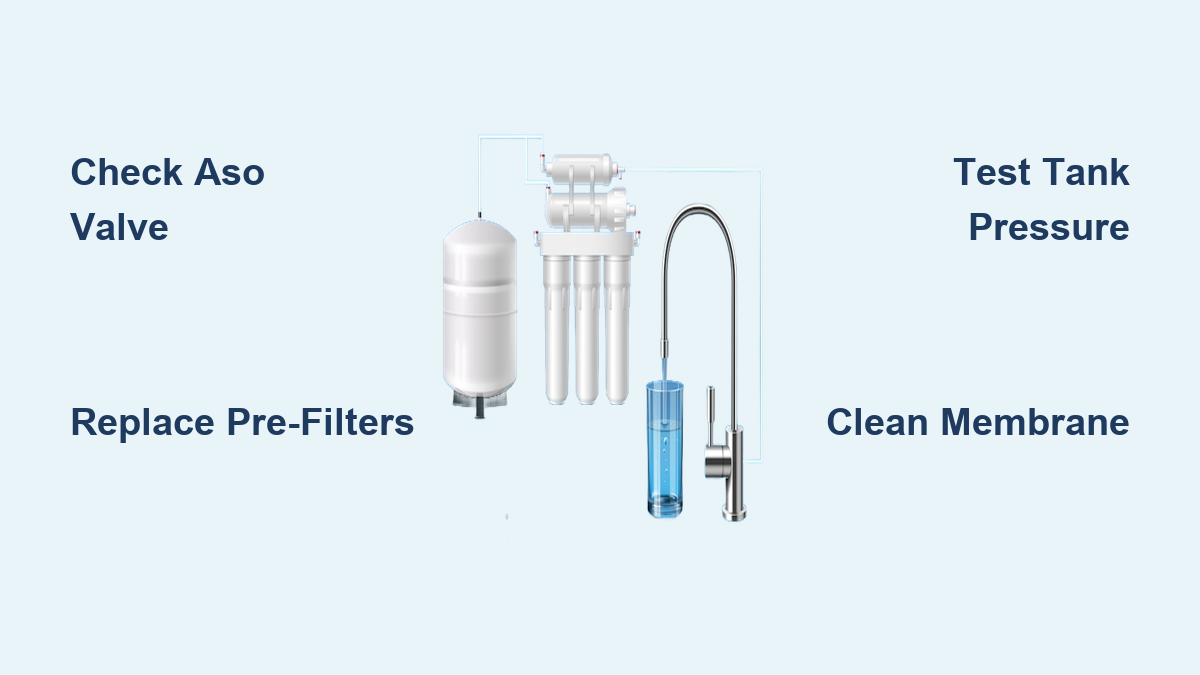
If your reverse osmosis system keeps sending water down the drain, fills the tank slowly, or produces water that tastes flat or metallic, you are dealing with one of the most common problems with reverse osmosis solutions. Thousands of homeowners face these exact issues every year, often caused by clogged filters, failing valves, or missed maintenance. RO systems are powerful purifiers, but their multi-stage design means a single weak component can disrupt the entire process. In this guide, you will learn how to diagnose the root cause of RO failures, apply targeted fixes, and follow a maintenance routine that prevents most problems before they start.
Diagnose Continuous Drain Flow
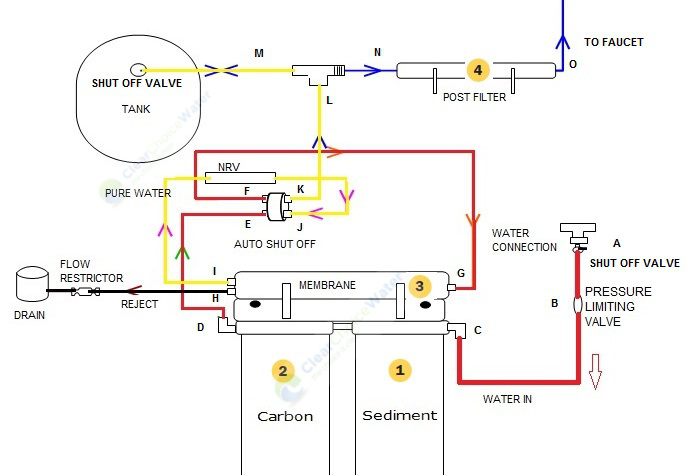
When water flows to the drain nonstop, even with a full tank, your system is wasting both water and money. This is one of the most reported problems with reverse osmosis solutions and usually points to a valve or line failure.
Check the Automatic Shut-Off Valve
The Automatic Shut-Off (ASO) valve stops water flow once the storage tank reaches 35–40 PSI. When it fails, the system keeps pushing water through the membrane and out the drain.
Test it in 3 steps:
1. Lift the tank. A full tank should feel heavy and solid.
2. Attach a tire pressure gauge to the Schrader valve. It should read 35–40 PSI.
3. If pressure is correct but drainage continues, the ASO valve is defective.
Fix: Replace the ASO valve. The part typically costs under $20 and installs in minutes.
Inspect for a Leaking Check Valve
A faulty check valve lets pressurized water from the tank backflow through the membrane and into the drain.
Warning signs:
– Drain flow resumes shortly after shutting off the system
– Tank loses pressure overnight
Solution: Replace the check valve near the membrane housing to stop reverse flow and restore proper cycling.
Clear Permeate Line Blockages
If the white permeate line to the storage tank is kinked or clogged, purified water cannot enter the tank and gets forced to the drain instead.
Steps to check:
– Follow the white line from the membrane to the tank
– Look for bends, crushing, or scale buildup
Fix: Straighten or replace the line, then flush the system to clear debris before reassembly.
Fix Low Water Production
Slow tank fill times or weak flow at the faucet signal reduced output. This issue often develops gradually and ranks among the top complaints from RO users.
Replace Clogged Pre-Filters
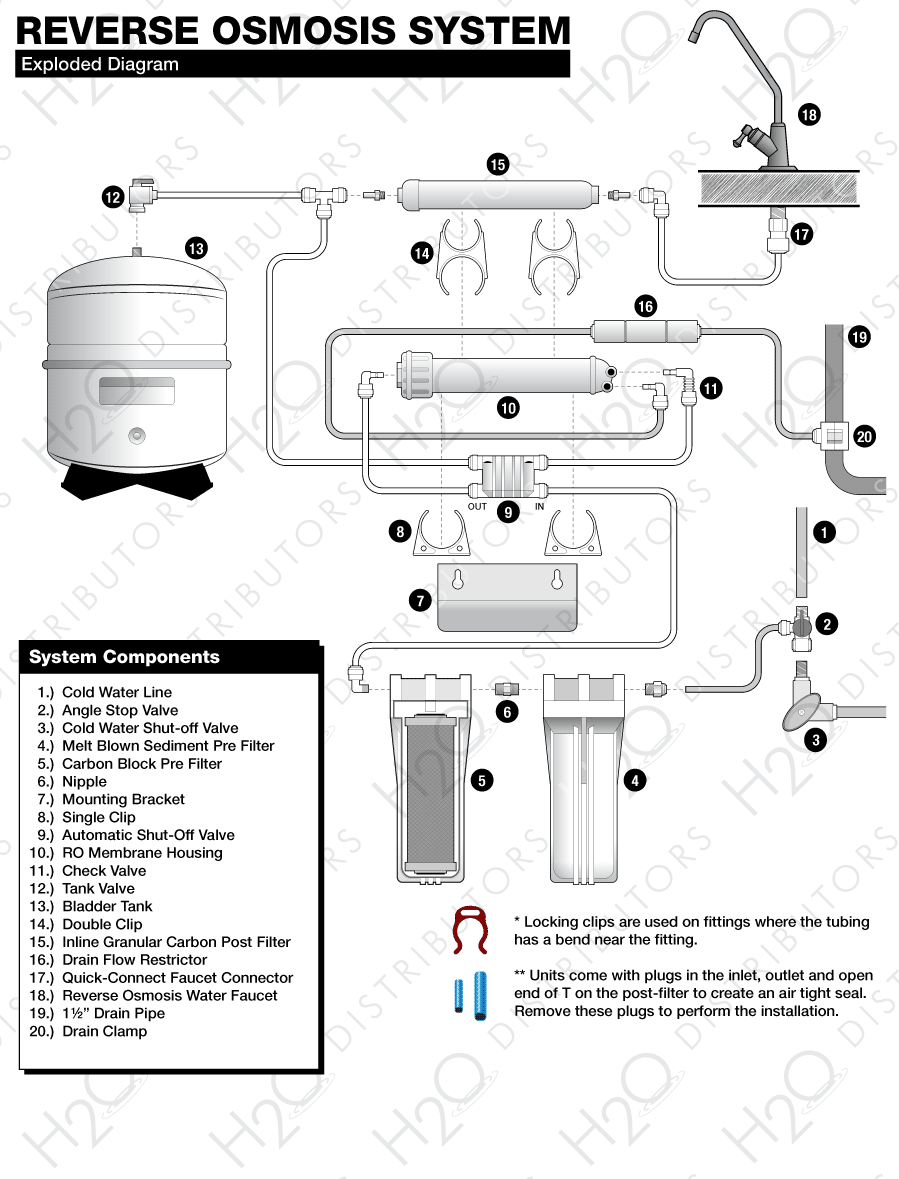
Sediment and carbon pre-filters trap particles and chlorine, but they become blocked over time.
Symptoms of clogging:
– Reduced flow from the faucet
– Hissing sounds near the filters
– Dark or discolored cartridges
Action: Replace pre-filters every 6–12 months using manufacturer-recommended parts. Keep spares on hand so you never wait for visible clogging.
Clean or Replace the RO Membrane
The membrane is the heart of the system. Scale, organic matter, or biofilm can reduce its efficiency dramatically.
When to act:
– Output drops by 10% or more
– TDS readings rise significantly
– Membrane age exceeds 2–3 years
Solution:
– For mild fouling, flush with citric acid for calcium or alkaline cleaner for organics
– For severe damage, replace the membrane
Always shut off the water and relieve system pressure before removing the membrane.
Boost Inlet Water Pressure
RO systems need 40–60 PSI minimum inlet pressure. Low pressure equals low production.
Test: Attach a pressure gauge to the cold water line.
If below 40 PSI:
– Install a booster pump
– Check for kinks in the supply line or closed valves
Ideal range: 60 PSI for optimal performance and rejection rates.
Verify Flow Restrictor Function
The flow restrictor maintains pressure across the membrane. When clogged or mismatched, efficiency drops.
Check:
– Listen for high-pitched whistling, which signals restriction
– Remove and inspect the restrictor for debris
Fix: Clean with vinegar or replace with the correct model for your membrane capacity (such as 75 GPD or 100 GPD).
Resolve Storage Tank Issues

Even with a working membrane, a failed tank can cripple your system’s performance.
Test Bladder Air Pressure
The internal bladder pressurizes stored water. If it leaks, flow stops after just a few cups.
Steps:
1. Empty the tank completely
2. Use a tire gauge on the Schrader valve
3. Pressure should read 35–40 PSI when empty
If below 10 PSI:
– Recharge with a bike pump, one or two pumps at a time
– Stop if resistance increases, since over-pressurizing can rupture the bladder
If pressure will not hold: The bladder is ruptured and the tank must be replaced. Replacement tanks cost around $45–$50.
Prevent Water-Logged Tanks
A tank that fills slowly or not at all may be water-logged due to low air pressure, leaving no room for new permeate water.
Prevention: Check tank pressure every 6 months and re-pressurize as needed.
Stop Leaks and Seal Failures
Water pooling under the sink usually points to degraded seals or improper installation.
Replace Worn O-Rings
O-rings on filter housings, membrane caps, and fittings degrade over time.
Signs:
– Drips at filter heads
– Moisture around quick-connect fittings
– Swollen or cracked rubber
Fix:
– Turn off water and relieve pressure
– Remove the housing and inspect O-rings
– Replace with manufacturer-specified parts
Important: Never use petroleum jelly on seals. It causes rubber to swell. Use only food-grade silicone grease or glycerin.
Tighten Fittings Without Over-Torquing
Loose connections cause leaks, but over-tightening cracks plastic housings.
Best practice: Hand-tighten, then add a quarter turn with a wrench. A small drip after startup is normal and should stop within minutes.
Improve Water Quality Output

RO water should be clear, odorless, and low in TDS. When it is not, contamination or component failure is the likely cause.
Test TDS Levels Regularly
A TDS meter is essential for tracking membrane health.
How to test:
– Measure feed water and permeate water
– Divide permeate TDS by feed TDS and subtract from 100% to get the rejection rate
Healthy system: Above 95% rejection. If rejection drops below 90%, inspect the membrane and seals immediately.
Address Cloudy or Metallic-Tasting Water
Cloudy water can come from harmless air bubbles after startup or from suspended solids indicating a membrane breach.
– If the water clears in a glass, it is just air
– If cloudiness persists, replace the membrane
Metallic taste suggests corrosion or membrane failure.
– Check whether filters are overdue
– Test source water for iron or copper
– Consider adding a remineralization filter to balance pH
Combat Microbial Growth
Bacteria and biofilm can grow in stagnant lines, especially after long shutdowns.
Symptoms:
– Musty odor
– White or black specks in water
– High bacterial counts
Sanitize the system:
1. Mix 1 teaspoon of unscented bleach per gallon of water
2. Pour into the pre-filter housing
3. Run the system for 10 minutes, then shut off and let sit 20–30 minutes
4. Flush thoroughly with clean water
Repeat sanitization every 6–12 months or after any repair.
Reduce Noise and Vibrations
Unusual sounds often signal mechanical or flow issues that are easy to correct.
Silence Gurgling in the Drain Line
Gurgling comes from air trapped in the drain saddle or an improper air gap.
Fix:
– Ensure the drain line has a high loop at least 30 inches above the floor
– Verify the air gap faucet is not submerged
– Remove kinks or sharp bends in the drain tubing
Eliminate Whistling Sounds
High-pitched noise means restricted flow.
Common causes:
– Clogged filter
– Partially closed valve
– Over-tightened fitting
Solution: Replace filters, check valve positions, and inspect lines for blockages.
Dampen Pump Vibrations
A humming or vibrating pump may be loose or unbalanced.
Steps:
– Place anti-vibration pads under the system
– Ensure the unit sits on a level surface
– Tighten any loose mounting screws or brackets
Some noise is normal during operation, but excessive vibration is not.
Prevent Pipe Bursts and Scale Buildup
High pressure and poor water quality can lead to catastrophic failures if left unchecked.
Avoid Pressure Buildup
Blocked membranes or clogged filters cause pressure to rise, risking pipe bursts.
Prevention:
– Replace pre-filters every 6–12 months
– Clean the membrane annually
– Install a pressure gauge to monitor inlet and reject lines
Warning: Never operate without pre-filters. Chlorine destroys membranes quickly.
Control Calcium Scaling
Hard water forms scale on the membrane, reducing both flow and lifespan.
Signs:
– Gradual drop in production
– Increased feed pressure
– Poor salt rejection
Solutions:
– Install a water softener if hardness exceeds 7 GPG
– Use an antiscalant dosing system
– Clean with citric acid every 6–12 months
Pro Tip: Keep the Langelier Saturation Index below 1 when using a scale inhibitor to prevent calcium deposits.
Optimize Your Maintenance Schedule
Most problems with reverse osmosis solutions stem from neglected maintenance. A simple routine prevents the majority of failures.
Replace Filters on Time
- Sediment filter: every 6 months
- Carbon filters: every 6–12 months
- Post-filter: every 12 months
Set reminders so you never wait for symptoms to appear.
Clean the Membrane Annually
Even when output seems fine, clean the membrane once a year.
Steps:
1. Use a proper cleaning kit (acid for scale, alkaline for organics)
2. Circulate the solution for 30 minutes
3. Rinse thoroughly with clean water
Avoid bleach or harsh chemicals, which damage polyamide membranes.
Sanitize the Entire System
Sanitize after filter changes, long shutdowns, or any change in odor or taste. Use a food-safe disinfectant or the diluted bleach method described earlier.
Minimize Water Waste
Standard RO systems waste 3 to 4 gallons for every gallon produced, which adds up quickly.
Upgrade to Low-Waste Models
Newer systems use permeate pumps or automatic shut-off timers to cut waste.
Benefits:
– Waste ratio drops to 1:1 or 2:1
– No electricity required
– Longer membrane life
Look for models labeled “Zero Waste RO” or “Permeate Pump Equipped.”
Reuse Drain Water
Collect reject water for non-potable tasks such as:
– Watering non-edible plants
– Mopping floors
– Flushing toilets
Install a drain diverter kit to make collection easy and safe.
Handle Temperature and Installation Limits
RO systems are sensitive to environmental conditions and setup errors.
Avoid Freezing and Heat
Operating range: 1°C to 49°C (34°F to 120°F)
Never install:
– In unheated garages where membranes can freeze
– Near boilers or dishwashers where heat degrades seals
In cold climates, insulate pipes or use heat tape to prevent freezing.
Ensure Proper Drain Connection
Use a proper air gap faucet or drain saddle.
Avoid:
– Direct connection to a sewer line (backflow risk)
– Submerged drain lines (siphoning hazard)
Always follow local plumbing codes for air gap height and placement.
Frequently Asked Questions About Reverse Osmosis Systems
Why does my RO system keep sending water to the drain?
A defective Automatic Shut-Off valve is the most common cause. It fails to stop flow when the tank reaches 35–40 PSI. A leaking check valve or a clogged permeate line can also cause continuous drainage.
How often should I replace RO filters?
Replace sediment and carbon pre-filters every 6–12 months. Post-filters should be replaced annually. The RO membrane typically lasts 2–3 years depending on feed water quality.
What causes low water pressure from the RO faucet?
Low pressure usually results from clogged pre-filters, a fouled membrane, low inlet pressure below 40 PSI, or a water-logged storage tank with insufficient air pressure.
Is cloudy RO water safe to drink?
Cloudy water that clears after sitting in a glass is usually just trapped air and is harmless. Persistent cloudiness indicates suspended solids and a possible membrane breach that requires replacement.
How can I reduce water waste from my RO system?
Install a permeate pump or upgrade to a low-waste model with a 1:1 or 2:1 ratio. You can also reuse drain water for irrigation or cleaning to cut overall consumption.
Why does my RO water taste flat or metallic?
Flat taste comes from mineral removal, which is normal for RO water. A metallic taste suggests corrosion, membrane failure, or acidic water. Consider a remineralization filter to improve flavor.
Key Takeaways for Solving Reverse Osmosis Problems
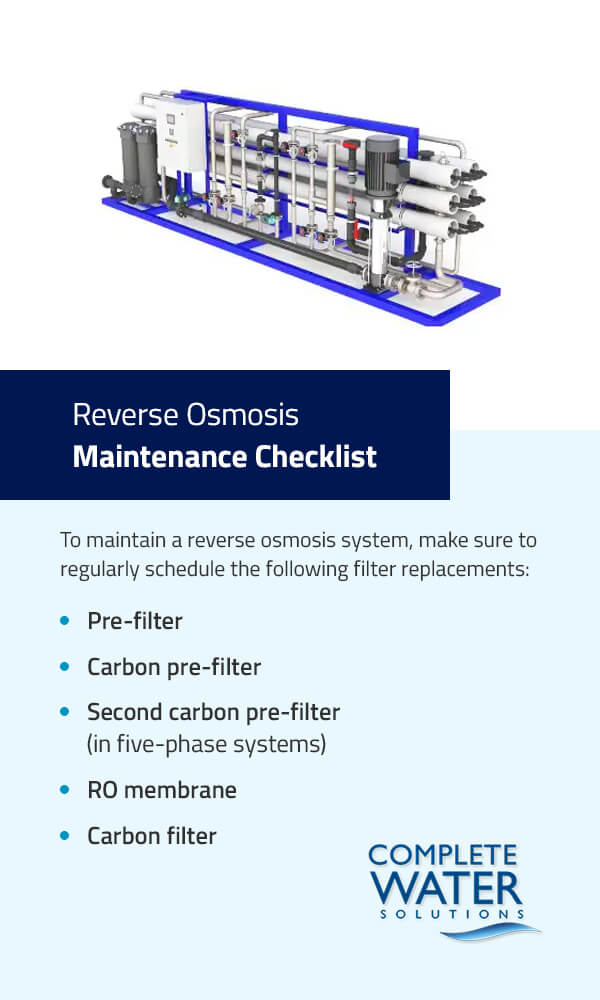
Common problems with reverse osmosis solutions are almost always preventable with routine care and prompt diagnosis. The three most impactful habits are testing tank pressure every 6 months, replacing filters on schedule, and sanitizing the system annually. Monitoring TDS levels gives you an early warning of membrane fatigue, while addressing small leaks quickly prevents costly water damage. Start by checking your tank pressure and filter age today, since these two steps alone resolve the majority of RO performance issues.