Fix Reverse Osmosis System Not Working
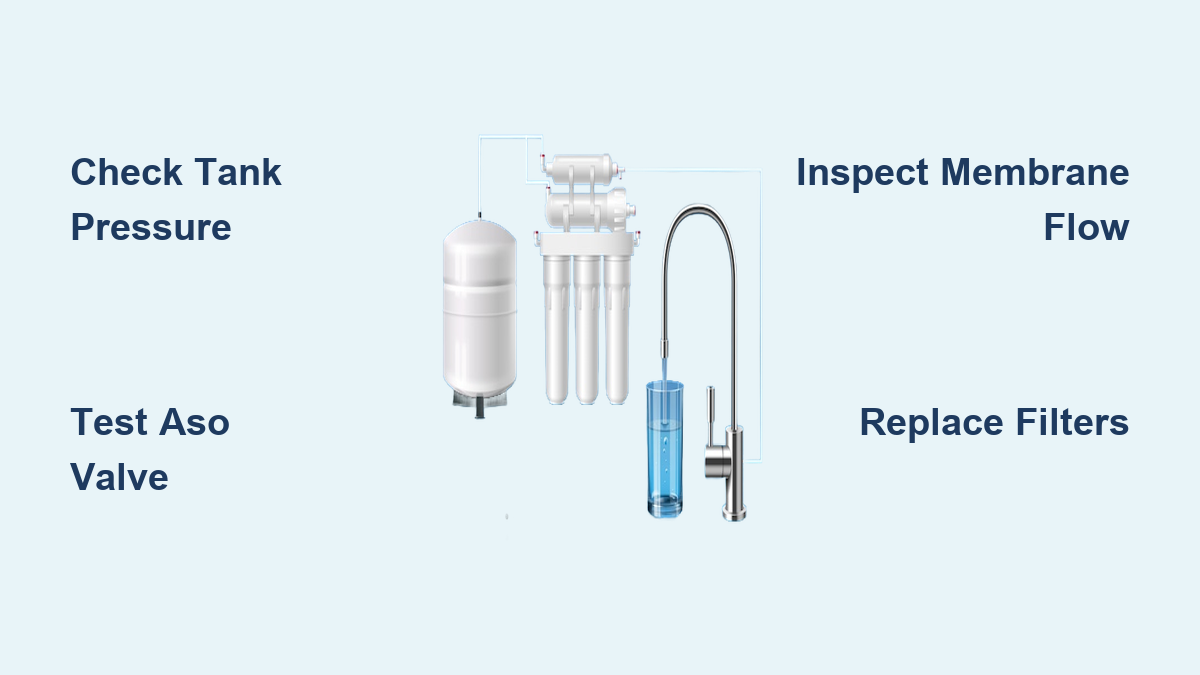
A reverse osmosis system not working can bring your daily routine to a halt. Thousands of homeowners face sudden drops in water flow, strange tastes, or complete shutdowns without knowing where to start. The good news is that 90% of RO failures come from a handful of common issues, including a failed storage tank, clogged filters, or a faulty shut-off valve.
This guide walks you through a step-by-step roadmap to diagnose and fix your RO system fast, with no plumber required. You will learn how to test pressure, spot leaks, measure flow rates, and replace critical components with confidence.
Check Storage Tank Pressure First

Low water output often traces back to a failed air bladder in the storage tank. If the tank feels heavy but delivers only a trickle, the bladder may be waterlogged or ruptured.
Test Tank When Empty
To check properly, the tank must be empty:
1. Shut off the water supply.
2. Open the RO faucet and drain all water.
3. Disconnect the tank from the system.
4. Press the Schrader valve (under the blue cap).
– If water sprays out: Bladder is ruptured, so replace the tank.
– If only air escapes: Use a tire pressure gauge to check PSI.
Target pressure (empty tank): 5–7 PSI. If below, use a bicycle pump to add air in small bursts. Never exceed 8 PSI.
⚠️ Warning: Never pump air into a full tank. This can burst the bladder.
Re-pressurize or Replace
If the tank holds air but will not build pressure when full (should reach 35–40 PSI), the bladder is compromised. Waterlogged tanks can sometimes be cleared by pumping air into the Schrader valve while draining to force out trapped water. Reset to 5–7 PSI and reconnect.
If pressure drops quickly or water leaks from the valve, replace the tank. Most cost $45–$50 and last about 5 years.
Fix Continuous Drain Flow
Water running nonstop down the drain usually points to a failed Automatic Shut-Off (ASO) valve, the most common cause of wasted water.
Confirm ASO Failure
- Let the system run until the tank should be full (feels heavy).
- Check tank pressure. It should read 35–40 PSI.
- Turn off the tank valve (not the supply).
- Wait 2–3 minutes.
– If water still flows to drain: ASO valve is not closing. Replace it immediately.
❌ Never bypass the ASO valve. Doing so causes endless water waste and risks membrane rupture.
Rule Out Check Valve Leak
Turn off the water supply while keeping the tank valve open. If drain flow continues, the check valve may be leaking back-pressure, fooling the ASO. Replace the ASO and check valve assembly.
Diagnose Low or No Water Flow
No water from the faucet? Start with quick wins before diving deeper.
Verify Basic Setup
- Inlet valve open? Ensure feed water is turned on.
- Tank valve open? Check both at tank and under sink.
- Airlock after filter change? Common after maintenance.
Break Airlocks Quickly
After replacing filters, air can become trapped in lines:
1. Disconnect tubing from tank inlet.
2. Open the RO faucet.
3. Let water run for 1–2 minutes until steady.
4. Reconnect tank line.
Or try this filter reinstallation trick:
1. Remove all filters.
2. Reinstall in reverse order: Post-filter → Membrane → Pre-filters.
3. This helps bleed air from the system.
Test RO Membrane Performance
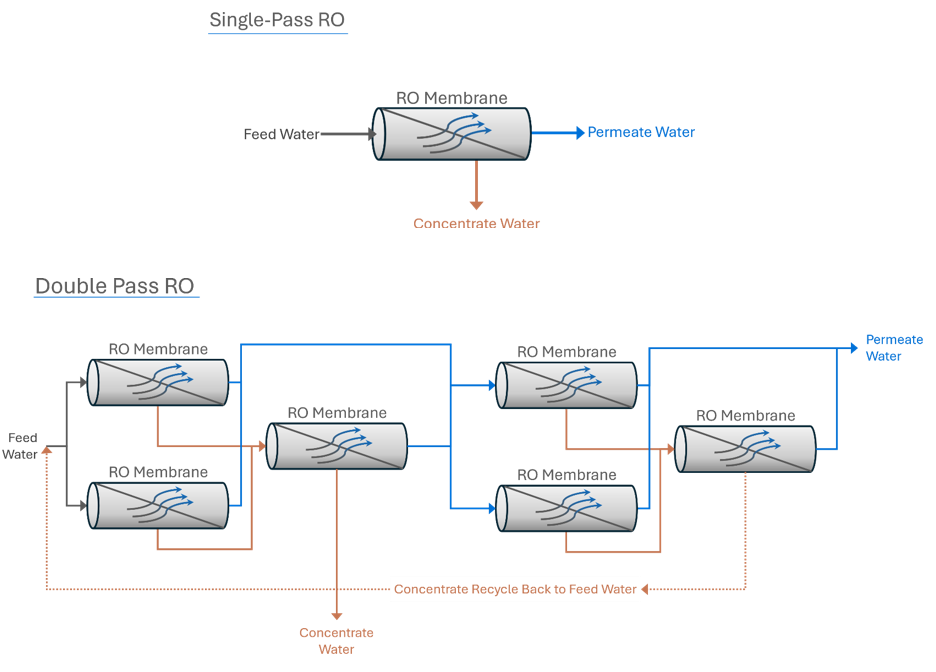
The membrane is the heart of your system. If it is failing, you will see low flow or high TDS (Total Dissolved Solids).
Measure Permeate Flow Rate
- Close the tank valve.
- Open the RO faucet.
- Collect water for 60 seconds.
- Compare to expected output:
| Membrane Size | Expected Flow (oz/min) |
|---|---|
| 50 GPD | 3.0 – 4.0 |
| 75 GPD | 4.5 – 6.0 |
| 100 GPD | 8.0 – 9.0 |
Low permeate + low drain flow? Check feed pressure or clogged pre-filters.
Zero permeate, normal drain flow? Membrane is fouled or scaled, so replace it.
High drain flow, zero permeate? Flow restrictor is missing or wrong size.
💡 Tip: Remove pre-filters temporarily. If flow improves, replace them.
Use a TDS Meter to Test Quality
Test tap water and RO water:
– Rejection rate = (Tap TDS – RO TDS) / Tap TDS × 100
– Healthy membrane: 90–98% rejection
Sudden TDS spike? Likely chlorine damaged the membrane. Replace both the carbon pre-filter and membrane.
High TDS on new membrane? Flush 1–2 full tanks to remove glycerin preservative.
Replace membranes every 2–5 years, depending on water hardness and usage.
Inspect Pre-Filters and Post-Filters
Clogged or expired filters are silent killers of RO performance.
Identify Each Filter’s Role
- Sediment filter (white): Stops sand and grit. Replace every 6–12 months.
- Carbon pre-filter (carbon block): Removes chlorine. Critical, since chlorine destroys membranes.
- Post-carbon filter: Polishes taste. Replace every 6–12 months.
- Remineralization filter: Adds calcium and magnesium. Replace every 6–12 months.
Spot Failure Signs
- Low flow? Clogged sediment filter.
- Chlorine taste? Exhausted carbon pre-filter. Replace immediately.
- Bad taste or odor? Replace post-filter or sanitize system.
🧼 Pro Tip: Sanitize your RO system annually to prevent bacterial growth and biofilm.
Verify Feed Water Pressure
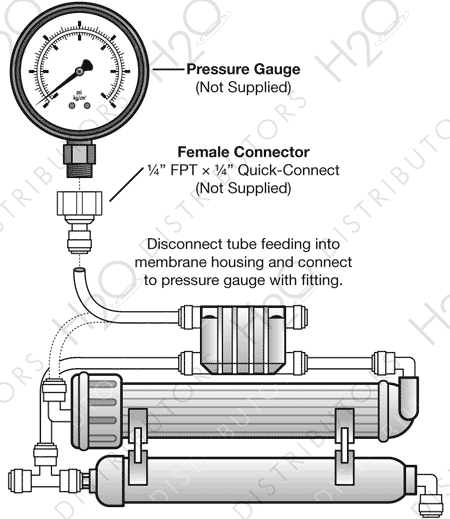
Your RO system needs at least 40 PSI to work. Below that, production plummets.
Test Supply Pressure
- Attach a pressure gauge to a cold water line or fridge line.
- Run water briefly, then shut off.
- Read static pressure.
Results:
– Below 40 PSI: Install a booster pump.
– 40–80 PSI: Ideal range.
– Above 80 PSI: Consider a pressure-reducing valve to protect fittings.
Low pressure from municipal supply or well systems is a common fixable issue.
Fix Leaks at Fittings and Housings
Leaks are not always major. Often, it is a simple tubing issue.
Stop Push-Fit Leaks
Most leaks happen at quick-connect fittings. Causes include:
– Tubing not fully inserted (needs about 1 inch depth)
– Angled or rough cut – use a proper tubing cutter
– Scratched tubing – cut off damaged end
– Dry or worn O-ring – lubricate with silicone grease only
❌ Never use petroleum jelly. It degrades rubber seals.
Check Filter Housings
Leaking filter canisters? Follow these steps:
1. Turn off water and relieve pressure.
2. Unscrew housing.
3. Inspect O-ring: Is it missing, cracked, or misaligned?
4. Clean and lubricate with food-grade silicone.
5. Reinstall firmly but do not overtighten.
Cracked housings require replacement.
Troubleshoot Noisy Operation
Loud gurgling or whining is not normal, and it is usually fixable.
Silence Drain Line Gurgling
This is caused by water pooling in kinked or poorly routed drain tubing:
– Use black drain line only (not clear tubing).
– Keep run short, straight, and sloped downward.
– Install drain saddle on vertical section of P-trap, not horizontal.
– Avoid loops or sags where air gets trapped.
Reduce Pump Noise
If you have a booster pump:
– Ensure mounting screws are tight.
– Check for air in the line (burp system by opening faucet).
– Confirm feed pressure is not too low (causes cavitation).
Validate Installation Errors
Even small mistakes during filter changes cause big problems.
Recheck Tubing Connections
After maintenance:
– Are all tubes in the right ports?
– Is the permeate line (from membrane to tank) connected correctly?
– Is the drain line secure and kink-free?
A misplaced tube can bypass the entire filtration process.
Ensure Membrane Is Fully Seated
A shallow-inserted membrane causes leaks and poor performance:
1. Pull membrane out and inspect O-ring.
2. Lubricate with silicone.
3. Push back in firmly until it stops.
4. Use a coin to nudge it if needed.
Decode Bad Taste or Odor
If your RO water tastes off, do not ignore it.
Common Causes
- Carbon filter expired? Replace every 6–12 months.
- Bacterial growth? Sanitize system with hydrogen peroxide.
- Remineralization over-dosing? Check for white scale; adjust or replace cartridge.
- Hydrogen sulfide (rotten egg smell)? Common in well water; requires pre-treatment like aeration.
🚫 Standard RO systems cannot remove dissolved gases like methane or H₂S effectively.
Follow Annual Maintenance Plan
Prevent failures before they happen.
Recommended Schedule
| Task | Frequency | Tools Needed |
|---|---|---|
| Replace pre-filters | Every 6–12 mo | Wrench, new filters |
| Replace post-filter | Every 6–12 mo | — |
| Replace membrane | Every 2–5 yrs | TDS meter, new membrane |
| Sanitize system | Annually | 3% H₂O₂, bucket |
| Check tank pressure | Annually | Tire gauge, pump |
| Inspect for leaks | Quarterly | Flashlight, towel |
Keep a log. Set calendar reminders. A well-maintained RO system lasts 10+ years.
When to Call a Pro
Most issues are DIY-friendly, but seek help if:
– You have well water with sulfur or iron (needs pre-treatment).
– Drain line connects to a horizontal sewer main (risk of backflow).
– Multiple components fail repeatedly (possible design flaw).
– You are uncomfortable working with plumbing.
Frequently Asked Questions About Reverse Osmosis System Not Working
Why is my reverse osmosis system not working after a filter change?
Airlocks are the most common cause. Disconnect the tank line, open the faucet, and let water run for 1–2 minutes to bleed trapped air. Reinstalling filters in reverse order (post-filter first, then membrane, then pre-filters) also helps release air.
How do I know if my RO storage tank is bad?
Lift the tank. A full residential tank weighs about 20 pounds. If it feels heavy but delivers only a trickle, the air bladder is likely ruptured or waterlogged. Drain the tank, press the Schrader valve, and check for water spray. Water means the bladder is ruptured and the tank needs replacement.
What causes an RO system to drain water continuously?
A failed Automatic Shut-Off (ASO) valve is the usual culprit. When the tank reaches 35–40 PSI, the ASO should stop water production. If drain flow continues with the tank full and the tank valve closed, replace the ASO valve immediately.
How often should I replace RO filters?
Sediment, carbon, and post-carbon filters need replacement every 6–12 months. The RO membrane lasts 2–5 years depending on water hardness and usage. Remineralization cartridges also need replacement every 6–12 months.
Can chlorine damage my RO membrane?
Yes. Chlorine oxidizes and destroys thin-film composite membranes. If you detect chlorine taste or smell, replace the carbon pre-filter immediately. A sudden TDS spike often signals chlorine breakthrough and membrane damage.
What is the minimum water pressure for an RO system?
Your RO system needs at least 40 PSI to function properly. Below this threshold, production drops sharply. If your supply pressure is lower, install a booster pump to restore performance.
Key Takeaways for Fixing Your Reverse Osmosis System
Start with tank pressure and the ASO valve, since these account for most failures. A tire pressure gauge and a TDS meter are your best diagnostic tools. Keep filters on a strict replacement schedule, and sanitize the system annually to prevent bacterial growth.
A reverse osmosis system not working is usually a simple fix you can handle yourself. Grab your pressure gauge, run through this checklist, and you will have clean, fresh water flowing again in under an hour.