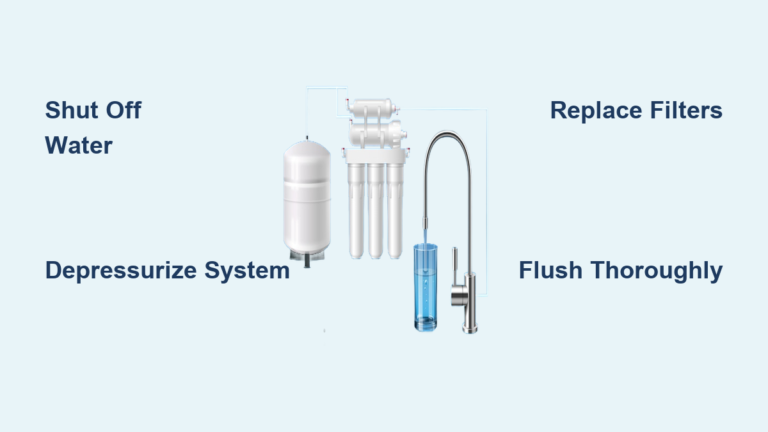
How to Use a Water Purifier
If your tap water tastes off, leaves scale, or you’re worried about contaminants, a water purifier can change your daily routine. But knowing how to use a water purifier correctly matters just as much as owning one. Improper setup or skipped maintenance can lead to leaks, bacterial growth, or poor filtration. Millions of households rely on purifiers, yet many overlook critical steps like priming filters, testing water, or replacing cartridges on time. This guide walks you through every stage, from choosing the right system to long-term care. You’ll learn how to install, operate, and maintain your purifier safely while avoiding common mistakes.
Choose the Right Purifier Type
Match System to Water Quality
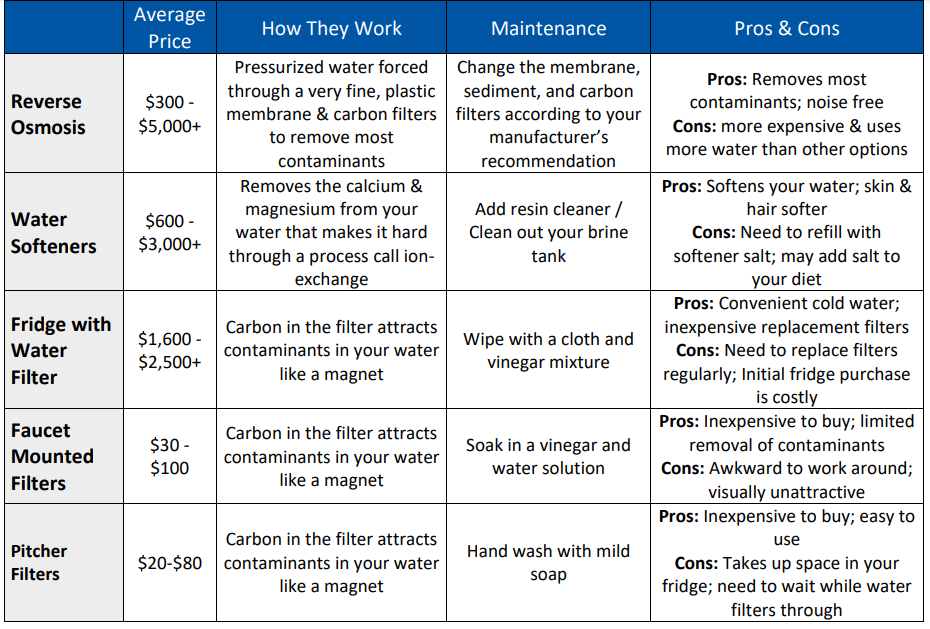
Your water source determines which purifier works best. Municipal water often contains chlorine and lead from aging pipes, while well water may carry bacteria, iron, or nitrates. Always test your water first for TDS, hardness, chlorine, lead, and bacteria. A carbon filter removes chlorine but won’t stop hard water scale. For scale prevention, you need an ion exchange softener, not just filtration.
Know Your Purification Technology
Different systems target different contaminants:
– Activated carbon removes chlorine, VOCs, and improves taste.
– Reverse osmosis (RO) removes up to 99.9% of dissolved solids, heavy metals, and fluoride.
– UV purification kills bacteria and viruses but doesn’t remove chemicals.
– Ion exchange softens water by replacing calcium and magnesium with sodium.
– Mechanical filters trap sediment and rust, rated in microns.
Using the wrong technology leads to ineffective purification. Always match the system to your water test results and manufacturer specifications.
Install Your Water Purifier Correctly
Set Up Countertop or Dispenser Units
Assemble Housing Securely
Clip the main housing sections together and fasten tightly. If your model includes a separate support clip for the top section, bond it using 4-minute epoxy adhesive. Let it cure for 10 minutes before use. A loose housing causes leaks and reduces filtration efficiency.
Prepare the Filter Cartridge
Soak the new filter in clean water for 30 minutes, then rinse under running water to remove loose carbon particles. Insert it fully into the housing. Partial seating allows water to bypass the filter, reducing effectiveness.
Prime the System
Place the top section under the housing and secure with the clip. Open the outlet valve slightly and fill the tank (up to 20 liters). Expect a slow drip at first. This flushes air from the filter. Cover the top to prevent splashing. Once full, close the valve and your unit is ready.
Install Chemical Purification for Emergency Use
Use Powder for Safe Emergency Water
When clean water isn’t available, chemical purification offers a reliable backup method.
Follow Exact Dosage Steps
For 10 liters of water, add one 10-gram sachet (e.g., P&G Purifier). Too little won’t kill pathogens; too much risks chemical exposure. Stir vigorously for 5 minutes to mix coagulants that bind contaminants.
Let It Settle and Filter
Wait 30 minutes for flocs (clumps) to form and sink. Pour the clear top layer through a clean cotton cloth to remove remaining particles. This removes 99.9% of bacteria and protozoa but not viruses or chemicals. Combine with boiling or UV treatment in high-risk areas for full safety.
Install Whole-House Systems
Connect Smart Monitor and Shut-Off
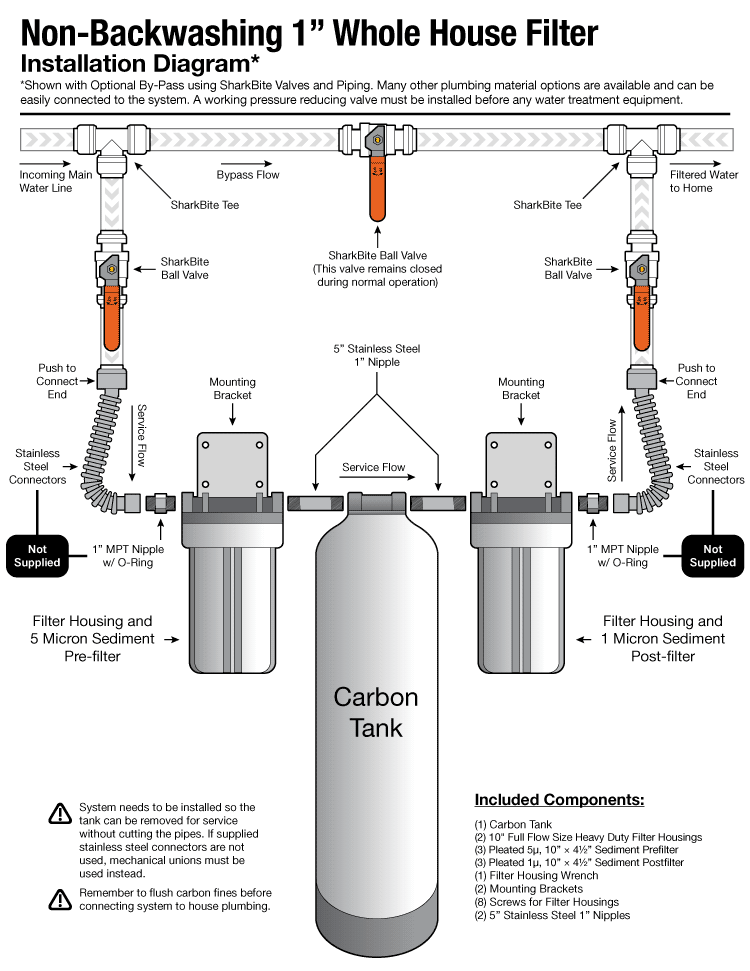
Install on the main water line using 3/4-inch PEX tubing and Sharkbite fittings. Wrap threaded connections with Teflon tape clockwise to prevent leaks. This device tracks usage and shuts off water during bursts, critical for flood prevention.
Mount Sediment Pre-Filter
Use a 500-micron filter to catch sand and rust. Mount on a plywood wall panel for stability. Flow direction runs left to right. Install bypass valves so you can service the unit without shutting off house water. Replace every 6–12 months, depending on water clarity.
Install Water Softener
Mount the softener on the wall and connect the brine tank with black tubing. Run a clear drain tube to the floor drain. Fill the tank with 40-pound salt pellets (approximately 4 bags). Set regeneration every 14 days or after 3,926 gallons via the app. After installation, clean faucets and showerheads with vinegar to remove existing scale.
Set Up UV Purifier
Mount with space above for bulb replacement. Insert the UV sleeve, then the bulb. Wear gloves to avoid skin oil, which shortens bulb life. Connect power and confirm the display shows active status. Replace the bulb every 12 months, even if it still lights.
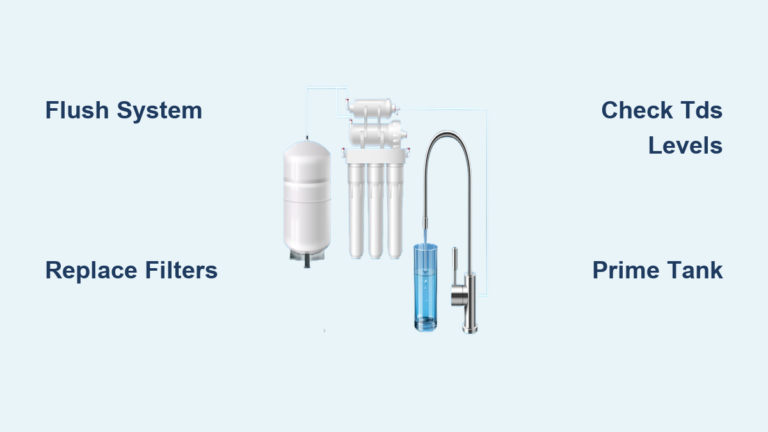
Install Under-Sink RO System
Shut off water and install a T-fitting to split the line. Mount the RO tank on a stand. Connect the drain line by drilling a hole in the sink pipe and clamping securely. Attach 1/4-inch tubing to each filter. Cartridges fit only one way. Label filters with install dates: pre-filter (6–12 mo), carbon block (12 mo), RO membrane (2–3 years).
Mount RO Faucet and Fridge Line
Drill a hole for the faucet or use an existing soap dispenser hole. Feed the tubes through, secure the base, and connect the gray tube to the faucet. For the refrigerator, use a T-fitting with a shut-off valve and run 1/4-inch tubing with a fridge kit. Expect a slight pressure drop. This is normal and safe for most fridges.
Flush the RO System
Fill the tank, then run the faucet for 10–15 minutes to flush manufacturing residues. Repeat once more before drinking. Skipping this step risks consuming loose carbon or membrane protectants.
Operate Your Purifier Safely
Understand Indicator Lights and Alerts
Many systems use lights to signal status:
– Green: Normal operation.
– Yellow: Filter due for replacement soon.
– Red: Immediate service needed or system failure.
Smart monitors send phone alerts for leaks, low filter life, or high usage. Check the app weekly to stay ahead of maintenance.
Monitor Flow Rate and Pressure
Slow flow often means air in the system or a clogged pre-filter. During initial use, slightly open the valve to help flush air. If flow remains slow, replace the sediment filter. High flow reduces contact time in UV and carbon systems, lowering effectiveness. Ensure your system is sized for household demand.
Avoid Bypassing Critical Stages
Never skip pre-filters in RO systems. They protect the expensive membrane from clogging. Similarly, UV systems require pre-filtration. Turbid water blocks UV light, rendering disinfection useless. Always follow the pre-filter → carbon → RO/UV sequence.
Maintain Your System Regularly
Follow Filter Replacement Schedule
Sticking to a replacement schedule prevents contamination and system damage:
– Sediment filters: Every 6–12 months
– Carbon block: Every 12 months
– RO membrane: Every 2–3 years
– UV bulb: Every 12 months
– Softener salt: Refill every 2–3 months
Write install dates on filters with a permanent marker. Use OEM or certified replacement parts. Aftermarket filters may not perform as tested.
Clean and Sanitize Components
Wipe down housings and faucets monthly. Sanitize the storage tank and dispenser every 3–6 months to prevent biofilm. Mix 1 tablespoon of bleach per gallon of water, circulate through the system, then flush thoroughly with clean water.
Descale Fixtures After Softener Install
Even with a softener, existing scale remains in pipes and fixtures. Soak showerheads and faucet aerators in white vinegar for 1–2 hours to dissolve buildup. This improves flow and prevents recontamination.
Troubleshoot Common Issues

Fix Slow Water Flow
Several factors cause slow flow:
– Air in new RO systems (flush longer)
– Clogged sediment or carbon filter (replace)
– Closed or partially open valves (check all connections)
If flow is slow only at one faucet, the issue is likely localized, not the purifier.
Eliminate Bad Tastes
Different tastes signal different problems:
– Flat taste: Common in RO water due to removed minerals. Add a remineralization cartridge.
– Chlorine taste: Carbon filter is saturated. Replace immediately.
– Salty taste: Softener malfunction or overuse of salt. Check brine tank settings.
Stop Leaks Immediately
Check PEX crimp rings, threaded fittings, and filter housings. Re-tighten with Teflon tape if needed. For persistent leaks, replace O-rings or the housing seal. Smart monitors can detect small leaks before they cause damage.
Know the Limitations
Understand What Each System Can’t Do
- Carbon filters don’t remove dissolved minerals or microbes.
- Sediment filters don’t stop chemicals or viruses.
- Sequestration prevents scale but doesn’t soften water.
- Chemical powders don’t remove viruses or heavy metals.
- Activated alumina works best at specific pH levels and may leach aluminum if not maintained.
Using a filter as a softener leads to appliance damage. Always pair technologies when needed, such as softener + RO + UV for comprehensive protection.
Don’t Confuse Filtration with Softening
Filtration improves taste and removes contaminants. Softening removes calcium and magnesium to prevent scale. A carbon filter won’t stop limescale in your water heater. If you have hard water, you need ion exchange, not just filtration.
Maximize Efficiency and Lifespan
Use Smart Monitoring Features
IoT-enabled systems track water usage, filter life, and purity levels. Set up alerts so you never miss a replacement. Some models even schedule service automatically. The data helps you spot usage spikes or leaks early.
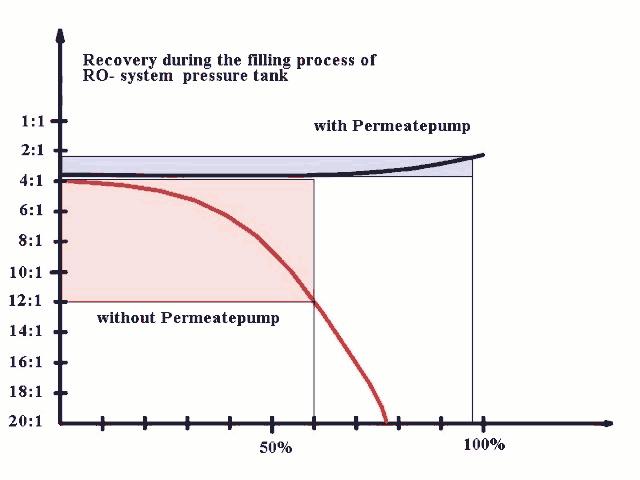
Optimize RO System Performance
RO systems produce wastewater (brine). To reduce waste:
– Use a permeate pump (cuts waste by 50%)
– Reuse drain water for gardening (if no salt or chemicals)
– Install a closed-loop system (advanced setups)
Ensure inlet pressure is at least 40 psi. Low pressure reduces RO efficiency.
Protect Appliances and Improve Taste
Filtered water extends the life of coffee makers, ice machines, and washing machines by preventing scale. For coffee, use a balanced filter that retains some minerals for flavor while removing chlorine. Commercial kitchens rely on this to protect combi ovens and ensure consistent taste.
Frequently Asked Questions About Water Purifiers
How often should I replace filters in my water purifier?
Replacement schedules vary by filter type. Sediment and pre-filters need replacement every 6–12 months. Carbon block filters last about 12 months. RO membranes work for 2–3 years, and UV bulbs need annual replacement. Always check your manufacturer’s guidelines and write install dates on each cartridge.
Can a water purifier remove viruses?
Standard carbon and sediment filters cannot remove viruses. You need UV purification, reverse osmosis, or distillation to eliminate viral contaminants. Chemical powder methods remove bacteria and protozoa but not viruses. For comprehensive protection, combine multiple technologies.
What’s the difference between a water filter and a water softener?
A water filter removes contaminants like chlorine, sediment, and chemicals to improve taste and safety. A water softener uses ion exchange to replace calcium and magnesium with sodium or potassium, preventing scale buildup. Filters don’t soften water, and softeners don’t filter contaminants. You may need both if you have hard water with quality issues.
Why does my RO water taste flat?
RO systems remove dissolved minerals along with contaminants, which can create a flat taste. Adding a remineralization cartridge reintroduces calcium and magnesium, improving flavor and providing some nutritional value. This is a common and easy fix for RO users.
Is it safe to drink water from a purifier without boiling it?
Yes, when your purifier is properly installed and maintained. RO, UV, and carbon systems are designed to produce safe drinking water directly from the tap. However, if your system fails, shows warning lights, or hasn’t been serviced on schedule, boil the water as a precaution until you resolve the issue.
How do I know if my water purifier is working properly?
Check indicator lights or smart app alerts regularly. Monitor flow rate and taste. If flow slows significantly or water develops an unusual taste or odor, inspect filters and connections. Smart monitors with leak detection add an extra layer of confidence by tracking usage and system status in real time.
Key Takeaways for Using Your Water Purifier Effectively
Mastering how to use a water purifier starts with testing your water and choosing the right technology. Proper installation, whether for a simple dispenser or a whole-house system, prevents leaks and ensures effective filtration. Regular maintenance, including timely filter replacement and sanitization, keeps your water safe and your system running efficiently. Understanding each system’s limitations helps you avoid common mistakes, like expecting a carbon filter to soften hard water. Test your water today, follow the replacement schedule, and check your system monthly to enjoy clean, safe water for years to come.