
Fix Reverse Osmosis Water Filter Issues
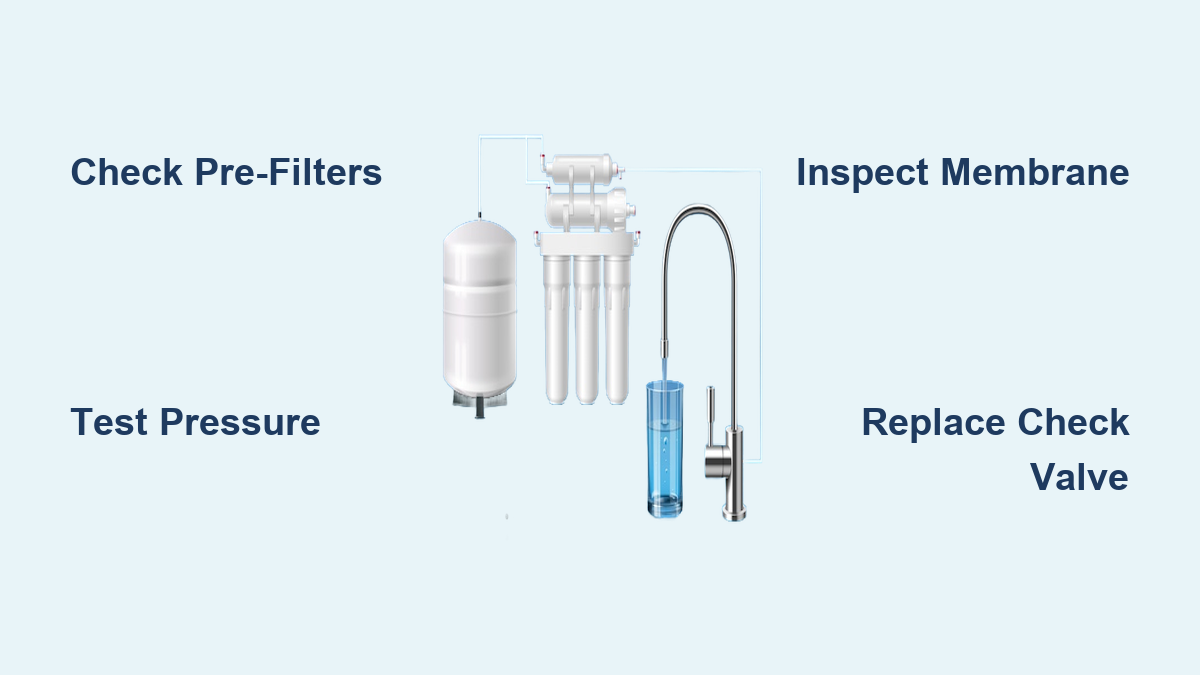
Reverse osmosis water filter repair becomes urgent when your under-sink system stops delivering clean water on demand. A struggling RO unit might produce a weak trickle, take hours to fill the tank, or dispense water with an odd taste. These symptoms don’t automatically mean you need a new system. Most failures trace back to a handful of replaceable parts and predictable wear patterns. This guide walks you through the diagnostic steps, repair procedures, and maintenance habits that keep your RO system running smoothly.
The heart of any reverse osmosis system is a semi-permeable membrane that strips out contaminants larger than water molecules. But that membrane depends on clean pre-filters, steady inlet pressure, and functioning valves to do its job. When one link in the chain breaks, the whole process stalls. Independent repair data from Los Angeles shows that more than 80% of service calls stem from neglected filters or single-component failures. With systematic checks and timely replacements, you can avoid most emergencies and restore purified water within a single afternoon.
Diagnose No Water or Slow Tank Fill
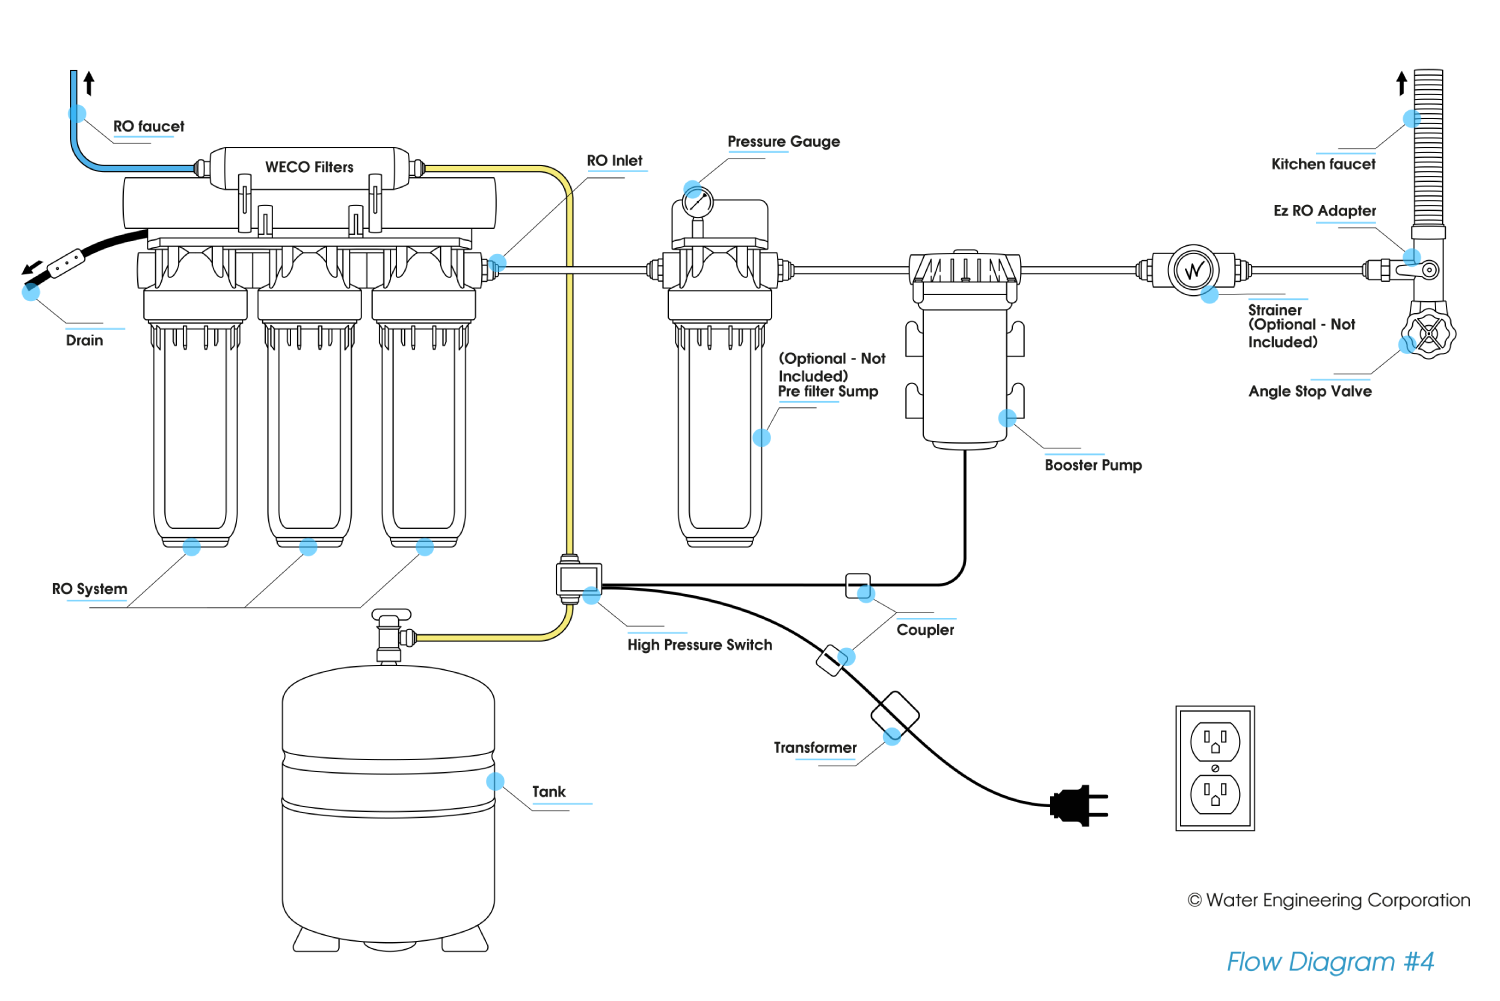
When your RO faucet barely dribbles or the storage tank refuses to fill, the first task is locating the blockage. Tank filling problems rank as the most frequent reverse osmosis water filter issue, and they usually point to a specific component.
Check Pre-filters for Clogs
Sediment and carbon pre-filters catch dirt, rust, and chlorine before water reaches the membrane. Over months of use, these filters saturate and choke off incoming flow.
Warning signs include:
– Brown or black discoloration inside the filter housing
– Visible debris packed into the filter media
– Noticeably reduced pressure at the faucet
Inspection and replacement steps:
1. Shut off the water supply valve feeding the RO system.
2. Open the RO faucet to release internal pressure.
3. Loosen the filter housing with an adjustable wrench.
4. Pull out the old filter and examine it for clogging.
5. Drop in a matching sediment or carbon block filter.
6. Reinstall the housing and hand-tighten only.
Replace pre-filters every 6–12 months based on your water quality. Skipping this step forces the membrane to work harder and shortens its lifespan.
Test Inlet Water Pressure
Insufficient incoming pressure starves the system of the force needed to push water through the membrane. Reverse osmosis units require a minimum of 40 PSI to operate properly.
How to check:
– Attach a pressure gauge to the feed water line before the first filter.
– Restore the water supply and read the gauge.
If pressure falls below 40 PSI:
– Confirm the main shutoff valve is fully open.
– Inspect supply lines for kinks or closed intermediate valves.
– Consider adding a booster pump if municipal pressure runs chronically low.
Low pressure slows production and causes the membrane to foul faster because water cannot flush contaminants away efficiently.
Inspect the RO Membrane

The membrane does the heavy lifting in any reverse osmosis water filter repair scenario. If pre-filters look clean and pressure checks out, but the tank still won’t fill, the membrane itself may be scaled or degraded.
Symptoms of membrane failure:
– Salty or off-tasting water
– Rising TDS (total dissolved solids) readings
– Very slow production even after fresh filter installation
Replacement procedure:
1. Shut off water and drain the system completely.
2. Disconnect tubing from the membrane housing.
3. Slide out the old membrane cartridge.
4. Insert a new membrane with lubricated O-rings.
5. Reconnect lines and flush the system for 10–15 minutes.
Plan to replace membranes every 2–3 years, or sooner in hard water regions.
Fix Low Water Output at the Faucet
A full tank doesn’t guarantee good flow at the tap. Low output at the faucet signals a separate set of issues that deserve attention.
Purge Air Locks from the Lines
Trapped air after filter changes or repairs creates blockages that mimic serious failures.
Clearing procedure:
1. Open the RO faucet fully.
2. Let it run for 3–5 minutes.
3. Sputtering and air bursts are normal during this phase.
4. Close the faucet once water flows steadily.
Repeat this purge after any maintenance session. Skipping it leads to misdiagnoses and unnecessary part swaps.
Verify Check Valve Function
The check valve stops backflow from the storage tank into the drain line. When it fails, pressure escapes and the tank never reaches full capacity.
Leak test:
– Run the system briefly, then shut off the water supply.
– Disconnect the tube after the membrane, before the tank.
– If water continues to drip, the check valve is compromised.
Replacement steps:
1. Turn off water and relieve pressure.
2. Cut the tubing with a tubing cutter for a clean edge.
3. Remove the old valve and install a new inline replacement.
4. Secure connections with push-fit or compression fittings.
A faulty check valve produces symptoms identical to membrane failure. Test it before spending on a new membrane.
Troubleshoot Drain Line Problems
A drain line that runs constantly wastes water and prevents the tank from pressurizing. This usually points to a flow restrictor issue or a physical blockage.
Identify Drain Line Blockages
Although uncommon, a collapsed or kinked drain line disrupts wastewater flow and throws the system out of balance.
Inspection checklist:
– Trace the drain line from the RO unit to the sink tailpiece.
– Look for sharp bends, pinches, or compression points under the cabinet.
– Confirm the air gap fitting (if installed) is not clogged.
Clear obstructions gently. Never blow into the drain line, as this can damage internal components.
Confirm Flow Restrictor Integrity
The flow restrictor balances drain water against purified water. When it fails, excessive water flows to drain and the tank fills slowly or not at all.
Symptoms of a bad restrictor:
– Loud hissing from the drain line
– Wastewater ratios exceeding 4 gallons per gallon of purified water
– Poor tank fill rate despite clean filters
Replacement guidance:
– Locate the restrictor, typically a small colored insert in the drain line.
– Match the exact GPD rating (such as 150 or 200 gallons per day).
– Install in the correct flow direction, following the arrow marking.
This small part carries outsized importance. Don’t overlook it during diagnostics.
Replace the Storage Tank When Necessary
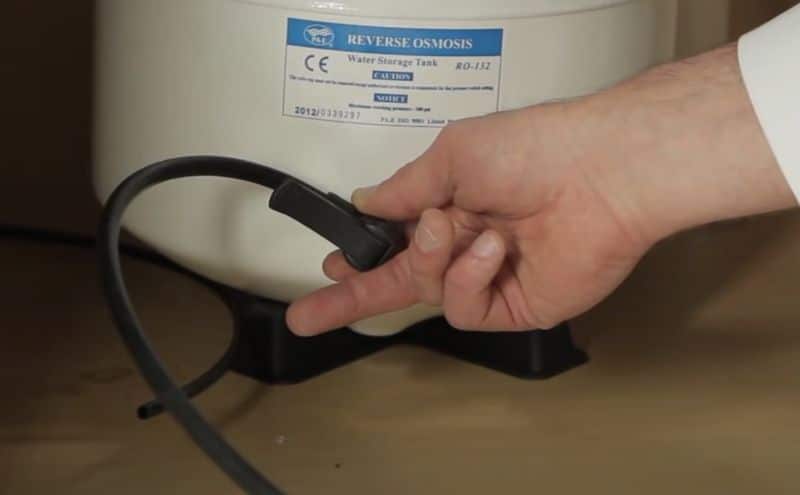
Even with perfect pressure and clean filters, a failing storage tank cannot hold water or maintain delivery pressure.
Test Tank Air Pressure
The tank uses a pressurized air bladder to push water out on demand. Over time, the bladder can rupture or lose air charge.
Testing procedure:
1. Shut off water and drain the tank fully.
2. Locate the air valve on top of the tank (similar to a bike tire valve).
3. Press a pressure gauge onto the valve.
4. Target reading: 7–8 PSI when empty.
If pressure reads low:
– Add air with a bike pump or small compressor (never exceed 10 PSI).
– Recheck after 24 hours. A drop confirms bladder failure.
Know When Replacement Is the Only Option
Replace the tank if you notice:
– Full fill but only a few cups dispensed
– Sloshing sounds (water in the air chamber)
– Air pressure that won’t hold steady
A bad tank mimics low production. Always test it before replacing filters or the membrane.
Follow a Step-by-Step Repair Protocol
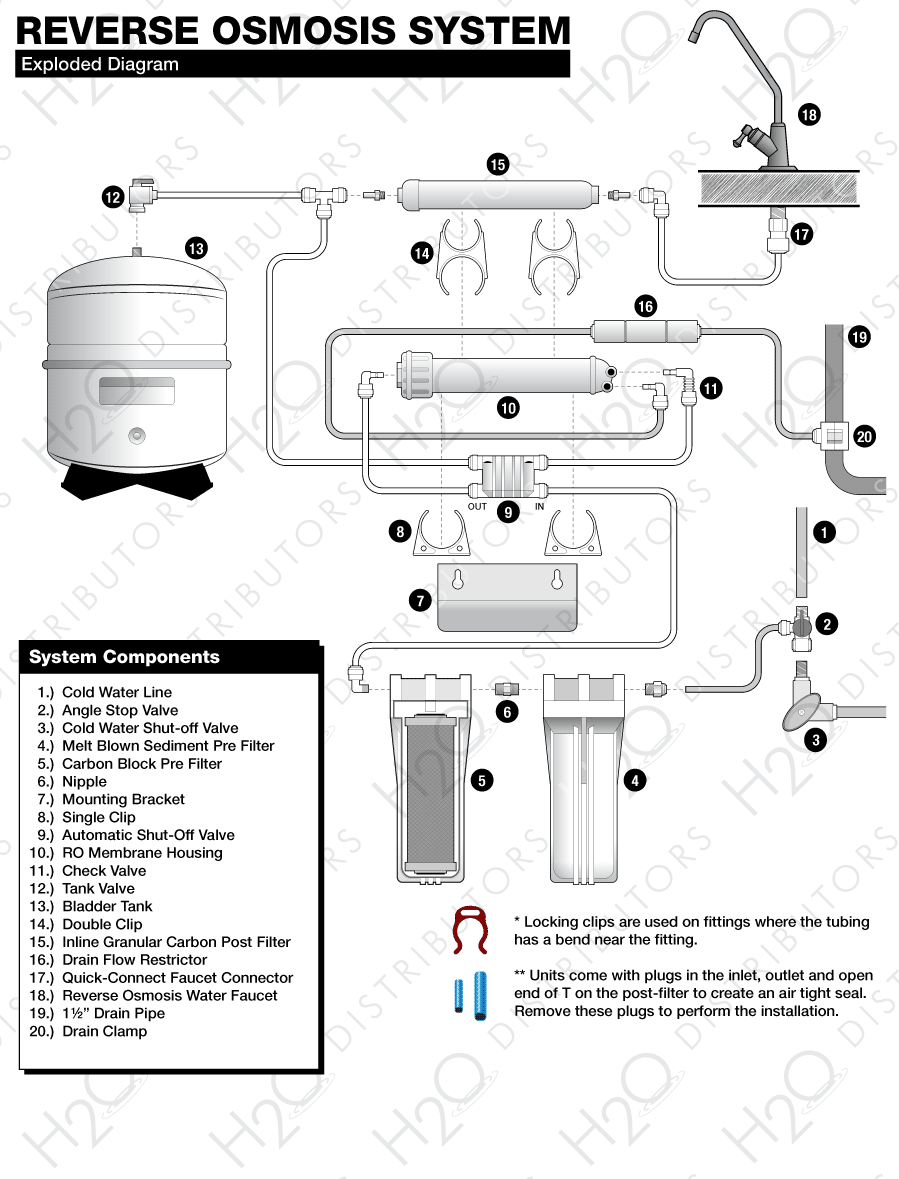
Reverse osmosis water filter repair works best when you follow a consistent sequence. This prevents missed steps and recurring issues.
Gather Required Tools
Before starting, assemble:
– Adjustable wrench
– Phillips and flathead screwdrivers
– Tubing cutter (recommended)
– Nitrile gloves
– Replacement parts (pre-filters, membrane, check valve)
– Pressure gauge for advanced diagnostics
Having everything ready avoids mid-repair trips to the hardware store.
Execute the Repair Sequence
- Shut off the water supply at the dedicated feed valve.
- Relieve pressure by opening the RO faucet.
- Drain the tank through the faucet or purge valve.
- Replace pre-filters (sediment and carbon stages).
- Remove and test the membrane, replacing if degraded.
- Inspect the check valve and swap it if leaking.
- Flush the system for 10–15 minutes after reassembly.
- Restore water supply and check all connections for leaks.
- Monitor tank fill time (target: 2–4 hours).
- Test flow and taste at the faucet.
First-time repairs typically take 60–90 minutes. Experienced users finish in about 30.
Avoid Common Repair Mistakes
Small errors during repair create bigger problems later. Keep these pitfalls in mind.
Don’t Overtighten Filter Housings
Hand-tighten only. Excessive force cracks housings and damages O-rings, causing leaks. If a filter leaks after installation, inspect the O-ring for nicks rather than cranking the housing tighter.
Never Mix Up Tubing Connections
RO systems rely on color-coded or labeled tubing. Match each line carefully:
– Blue: Product water to the tank
– Red or white: Drain line
– Clear: Feed water
Double-check every connection before restoring pressure.
Always Flush After Maintenance
New carbon filters release fine particles that discolor water and affect taste. Flush for at least 10 minutes after any filter change to clear debris from the system.
Choose Professional Repair Wisely
Some situations call for expert help, especially persistent leaks, booster pump issues, or complex installations.
Look for Transparent Service Providers
Top-rated RO repair companies in Los Angeles share common traits worth seeking out:
– Clear explanations of the problem
– Demonstrations using old versus new parts
– Warranty coverage (90-day terms are standard)
– Fast response times (same or next day)
Avoid providers who push full system replacements without testing individual components.
Compare Costs and Warranties
Independent services typically charge 30–50% less than original installers like Culligan. Most offer free diagnostics, flat-rate pricing, and flexible payment options. Always ask whether the repair includes both labor and parts warranty.
Maintain Your RO System Proactively
Prevention consistently beats repair. A simple maintenance routine extends system life and avoids emergency calls.
Stick to a Filter Replacement Schedule
| Component | Replacement Interval |
|---|---|
| Sediment Filter | Every 6 months |
| Carbon Filter | Every 6–12 months |
| RO Membrane | Every 2–3 years |
| Check Valve | Replace if leaking |
Set calendar reminders. Hard water or high household usage may require more frequent changes.
Schedule Annual Performance Checks
Once each year:
– Test incoming water pressure
– Inspect all connections for leaks
– Flush the storage tank
– Wipe down external components
Catching small issues early prevents major failures down the road.
Frequently Asked Questions About Reverse Osmosis Water Filter Repair
Why is my RO tank not filling even after I changed the filters?
If new filters don’t solve the problem, the membrane may be fouled or the check valve may be leaking. Test inlet pressure first to confirm it meets the 40 PSI minimum, then inspect the check valve for backflow.
How often should I replace the RO membrane?
Most membranes last 2–3 years under normal conditions. Hard water or heavy usage can shorten this window. Replace when TDS readings climb or production slows despite clean pre-filters.
What causes low water pressure at the RO faucet?
Common culprits include clogged pre-filters, air locks in the lines, a failing membrane, or a storage tank that has lost its air charge. Work through the diagnostic sequence to isolate the cause.
Can I repair a reverse osmosis system myself?
Yes, most repairs involve swapping filters, the membrane, or the check valve using basic tools. Complex issues like booster pump failures or persistent leaks may require a professional technician.
How do I know if my storage tank is bad?
Drain the tank fully and check air pressure at the valve. A reading below 7 PSI that keeps dropping indicates a ruptured bladder. Sloshing sounds or very short dispensing cycles also point to tank failure.
Is it worth repairing an older RO system?
In most cases, yes. Replacing filters, the membrane, or the tank costs far less than installing a new system. Systems under 10 years old typically respond well to targeted repairs.
Key Takeaways for Successful Reverse Osmosis Repair
Reverse osmosis water filter repair is a manageable task once you understand the system’s core components. Start every diagnosis with the pre-filters, verify inlet pressure, then work through the membrane, check valve, and storage tank. Keep replacement parts on hand and follow a consistent repair sequence to avoid missed steps. Above all, schedule routine maintenance every 6–12 months to prevent the clogs and pressure issues that cause most failures. With the right approach, your RO system can deliver clean, reliable water for well over a decade.


