Fix Reverse Osmosis Tank Not Filling
You turn on your reverse osmosis faucet expecting clean water, but only a weak trickle comes out. The tank should be full, yet it isn’t. This is one of the most common complaints with RO systems, and while frustrating, the fix is often simple and inexpensive.
When a reverse osmosis tank not filling is the problem, the cause usually traces back to one of five issues: incorrect tank pressure, clogged filters or membrane, a failed flow restrictor, low incoming water pressure, or a basic oversight like a closed valve. Rarely does the entire system need replacement. More often, one small component disrupts the whole process.
This guide walks you through diagnosing and fixing every possible cause. You’ll learn how to check air pressure, test production rates, and replace key parts. By the end, you’ll know how to restore full flow and prevent future breakdowns with proper maintenance.
Check Tank Valve Position
Before diving into complex diagnostics, confirm the most overlooked cause: the storage tank valve is closed.
Is the Valve Open?
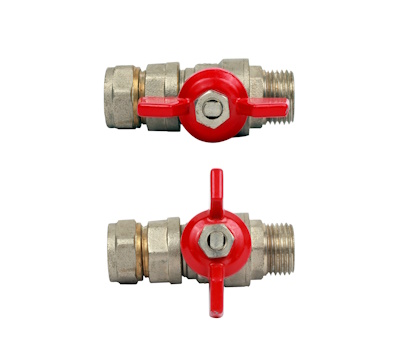
The red-handled ball valve on top of the RO tank must be open for water to enter. When the handle sits parallel to the pipe, water flows freely. If it sits perpendicular, the tank is isolated and cannot fill, even if the rest of the system works perfectly.
- Visual cue: A red handle turned sideways means closed.
- Common mistake: After filter changes or tank replacement, users forget to reopen the valve.
- Fix: Rotate the handle until it aligns with the tubing.
Wait 2–4 hours after opening the valve. If the tank still doesn’t fill, move to the next test.
Test Incoming Water Pressure
Reverse osmosis relies on water pressure to push water through the membrane. Without enough force, filtration cannot occur.
Minimum Pressure Requirement
- Ideal: 60 psi
- Minimum usable: 40 psi
- Above 80 psi: May damage components
If household pressure falls below 40 psi, the system cannot produce water efficiently.
How to Measure Line Pressure
- Use a pressure gauge: Attach it to a nearby faucet or washing machine outlet.
- Check other fixtures: Are showers and sinks slow? If yes, low pressure affects the whole house.
- Isolate the issue:
– If only the RO system is affected, the problem is internal (kink, clog).
– If all fixtures are slow, check the main supply or install a booster pump.
Pro Tip: Cold water lines feed RO systems. Never connect to hot water, as it can warp the membrane.
Inspect for Kinked or Pinched Tubing
Even a slight bend in the tubing can block water flow completely.
Where to Look
- Behind the sink cabinet where the unit slides in and out
- Near the drain saddle or feed connection
- Around tight corners or clamps
What to Do
- Gently trace all lines from the shutoff valve to the tank.
- Straighten any loops or sharp bends.
- Replace cracked or collapsed tubing (standard size: 1/4″ poly tubing).
A kink often happens during reinstallation after cleaning or filter changes, especially in tight spaces.
Diagnose Storage Tank Pressure

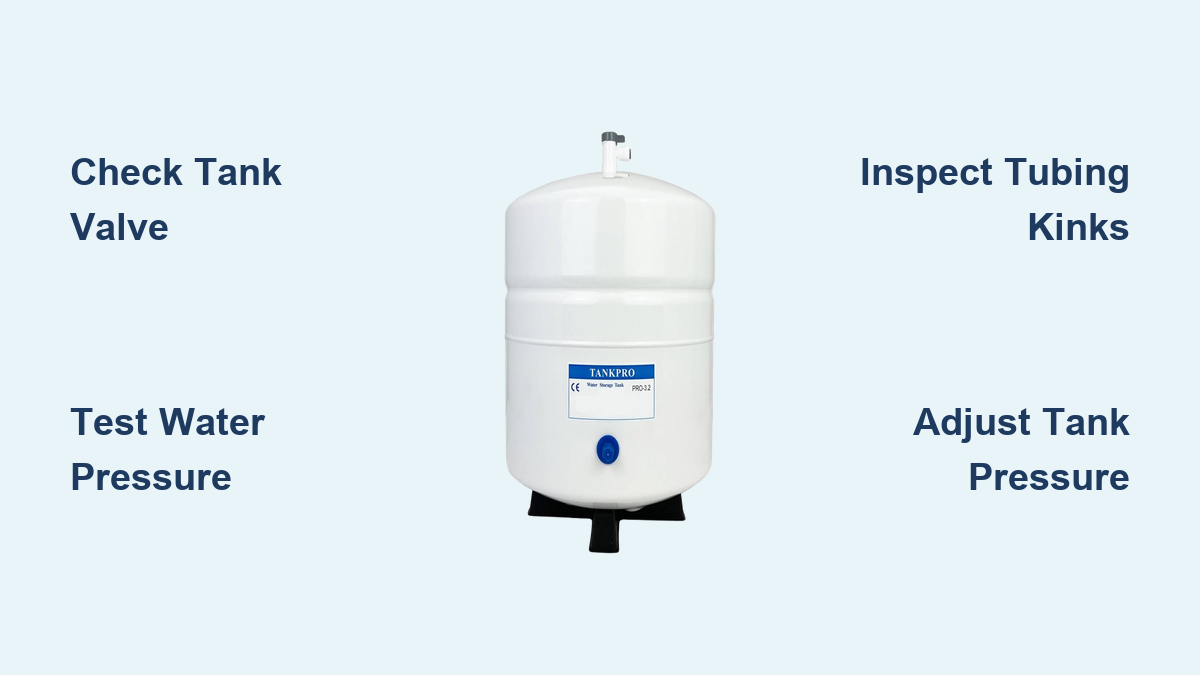
An under- or over-pressurized tank is a leading cause of a reverse osmosis tank not filling.
Normal Air Pressure Range
- Empty tank: 5–8 psi (target 7 psi)
- Full tank: Up to 12 psi
Too much air pressure fights incoming water. Too little means no push for dispensing.
How to Check Tank Pressure
- Turn off water supply to the RO system.
- Open RO faucet and drain all water.
- Close tank valve, disconnect the water line.
- Use a tire pressure gauge on the Schrader valve (under the blue cap).
- Read pressure:
– Below 5 psi? Add air.
– Above 8 psi? Release air slowly.
Adjusting Tank Pressure
- Add air: Use a bicycle pump or small compressor. Pump in short bursts.
- Release air: Press the center pin on the valve with a small tool.
- Reconnect and reopen valves. Allow 2–4 hours to refill.
⚠️ Warning: Never exceed 10 psi when empty. Over-pressurizing can rupture the bladder.
Detect a Ruptured Bladder
A failed internal bladder mimics other problems but has a telltale symptom.
Classic Sign: “One Cup Then Nothing”
You get about one cup of water at pressure, then the flow drops to a dribble, even though the tank feels heavy.
Why? Water fills the chamber, but without air pressure, it cannot be pushed out.
Confirm Bladder Failure
- Disconnect the tank from the system.
- Press the air valve (Schrader valve).
- If water sprays out, the bladder is ruptured.
There is no repair, only replacement. Standard tanks last 7–10 years.
Replacement Tips
- Match gallon capacity (most hold 2.8–3.2 gallons of water).
- Pre-pressurize new tank to 7 psi before installation.
- Reuse fittings only if undamaged.
Measure System Production Rate
Not filling means not producing. But how do you know if output is normal?
Calculate Gallons Per Day (GPD)
Use this simple test to see if your system is underperforming.
Step-by-Step Bucket Test
- Close the tank valve.
- Open the RO faucet and let water drain for 5 minutes.
- Collect water for 60 seconds in a measuring cup.
- Record ounces collected.
Use the Formula
Daily Output (gallons) = (Ounces per minute × 1440) ÷ 128
Example: 4 oz/min → (4 × 1440) ÷ 128 = 45 GPD
Compare to your system’s rating:
– 50 GPD system should produce 45–50 GPD
– 100 GPD system fills twice as fast
If output falls below 70% of rated capacity, suspect clogged filters or membrane.
Replace Clogged Filters and Membrane
Old or dirty filters are the top reason for slow or zero production.
Filter Replacement Schedule
| Component | Replace Every | Warning Signs |
|---|---|---|
| Pre-filter (sediment) | 6 months | Cloudy water, reduced flow |
| Carbon block (pre & post) | 6–12 months | Chlorine taste, bad odor |
| RO membrane | 2 years | Very slow fill, low GPD |
| Flow restrictor | With filters | Continuous drain flow |
Why New Filters Can Cause Immediate Clogs
If the tank won’t fill after changing filters, loose carbon particles from a new carbon block may have flushed downstream and blocked the membrane.
Solution: Always pre-rinse carbon filters under running water for 30–60 seconds before installing.
Examine the Flow Restrictor

This tiny part controls system efficiency and is often ignored.
What It Does
The flow restrictor (usually red or black plastic) sits on the drain line. It creates back-pressure so water goes through the membrane instead of straight to waste.
Failure Modes
- Clogged: Reduces flow, causing the tank to fill slowly
- Missing or failed: Water bypasses membrane and runs to drain nonstop
- Wrong size: Mismatched to membrane, resulting in poor performance
Fix It
- Locate the restrictor (on drain line or membrane housing).
- Replace every 6–12 months, or with each filter change.
- Cost: roughly $4. Ensure correct GPD match (e.g., 50 GPD restrictor for 50 GPD system).
✅ Pro Tip: A clogged restrictor can mimic a bad membrane. Always replace it during maintenance.
Test the Automatic Shut-Off (ASO) Valve

The ASO valve stops production when the tank is full. If stuck closed, it blocks water entry.
Is the ASO Working?
- Close the tank valve.
- Turn on water supply.
- Listen: Drain line should run for 1–2 minutes, then stop.
If water keeps draining, the ASO isn’t closing, likely due to:
– Failed diaphragm
– Debris in the valve
– Membrane seal leak
If no water flows at all, the ASO may be stuck shut.
Bypass Test
Temporarily disconnect the ASO valve (if accessible) or replace it. If the system starts producing, the ASO was the culprit.
Replacement cost: $15–$25. Most are universal fit.
Verify Membrane Installation
After replacing the RO membrane, improper seating can stop flow entirely.
Common Errors
- Backward insertion: The end with two O-rings goes in first (feed side).
- Damaged seal: Rubber gasket pinched or cracked.
- Loose housing: Cap not tightened, which causes leaks or bypass.
How to Check
- Shut off water and relieve pressure.
- Remove membrane housing cap.
- Pull out membrane and inspect:
– Direction (check markings or O-ring location)
– Seal integrity (no nicks or flattening) - Reinstall correctly and hand-tighten.
A misaligned membrane can allow water to skip filtration and go straight to the drain.
Address Continuous Drain Flow
If you hear water running to the drain nonstop, the system never shuts off, and the tank won’t fill.
Root Causes
| Cause | How to Diagnose | Solution |
|---|---|---|
| Failed ASO valve | Drain runs even with tank full | Replace ASO valve |
| Missing flow restrictor | No back-pressure | Install correct restrictor |
| Membrane seal leak | Water bypasses membrane | Reseat or replace membrane |
| Cracked housing | Visible leak or drip | Replace housing |
Quick Test
Turn off the tank valve. Wait 5 minutes.
- Drain flow stops → system is working normally.
- Drain keeps flowing → ASO or membrane seal issue.
Fix the root cause. Otherwise, you’re wasting water and damaging the membrane.
Prevent Future Filling Problems
Avoid repeat failures with smart maintenance habits.
Annual Maintenance Checklist
- ✅ Check tank pressure (5–7 psi when empty)
- ✅ Replace pre- and post-filters (every 6 months)
- ✅ Replace RO membrane (every 2 years)
- ✅ Swap flow restrictor (with filters)
- ✅ Inspect tubing for kinks
- ✅ Confirm all valves are open
Upgrade for Low Pressure
If your home pressure is below 40 psi:
– Install an RO booster pump (roughly $80–$150)
– Ensures consistent 60 psi feed
– Extends membrane life
Know Your System Specs
- GPD rating: A 50 GPD system takes longer than 100 GPD.
- Tank size: Standard holds roughly 3 gallons total (2.8 usable).
- Faucet type: Air-gap models gurgle. This is normal.
Understanding your system prevents false alarms.
Frequently Asked Questions About Reverse Osmosis Tanks
Why is my RO tank not filling even after I changed the filters?
The most common reasons are a closed tank valve, kinked tubing during reinstallation, or carbon particles from a new filter clogging the membrane. Always pre-rinse carbon filters for 30–60 seconds before installing, and double-check that the red tank valve handle is parallel to the pipe.
How long should it take to fill an RO tank?
A standard 3-gallon RO tank typically takes 2–4 hours to fill completely under normal conditions. If your tank takes significantly longer, you likely have low water pressure, a clogged membrane, or a failing flow restrictor.
What is the correct air pressure for an empty RO storage tank?
The target air pressure for an empty RO tank is 5–8 psi, with 7 psi being the ideal median. Pressures above 8 psi prevent the tank from filling, while pressures below 5 psi cause weak flow at the faucet.
How do I know if my RO tank bladder is ruptured?
The classic sign is getting about one cup of water at full pressure, then the flow drops to a trickle even though the tank feels heavy. To confirm, disconnect the tank and press the Schrader valve. If water leaks out instead of air, the bladder has failed and the tank needs replacement.
Can low household water pressure stop an RO tank from filling?
Yes. RO systems need at least 40 psi to push water through the membrane, with 60 psi being ideal. If your home pressure is consistently below 40 psi, install a booster pump to restore proper function.
What does it mean if water runs to the drain continuously?
Continuous drain flow usually points to a failed automatic shut-off valve, a missing or clogged flow restrictor, or a membrane seal leak. Turn off the tank valve and wait 5 minutes. If the drain keeps running, the ASO valve likely needs replacement.
Key Takeaways for Fixing a Reverse Osmosis Tank That Won’t Fill
A reverse osmosis tank not filling is rarely a total system failure. In most cases, the fix involves opening a closed valve, repressurizing the tank to 7 psi, or replacing a $4 flow restrictor. Start with the simplest checks (valve position, tubing kinks, tank pressure) before moving to component replacements.
Stick to a regular maintenance schedule: replace filters every 6 months, swap the membrane every 2 years, and verify tank pressure annually. Your next step is to grab a tire pressure gauge and check your empty tank’s air pressure. That single reading often reveals the problem in under five minutes.