How to Clean Refrigerator Water Dispenser
Is your refrigerator water dispenser producing slow flow, cloudy water, or a strange taste? You’re not alone. Over time, mineral buildup, mold, bacteria, and debris accumulate in the dispenser spout, water lines, and drip tray, especially if you have hard water. Left unchecked, these contaminants affect water quality, appliance performance, and even ice production. The good news? A thorough cleaning with simple household supplies can restore fresh-tasting water and smooth operation in under an hour.
This guide walks you through every step, from shutting off the water supply to flushing the system, using white vinegar, dish soap, and basic tools. You’ll also learn how often to clean, when to replace the filter, and how to prevent future clogs.
Shut Off Water and Power Safely
Before cleaning, protect yourself and your appliance by disconnecting water and disabling the dispenser.
Turn Off Water Supply
Locate the water shut-off valve, usually found under the sink or behind the fridge. Turn it clockwise until tight. This stops water from flowing into the refrigerator during cleaning.
Disconnect Water Line for Deep Cleaning
For internal line cleaning, disconnect the water supply tube from the back of the fridge. Place a towel underneath to catch drips. This allows you to use vinegar safely without contaminating your home’s water system.
Lock the Dispenser Controls
Press and hold the lock button on the front panel for 3 seconds. The indicator light will turn on, preventing accidental dispensing while you clean external parts.
Drain Remaining Water
Place a cup under the dispenser and press the water lever to release any leftover pressure and water in the line. This clears the system before introducing cleaning agents.
Descale the Water Line with Vinegar
Mineral deposits in the internal tubing reduce water flow and affect taste. Vinegar dissolves calcium and lime naturally.
Use Gravity to Flush Vinegar
Pour white vinegar into a small cup. Elevate it on top of the fridge and insert the disconnected water line into the vinegar. Let gravity draw the vinegar into the tube.
Circulate and Soak
Have someone press the water dispenser button to pull vinegar through the system. Once vinegar reaches the front, stop and let it soak for 5 minutes. This breaks down internal scale.
Skip Complex Pump Methods
Avoid pumping vinegar through the main household line. It’s complicated and risks contamination. Stick to the gravity-fed method or surface cleaning for safe, effective results.
Clean the Drip Tray Thoroughly
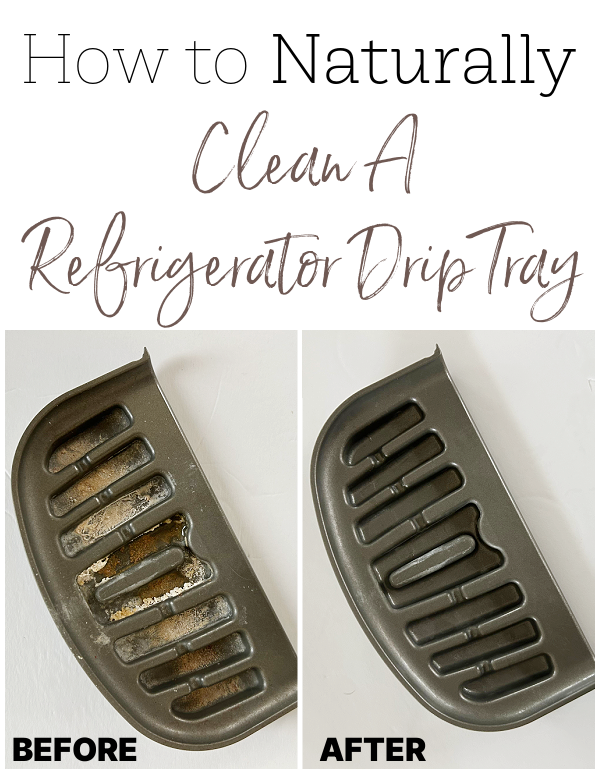
The drip tray collects spills and is a hotspot for stains and mold. Remove and deep-clean it separately.
Remove and Inspect Tray
Slide out the drip tray from under the dispenser. Check for hard water stains, orange tints from iron, or slimy residue.
Soak in Vinegar
Pour distilled white vinegar into the tray, covering all stained areas. Let it sit for 30–60 minutes. Vinegar dissolves deposits without scrubbing in most cases.
Rinse and Dry Completely
Pour out vinegar and rinse with clean water. If residue remains, gently scrub with a microfiber cloth. Air-dry fully before reinstalling.
Warning: Never place vinegar directly on natural stone countertops. It can etch marble or granite. Clean the tray in the sink or on a protected surface.
Scrub the Dispenser Spout and Nozzle
Clogs often occur in the spout due to mineral buildup and mold. Clean both exterior and interior surfaces.
Soak Exterior with Vinegar
Soak paper towels in vinegar and wrap them around the spout. Secure with a rubber band if needed. Let sit for 30–60 minutes to loosen grime.
Clean Interior with Pipe Cleaner
Mix warm water and a squirt of dish soap. Dip a straw cleaner brush or pipe cleaner into the solution. Insert into the nozzle and scrub the inside by rotating and moving up and down.
Rinse Until Clear
Run water through the dispenser until a full cup comes out clear and debris-free. Repeat if particles appear. This removes loosened gunk and soap residue.
Sanitize the Ice Maker and Chute
If your fridge has an ice dispenser, clean it alongside the water system to prevent cross-contamination.
Remove Ice Maker and Discard Ice
Slide or lift out the ice maker if removable. Dump old ice into the sink. Don’t consume it after cleaning.
Spray with Cleaning Solution
Mix 1 cup vinegar, 1 cup water, and 1 teaspoon dish soap. Spray or wipe this solution on all internal parts, including the ice mold, tray, and underside.
Scrub Hard-to-Reach Areas
Use a soft brush or sponge to scrub corners and crevices where grease and mold hide. Focus on the water inlet and moving parts.
Treat the Ice Chute
Place a vinegar-soaked towel inside the chute. Let it sit 10–15 minutes to kill mold and dissolve residue.
Dry Fully Before Reinstalling
Wipe all parts with a dry microfiber towel. Ensure 100% dryness. Any moisture will freeze instantly and cause jams.
Reconnect and Flush the System
Reassembly must be done carefully to avoid leaks and ensure clean water output.
Reattach Water Line
Reconnect the water supply tube to the back of the fridge. Hand-tighten. Don’t over-tighten, which can crack fittings.
Restore Water Supply
Turn the shut-off valve counter-clockwise to reopen the water flow. Check for leaks at the connection point.
Flush 3 Gallons of Water
Run water through the dispenser continuously until 3 gallons have passed. This removes all vinegar, soap, and dislodged debris.
Success Signs: Water flows freely, tastes neutral, and has no odor. If vinegar smell persists, continue flushing.
Reinstall Components
Slide the dry ice maker back until it clicks. Replace the clean drip tray. Unlock the dispenser controls.
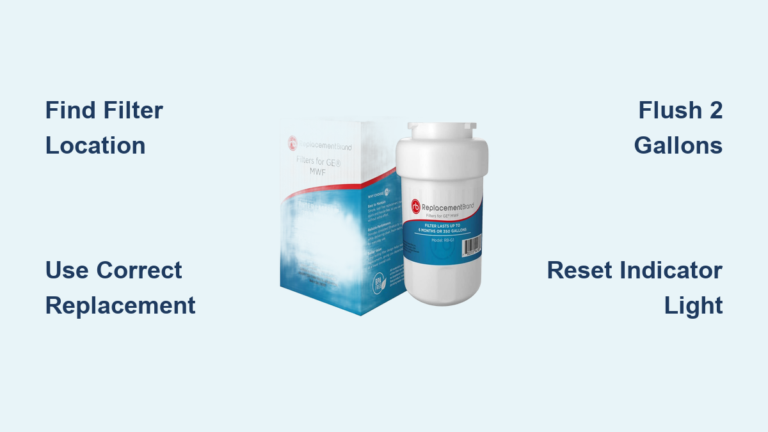
Replace the Water Filter

Cleaning with vinegar compromises the filter, so replace it immediately for best results.
Why Replace After Cleaning?
Vinegar degrades the carbon media inside the filter, reducing its ability to remove contaminants. A fresh filter ensures clean, great-tasting water.
Find the Right Filter
Check your fridge’s model number, usually inside the door, and search online for compatible filters.
Install and Reset
Insert the new filter as directed. Some models require a reset. Press and hold the filter button for 3 seconds until the light turns green.
Stick to a Schedule
Replace filters every 6 months, or when the indicator light turns red. Doing so slows mineral buildup and extends time between deep cleans.
Troubleshoot Common Issues
Even after cleaning, problems can arise. Here’s how to fix them fast.
Water Tastes Funny
Cause: Old filter, residual vinegar, or stagnant water.
Fix: Replace the filter and flush another gallon. If metallic taste persists, test your home’s water for iron.
Slow Water Flow
Cause: Partial clog in nozzle or line.
Fix: Re-clean the spout with a pipe cleaner. Flush more water, since loosened debris sometimes takes time to clear.
Mold Keeps Coming Back
Cause: Infrequent cleaning or high humidity.
Fix: Clean every 3 months instead of 6. Use undiluted vinegar on visible mold spots monthly.
Orange Stains in Tray
Cause: Iron in water supply.
Fix: Vinegar removes existing stains. Consider a whole-house water softener if the problem is chronic.
Prevent Buildup with Regular Maintenance
Keep your dispenser running like new with simple habits.
Clean Every 3–6 Months
Stick to a schedule. If you have hard water, clean every 3 months. Use visual cues: white crust, slow flow, or odd tastes mean it’s time.
Wipe Spout Weekly
After use, quickly wipe the nozzle with a vinegar-dampened cloth to prevent surface buildup.
Clean Coils During Service
While cleaning the dispenser, vacuum the condenser coils at the back or bottom. Dust buildup reduces cooling efficiency.
Use the Two-Towel Method
When wiping external parts, use one towel dampened with cleaning solution followed by a second dry microfiber towel to remove all moisture. This prevents water streaks and bacterial growth.
Frequently Asked Questions About Refrigerator Water Dispenser Cleaning
How often should I clean my refrigerator water dispenser?
Clean your water dispenser and drip tray every 3 to 6 months. If you have hard water, clean more frequently, ideally every 3 months. Replace the water filter every 6 months or when the indicator light turns red.
Can I use bleach to clean my water dispenser?
No. Stick to white vinegar, dish soap, water, or baking soda. Never mix vinegar with bleach, as this produces toxic fumes. Vinegar is effective for descaling and killing mold without harsh chemicals.
Why does my water taste funny after cleaning?
A lingering taste usually means residual vinegar in the lines. Flush at least 3 gallons of water through the dispenser until the vinegar smell is completely gone. If the taste persists, replace the water filter.
What causes white buildup on the dispenser spout?
White, chalky buildup comes from mineral deposits, primarily calcium and lime from hard water. Soak the spout in white vinegar for 30–60 minutes to dissolve these deposits naturally.
Is it safe to use baking soda instead of vinegar?
Yes. Baking soda mixed with lukewarm water works as a mild abrasive for surface cleaning. However, vinegar is superior for descaling internal water lines and killing mold.
How do I remove mold from my water dispenser?
Use pure, undiluted white vinegar on mold spots. Dampen a microfiber cloth with vinegar and wipe affected areas. The acidity kills bacteria and mold spores. Clean every 3 months to prevent regrowth.
Key Takeaways for a Spotless Refrigerator Water Dispenser
A clean refrigerator water dispenser delivers safe, fresh water and extends your appliance’s life. Use white vinegar as your primary cleaning agent to dissolve mineral deposits, kill mold, and remove grease without harsh chemicals. Follow a consistent cleaning schedule every 3 to 6 months, and always replace the water filter after deep cleaning since vinegar degrades filter media.
Start by gathering your supplies: white vinegar, dish soap, a pipe cleaner or straw brush, microfiber cloths, and paper towels. Work through each phase systematically, from shutting off the water to flushing 3 gallons through the system. Your reward is better-tasting water, smoother flow, and an ice maker that performs reliably for years.