How to Make a Reverse Osmosis Water Filter
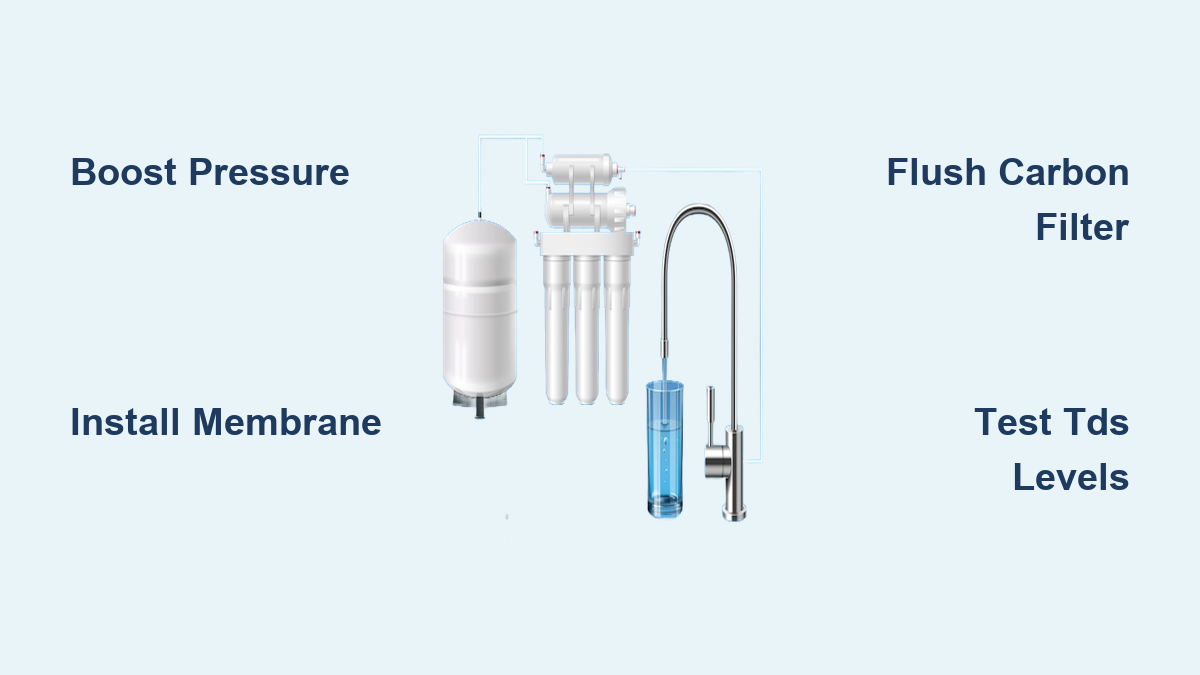
If you want pure drinking water at home, off-grid, or for a specialty project like maple syrup, a reverse osmosis (RO) water filter delivers unmatched purification. Standard filters trap sediment and bacteria, but RO systems force water through a semi-permeable membrane with pores as small as 0.0001 microns. This removes up to 99% of dissolved solids, including heavy metals, nitrates, pesticides, and viruses that other filters miss.
Building your own RO system costs around $150 and gives you full control over water quality. Whether you treat tap water, brackish well water, or concentrate maple sap, a custom setup pays for itself quickly. This guide covers component selection, assembly, pressure optimization, and long-term maintenance based on proven technical specifications.
Core RO System Components
Essential Filtration Stages
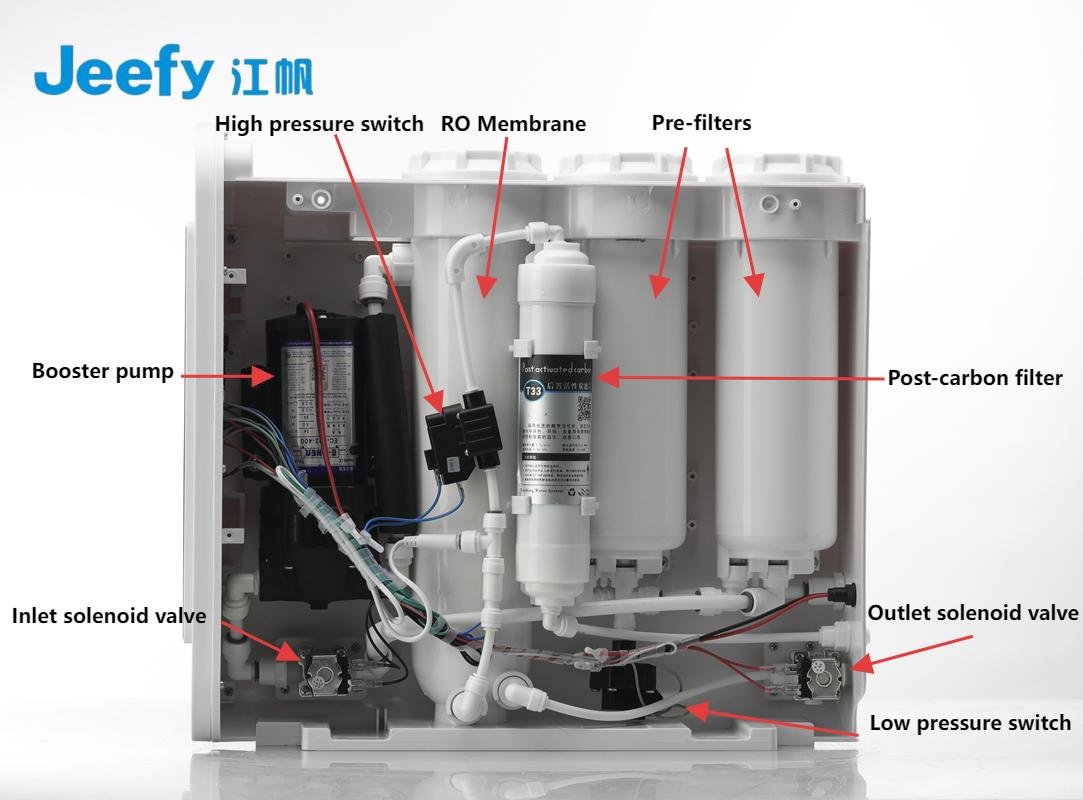
A reverse osmosis system uses a multi-stage filtration process to protect the delicate membrane and ensure clean output. Skipping any stage risks rapid failure.
- Sediment Filter (5-micron): Removes sand, silt, and rust before water reaches the membrane. Replace every 3–6 months or after 1,000 gallons.
- Carbon Block Filter: Eliminates chlorine, pesticides, and VOCs. Chlorine destroys Thin Film Composite (TFC) membranes, making this stage mandatory with municipal water.
- RO Membrane (TFC, 0.0001 microns): The system heart. Forces water through a microscopic barrier that rejects dissolved salts and contaminants. Choose 100 GPD for homes or 400 GPD for high-demand uses like syrup production.
Required Pressure and Flow Control
RO needs mechanical force to push water against natural osmotic pressure. Without adequate pressure, the membrane cannot function.
- Minimum Pressure: 40 PSI
- Optimal Range: 60–80 PSI
- Seawater Desalination: Requires 800+ PSI, which is not feasible for DIY builds.
Pressure Components:
– 12V Booster Pump (e.g., AquaTech 8800): Essential for off-grid or low-pressure sources. Runs on battery, solar, or portable power.
– Flow Restrictor: Installed on the waste (brine) line to create back-pressure that forces water through the membrane.
– Needle Valve: Allows manual flow balancing in dual-membrane systems.
– Pressure Gauge (0–100 psi): Monitors system health. Sudden drops signal clogs or pump issues.
– Pressure Switch: Automatically activates the pump when pressure drops below ~30 PSI.
Post-Filtration and Storage Setup
After purification, proper handling maintains water quality and usability.
- Remineralization Filter: RO strips all minerals, leaving flat, slightly acidic water. A calcite or magnesium filter restores pH and adds beneficial minerals.
- Storage Tank: Pressurized tanks store purified water for on-demand use. Include a check valve to prevent backflow into the membrane.
- Faucet: Use a dedicated air-gap or standard RO faucet, which costs around $20.
Mounting and Assembly Steps
Build a Stable Base
A secure mounting platform prevents vibration damage and simplifies maintenance.
- Use a 2×12 OSB or wooden board as a backing.
- Secure components with strap brackets and screws.
- Route wiring and tubing behind the board for a clean setup.
Install the Booster Pump
If using a 12V electric pump, follow these steps:
- Mount the AquaTech 8800 or equivalent using custom brackets.
- Connect power via quick-connect clips to a 12V battery or solar system.
- Wire the pressure switch to the pump for automatic on/off control.
Pro Tip: Always place the pump after the carbon filter to avoid exposing it to chlorine.
Arrange Filter Housings
Sequence matters. Follow the correct flow path:
- Sediment Filter
- Carbon Filter
- RO Membrane
Secure each housing with brackets to prevent loosening from vibration. For ultra-low-cost builds, drill a 5-gallon food-grade bucket lid and insert PVC pipes for filter ports using barb fittings with sealant.
Connect Pre-Filtration Plumbing
Link Sediment to Carbon Filter
- Cut 1/4-inch or 3/8-inch food-grade polyethylene tubing rated above 100 PSI.
- Use push-to-connect fittings for leak-free assembly.
- Connect sediment outlet to carbon inlet with the shortest run possible.
Visual Cue: Tubing should click and seat fully into fittings with no gaps.
Flush the Carbon Filter
Before connecting to the RO membrane:
- Flush the carbon filter for 3–5 minutes to remove carbon fines.
- These particles can permanently clog the membrane if not removed.
Final Pre-Filter Connection
Route output from the carbon filter to the booster pump inlet. Then connect the pump outlet to the RO membrane inlet.
Correct Flow Path:
Source → Sediment → Carbon → Boost Pump → RO Membrane
Common Mistake: Placing the pump before the carbon filter exposes it to chlorine, shortening its life.
Install the RO Membrane
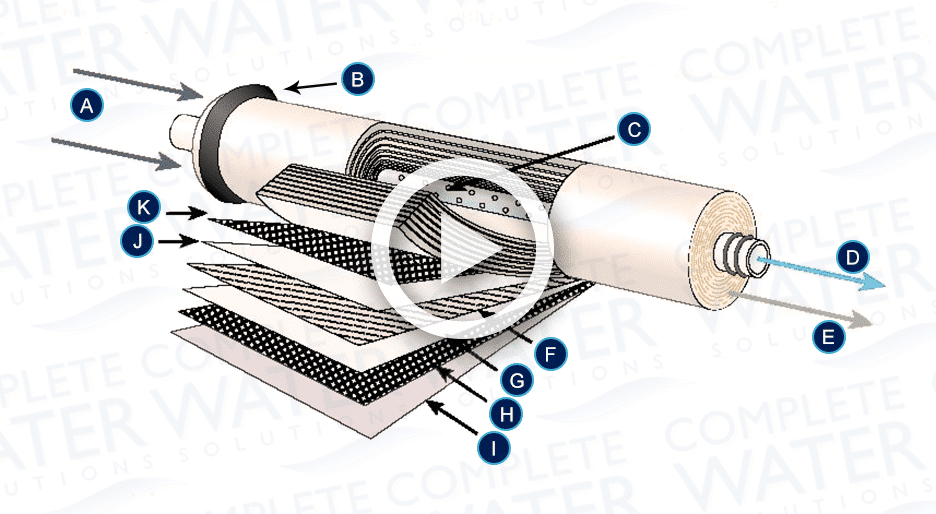
Insert the TFC Membrane
- Open the RO membrane housing.
- Slide the TFC membrane in with the correct orientation by checking flow arrows.
- Reassemble the housing tightly.
Warning: Never run untreated water directly into the membrane. Pre-filters are mandatory.
Monitor Pressure at Membrane Inlet
Use a T-fitting between the pump outlet and membrane inlet to install:
- Pressure Gauge: Confirm 60–80 PSI during operation.
- Pressure Switch: Wire to pump for auto-shutoff.
This setup ensures the membrane receives consistent, optimal pressure.
Dual-Membrane Setup for Maple Syrup
For high-volume applications like sap concentration:
- Connect the first membrane’s outlet to the second membrane’s inlet.
- Use a needle valve on the concentrate line to balance flow.
- Target a 50/50 split between permeate and brine.
- Mount both housings with strap brackets for easy access and cleaning.
Set Up Flow Control and Waste Line
Install the Flow Restrictor
This step is critical because without it, water bypasses the membrane entirely.
- Attach the flow restrictor to the concentrate (brine) line.
- Ensure it matches your membrane’s GPD rating (e.g., 100 GPD restrictor for a 100 GPD membrane).
Adjust with a Needle Valve
For fine-tuning in dual systems:
- Install a needle valve in the brine line.
- Adjust until permeate and concentrate flows are balanced as per manufacturer spec, usually a 1:3 or 1:4 ratio.
Test: Use a bucket and stopwatch to measure output over one minute.
Route the Brine Line
Direct the waste water to:
- A floor drain
- A collection bucket
- A reuse system for flushing toilets or washing
Do Not: Use brine water on sensitive plants, as it contains concentrated contaminants.
Finalize Permeate and Output Lines
Connect the Purified Water Line
The permeate line carries clean water from the membrane. Route it to:
- A pressurized storage tank with a check valve
- A remineralization filter
- A dedicated faucet
Best Practice: Install an air-gap faucet to prevent back-siphonage into the RO system.
Add a Permeate Pump for Waste Reduction
Instead of discarding 2–4 gallons per gallon produced:
- Install a permeate pump on the brine line.
- It uses waste water energy to push purified water into the tank.
- Reduces waste by up to 80%.
Test and Validate System Performance
Power On and Check for Leaks
- Open the water supply or power the pump.
- Inspect all fittings for drips.
- Tighten or reseat tubing as needed.
Fix Vibration: Secure loose tubing with clips to prevent fatigue cracks.
Verify Pressure and Flow
- Check the gauge. Pressure should stabilize at 60–80 PSI.
- Confirm flow from both permeate (clean) and concentrate (waste) lines.
Measure Water Quality with TDS Meter
This is the only way to confirm RO effectiveness.
- Test source water TDS (e.g., 300 ppm).
- Test product water TDS, which should be below 15 ppm.
- Calculate efficiency: ((Source TDS − Product TDS) / Source TDS) × 100. Target above 95%.
Red Flag: If product TDS exceeds 50 ppm, check for membrane damage or improper installation.
Maintain and Troubleshoot Your RO System
Replace Pre-Filters Every 3–6 Months
Clogged or spent filters reduce pressure and damage the membrane.
- Replace sediment and carbon filters every 3–6 months or after 1,000 gallons.
- Change more frequently if source water is cloudy or high in sediment.
Sanitize the System Every 6 Months
Prevent biofilm and bacterial growth:
- Bypass the RO membrane.
- Run a 1–2% bleach solution through sediment and carbon housings.
- Flush thoroughly with clean water before reconnecting the membrane.
Clean the Membrane Annually
Scale and mineral buildup reduce efficiency.
- Use a citric acid solution for a mild acid wash.
- Circulate for 30–60 minutes.
- Rinse completely before resuming use.
Replace the RO Membrane Every 2–5 Years
Lifespan depends on:
- Pre-filter maintenance
- Source water quality
- Operating pressure
Signs of Failure: Rising TDS levels, low water production, or cloudy or off-taste permeate.
Optimize for Special Applications

Build a Low-Cost Bucket RO System
For budget-conscious users:
- Use a 5-gallon food-grade bucket as a base.
- Drill lid for 1/2-inch PVC pipes at inlet and outlet.
- Install barb fittings with rubber gaskets.
- Mount a 100 GPD membrane and pre-filters on top.
Reality Check: Gravity alone won’t generate enough pressure. You must add a booster pump or connect to a pressurized line.
Total cost: approximately $150 with faucet.
Configure for Maple Syrup Production
Sap has high sugar content, so standard RO settings won’t suffice.
- Use dual 400 GPD membranes.
- Maintain a 50/50 flow split via needle valve.
- Flush immediately after use to prevent sugar buildup.
- Achieves 70–80% water removal, cutting boiling time from hours to minutes.
Design an Off-Grid Survival RO Rig
For preppers or remote use:
- Power a 12V booster pump with a solar panel or portable power station.
- Mount all components on a portable wooden board.
- Use quick-connect fittings for rapid deployment.
Capability: Treats brackish water, nitrates, and pesticides, but not full seawater, which requires 800+ PSI.
Compare RO vs Standard Filters
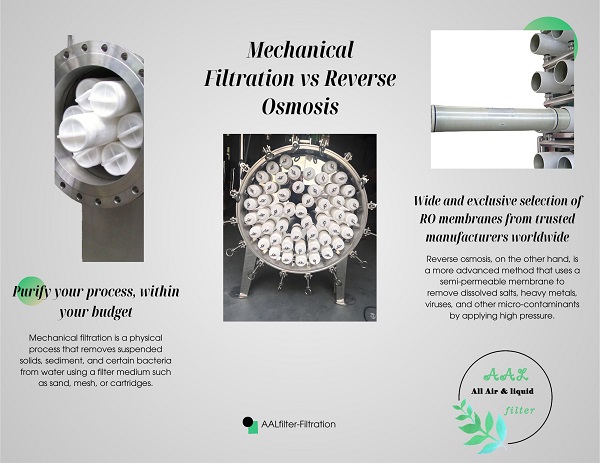
Why RO Outperforms Mechanical Filters
| Feature | Standard Filter | Reverse Osmosis |
|---|---|---|
| Pore Size | 0.1 microns | 0.0001 microns |
| Removes | Sediment, bacteria, cysts | Salts, metals, viruses, chemicals |
| Pressure Needed | Low (gravity OK) | 40–80+ PSI required |
| Waste Water | None | 2–4 gallons wasted per 1 gallon |
| Minerals | Retained | Removed (add back via remineralization) |
| Best For | Hiking, clear water | Contaminated sources, long-term use |
Bottom Line: Use RO when water safety is uncertain, such as wells, runoff, or industrial contamination.
Final Checklist Before Use
Verify All Critical Connections
- Tubing fully seated in push-to-connect fittings
- Flow restrictor on brine line only
- Carbon filter flushed before membrane connection
- Pressure gauge and switch wired and tested
- TDS meter calibrated and ready
Safety and Longevity Tips
- Never freeze the membrane, as ice expansion destroys the layers.
- Drain system if storing in sub-freezing temperatures.
- Wear eye protection when testing under pressure.
- Test before relying on it; don’t wait for an emergency to discover a leak.
Next Steps
- Monitor TDS weekly for the first month.
- Label filter replacement dates.
- Consider adding a UV light stage if bacterial contamination is a concern.
Frequently Asked Questions About Building a Reverse Osmosis Water Filter
What pressure do I need for a DIY reverse osmosis system?
You need a minimum of 40 PSI for the membrane to function, with an optimal range of 60–80 PSI. Municipal water lines often provide enough pressure, but off-grid setups require a 12V booster pump like the AquaTech 8800.
Can I build a reverse osmosis filter without a pump?
Not effectively. Gravity alone produces far less than 40 PSI, which is the minimum required to push water through the membrane. You would need a water source elevated over 90 feet above the system, which is impractical. A booster pump or pressurized line is necessary.
How much does it cost to build a reverse osmosis water filter?
A complete DIY RO system costs around $150, including the faucet. Annual maintenance for filter replacements runs about $14 for basic home units. The membrane itself lasts 2–5 years depending on water quality and maintenance.
How often should I replace RO filters?
Replace sediment and carbon pre-filters every 3–6 months or after 1,000 gallons. The RO membrane lasts 2–5 years depending on source water quality and pre-filter maintenance. Replace it when TDS readings rise above 50 ppm or water production drops significantly.
Can a reverse osmosis filter treat seawater?
Standard DIY RO systems cannot desalinate seawater. Seawater requires over 800 PSI of pressure, far beyond what booster pumps can deliver. DIY systems handle fresh and brackish water effectively but not full ocean water.
Why does my RO system waste so much water?
Traditional RO systems produce 2–4 gallons of brine waste per gallon of purified water. Installing a permeate pump on the waste line reduces waste by up to 80% by using the brine’s energy to push purified water into the storage tank.
Key Takeaways for Building Your Own Reverse Osmosis System
Building a reverse osmosis water filter gives you complete control over water purity for about $150. The system removes up to 99% of dissolved solids, including heavy metals, nitrates, and viruses that standard filters miss. Success depends on three critical factors: proper pre-filtration to protect the membrane, correct pressure between 60–80 PSI, and consistent maintenance every 3–6 months.
Start by gathering your components, mount everything on a sturdy board, and follow the flow path: Source → Sediment → Carbon → Booster Pump → RO Membrane. Test your finished system with a TDS meter and aim for above 95% efficiency. Once assembled and validated, your DIY RO system delivers crystal-clear, safe water for years to come.