How to Install a Whole House Water Filter
If your showerhead clogs every few months, your laundry comes out dingy, or your tap water smells like a swimming pool, a whole house water filter could solve these problems at the source. These systems install directly on your home’s main water line and filter every drop that flows through your faucets, appliances, and showers. Unlike under-sink or countertop filters, a whole house system tackles sediment, chlorine, chloramines, heavy metals, and volatile organic compounds (VOCs) at the point of entry, protecting your plumbing and improving water quality everywhere.
Installing a whole house water filter might sound like a job for a plumber, but with the right tools, planning, and step-by-step guidance, it is a DIY-friendly project that can save hundreds compared to professional installation. This guide walks you through choosing the right location, building a bypass loop, mounting the unit securely, connecting plumbing, and setting up long-term maintenance. You will learn how to avoid common mistakes, ensure leak-free connections, and keep your system running efficiently for years.
Choose the Right Installation Location

Find the Main Water Line Entry Point
The filter must be installed on the main water line after the water meter and before the line splits to different parts of the house. Common locations include near the water heater, beside the pressure tank for well systems, and close to the main shut-off valve in the basement, garage, or utility room. Ensure the area is accessible and allows space for changing filters every 6 to 12 months.
Prioritize Safety and Clearance
Avoid installing above electrical panels, outlets, or junction boxes because water leaks can cause electrical hazards. Keep the unit away from high-traffic zones where it could be bumped. You will need at least 12 inches of clearance on all sides for maintenance access and tool use.
Mount on a Stable, Level Surface
Whole house filters are heavy, especially when filled with water and media. Never mount directly to drywall or thin paneling. Instead, secure a 1×6-inch hardwood board or ¾-inch plywood backer to wall studs. Use concrete anchors if mounting on masonry. Ensure the board is level and spans at least two studs for maximum support. Once the backer is secure, attach the filter’s mounting bracket using the provided hardware.
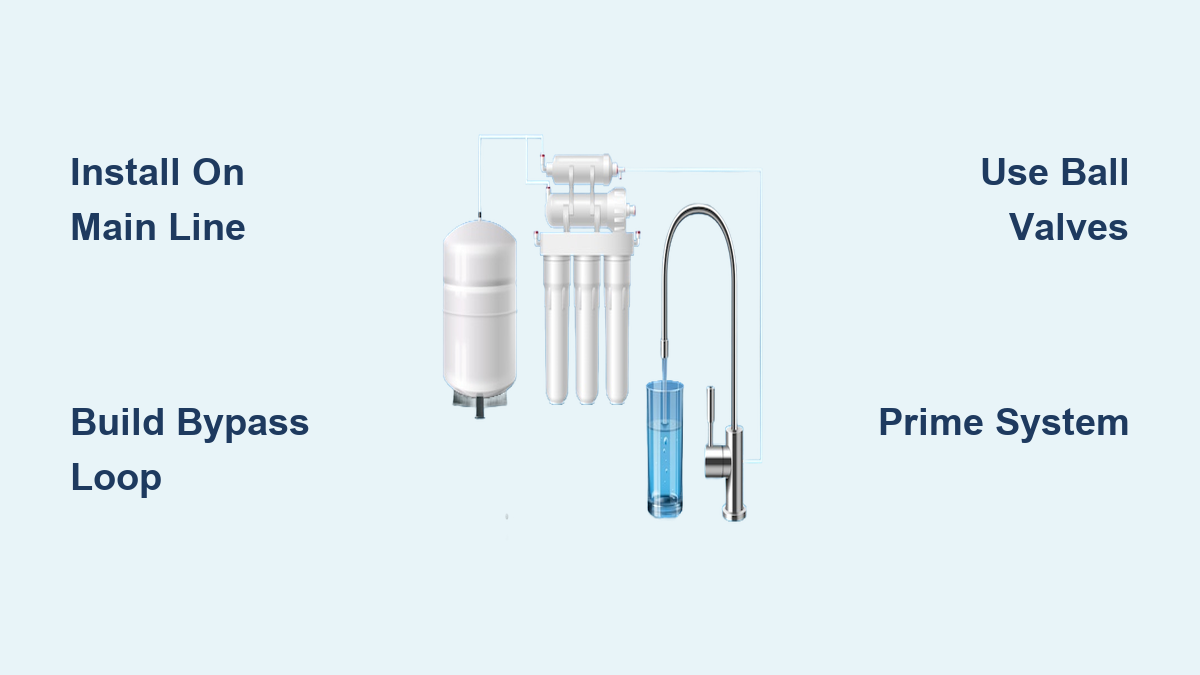
Build a Bypass Loop for Maintenance
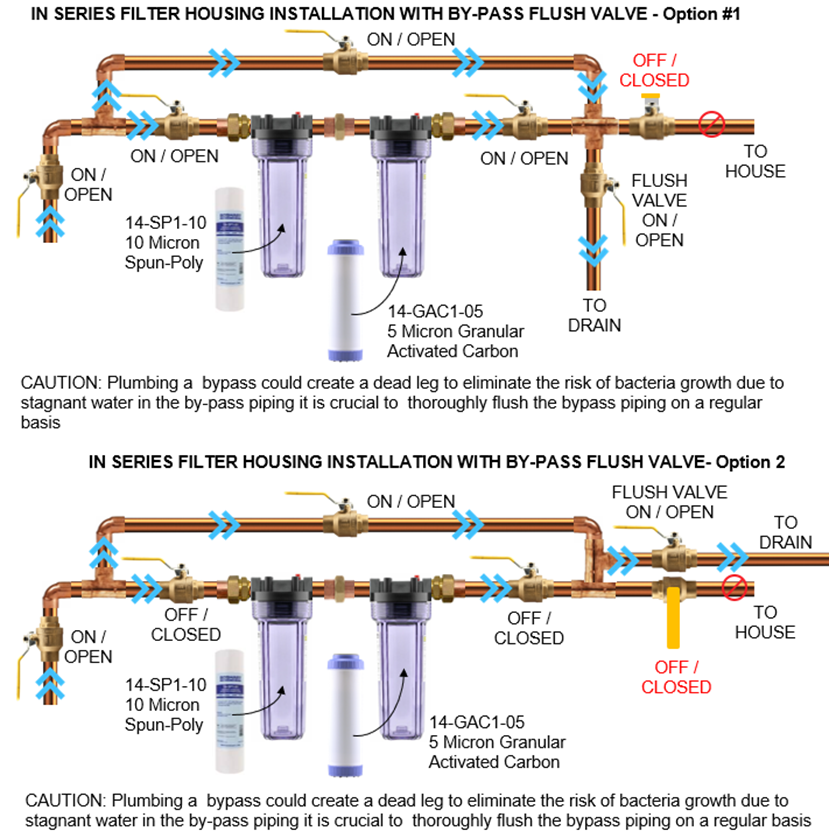
Install Isolation Ball Valves First
Use three ¾-inch or 1-inch ball valves depending on pipe size. The upstream valve goes on the incoming water line, the downstream valve goes on the outgoing line to the house, and the bypass valve sits in the middle of the bypass loop. Ball valves offer full flow and reliable shutoff. Gate valves should be avoided due to potential leakage over time.
Connect the Bypass with Rigid or Flexible Pipe
Run a parallel line between the upstream and downstream sides using copper (preferred for durability and flow) or PEX (acceptable for tight spaces and easier routing). The bypass allows water to flow around the filter during cartridge changes or emergencies so your family is not left without water.
Wire the Valves for Correct Operation
During normal mode, the upstream and downstream valves stay open while the bypass valve stays closed. During filter change mode, the upstream and downstream valves close while the bypass valve opens. Label the valves clearly with waterproof tags or paint markers.
Gather Tools and Materials
Essential Tools for the Job
You will need a pipe cutter for copper or a hacksaw, a propane torch with flux and lead-free solder, two pipe wrenches, a filter wrench (usually included), a drill with wood or masonry bits, a level, tape measure, bucket, and clean gloves.
Required Materials List
| Item | Purpose |
|---|---|
| Whole house filter system | Includes housing, bracket, cartridges |
| 3 Ball valves | Isolation and bypass |
| T-fittings and 90° elbows | For bypass loop and directional routing |
| Adapter fittings | Match pipe to filter ports |
| Teflon tape and pipe dope | Seal all threaded joints |
| Food-grade silicone grease | Lubricate O-rings |
| Cushion clamps | Secure housing to bracket |
| Pressure gauges (optional) | Monitor filter clogging |
Pro Tip: Use lead-free brass fittings and NSF/ANSI-certified materials for potable water safety.
Cut and Prepare the Main Line
Shut Off Water and Drain the System
Close the main shut-off valve first. Then open a high-point faucet (such as a second-floor bathroom) and a low-point faucet (such as a basement sink or outdoor spigot) to relieve pressure and drain lines. Leave faucets open during work to prevent vacuum lock.
Measure and Cut the Pipe
Measure the space needed for valves, filter, and fittings. Use a pipe cutter for clean, square cuts on copper. Deburr the inside of the pipe to prevent flow restrictions. Place a bucket under the cut to catch residual water.
Warning: Never use a grinder because sparks near gas lines or electrical wiring are dangerous.
Mount the Filter Unit Securely
Attach the Backing Board to Wall Studs
Cut a 1×6 board to span at least two wall studs. Pre-drill holes and secure with 3-inch wood screws. Use a level to ensure it is perfectly horizontal.
Install the Bracket and Housing
Mount the filter’s bracket to the backer board. Slide the filter sump into the bracket. Install cushion clamps on both sides to prevent vibration and stress during water flow. Double-check that the housing is upright and secure.
Weight Note: A filled 20-inch sump can weigh over 20 lbs. Over-tightening clamps can crack plastic, so snug is sufficient.
Connect Plumbing with Leak-Proof Joints
Dry-Fit All Components First
Assemble valves, adapters, and pipes without sealant to test fit and alignment. This prevents costly mistakes during soldering.
Seal Threads Properly
Wrap Teflon tape clockwise (3 to 5 layers) on all male threads. Apply pipe dope on top for critical joints, especially brass-to-brass. Use food-safe silicone grease on O-rings and filter head threads.
Solder or Thread Final Connections
Solder copper joints first, away from the filter housing to avoid heat damage. Use heat shields or wet rags if soldering near plastic. Connect the inlet of the filter to the upstream valve and the outlet of the filter to the downstream valve. Support long pipe runs with straps or clamps to prevent stress on fittings.
Avoid: Relying solely on push-fit connectors in permanent installations. Rework into soldered or threaded joints for reliability.
Install Filter Cartridges and Prime System

Insert the Correct Cartridge
Most systems use a two-stage setup. The prefilter (5-micron sediment) captures rust, sand, and dirt. The main filter (GAC, KDF, or CTO) removes chlorine, VOCs, and heavy metals. Ensure cartridges are seated fully and oriented correctly by checking flow direction arrows.
Lubricate and Tighten the Sump
Apply silicone grease to the O-ring and sump threads. Hand-tighten the sump until snug. Use the filter wrench for a quarter-turn more, but do not overtighten.
Prime and Bleed Air
Close the downstream valve. Slowly open the upstream valve to pressurize the housing. Listen for air hissing, which means water is filling the chamber. If equipped, open the air release valve until water spurts out, then close it. Slowly open the downstream valve. Open an indoor faucet to purge air and run until flow is steady and sputtering stops.
Flush and Activate the System
Run Initial Flush Cycle
Open a cold water faucet and let water run for 10 minutes. This removes carbon fines, dust, and manufacturing residues. Water may appear cloudy or dark at first, which is normal.
Let Media Soak (If Required)
Some carbon filters need a 1-hour soak to activate. Check your manufacturer’s instructions.
Perform Final Flush
Run water for another 10 minutes. Check all connections for leaks under pressure.
Install Pressure Gauges (Optional)
Mount ¼-inch gauges on inlet and outlet blocks. Record baseline pressure (for example, 50 psi both sides). A 10 to 15 psi drop downstream later indicates a clogged filter.
Set Up Maintenance and Monitoring

Track Filter Replacement Schedule
| Filter Type | Replacement Interval |
|---|---|
| Sediment prefilter | Every 6–12 months |
| Carbon/KDF media | Every 3–5 years or 1M gallons |
| CTO cartridge | Every 3–5 years |
Tip: Mark replacement dates on a calendar or set phone reminders.
Monitor Pressure Drop
Without gauges, watch for reduced shower pressure, longer dishwasher fill times, and sputtering faucets. These signs mean your prefilter is clogged and needs replacement.
Replace Filters Without Shutting Off Water
Close the upstream and downstream valves. Open the bypass valve so the house gets unfiltered water. Unscrew the sump, replace the cartridge, and reassemble. Close the bypass and open isolation valves slowly to repressurize.
Troubleshoot Common Issues
Fix Leaking Filter Housing
An overtightened sump or dry, damaged O-ring usually causes leaks. Replace the O-ring, lubricate with silicone grease, and hand-tighten plus a quarter-turn with the wrench.
Restore Low Water Pressure
Check for kinked PEX lines or partially closed ball valves. Replace a clogged sediment prefilter. Ensure the system has 1-inch ports, since undersized ¾-inch units cause flow restrictions.
Eliminate Air in Lines
After filter changes, open a faucet and let water run until flow is smooth. Persistent air may indicate a suction leak on the inlet side, so check all joints.
Address Persistent Bad Taste
A metallic taste should clear after 20 minutes of flushing. If it remains, test water for bacteria, nitrates, or lead because a whole house carbon filter does not remove these. For biological contaminants, add a point-of-use RO or UV system at the kitchen sink.
Winterize and Prevent Freezing
If installed in an unheated garage or basement, insulate pipes and housing with foam pipe wrap. In freezing temperatures, close isolation valves and open the bypass to keep water flowing while draining the filter. Never let water sit in the housing below 32°F (0°C).
Frequently Asked Questions About Whole House Water Filters
Where should a whole house water filter be installed?
Install it on the main water line after the water meter and before the line branches to the rest of the house. Common spots include near the water heater, beside the pressure tank for well systems, or close to the main shut-off valve in a basement, garage, or utility room. The area should have at least 12 inches of clearance on all sides and must not be above electrical panels or junction boxes.
Do whole house water filters reduce water pressure?
Properly sized systems do not reduce pressure noticeably. Units with 1-inch ports and flow rates of 15 to 20 GPM maintain strong pressure throughout the home. Undersized ¾-inch units or clogged prefilters are the most common causes of pressure drops. Installing pressure gauges helps you monitor performance and catch clogging early.
How often do you need to change a whole house water filter?
Sediment prefilters typically need replacement every 6 to 12 months. Carbon, KDF, or CTO cartridges last 3 to 5 years or about 1 million gallons. Replace filters sooner if you notice reduced water pressure, sputtering faucets, or returning chlorine taste.
Can a whole house water filter remove bacteria or lead?
Standard carbon and sediment filters do not remove bacteria, viruses, or nitrates. Some systems with KDF media can reduce certain heavy metals like lead and nickel, but for guaranteed bacterial safety or nitrate removal, you need a point-of-use Reverse Osmosis system or a UV sterilizer at specific taps. Test your water before installation to know exactly what contaminants you are addressing.
Is it hard to install a whole house water filter yourself?
With basic plumbing skills and the right tools, most homeowners can complete the installation in a day. The project involves cutting the main line, soldering or threading connections, and mounting the unit securely. Professional installation typically costs $2,000 to $5,000, so DIY can save significant money if you are comfortable with the work.
Final Tips for a Successful Whole House Water Filter Installation
Test your water first so you know which contaminants you are targeting. Match system capacity to your household size by looking for 15 to 20 GPM flow and at least 1 million gallon capacity. Use high-quality parts because cheap valves or thin housings fail faster. Label every valve and connection clearly so future maintenance is straightforward.
A properly installed whole house water filter delivers cleaner water, extends appliance life, and eliminates the need for multiple point-of-use filters. Start by gathering your tools, choosing the right location, and following each step carefully. With a bypass loop, pressure monitoring, and a clear maintenance plan, your system will run smoothly for years, protecting your home one drop at a time.