How to Change Keurig Water Filter
Nothing ruins a fresh cup of coffee faster than an off taste, and the culprit is often the water itself. If your morning brew tastes flat or bitter, your Keurig water filter is likely overdue for a swap. Most Keurig models with internal filters, including the K-Classic, K-Select, K-Elite, K-Cafe, and K-Supreme series, rely on activated charcoal cartridges to remove chlorine, sediment, and impurities. Over time, that filter loses effectiveness, leading to slower brewing and increased scale buildup.
This guide walks you through how to change Keurig water filter correctly, from identifying your model to resetting the reminder, so every cup tastes clean and fresh.
Confirm Your Keurig Model Has a Filter
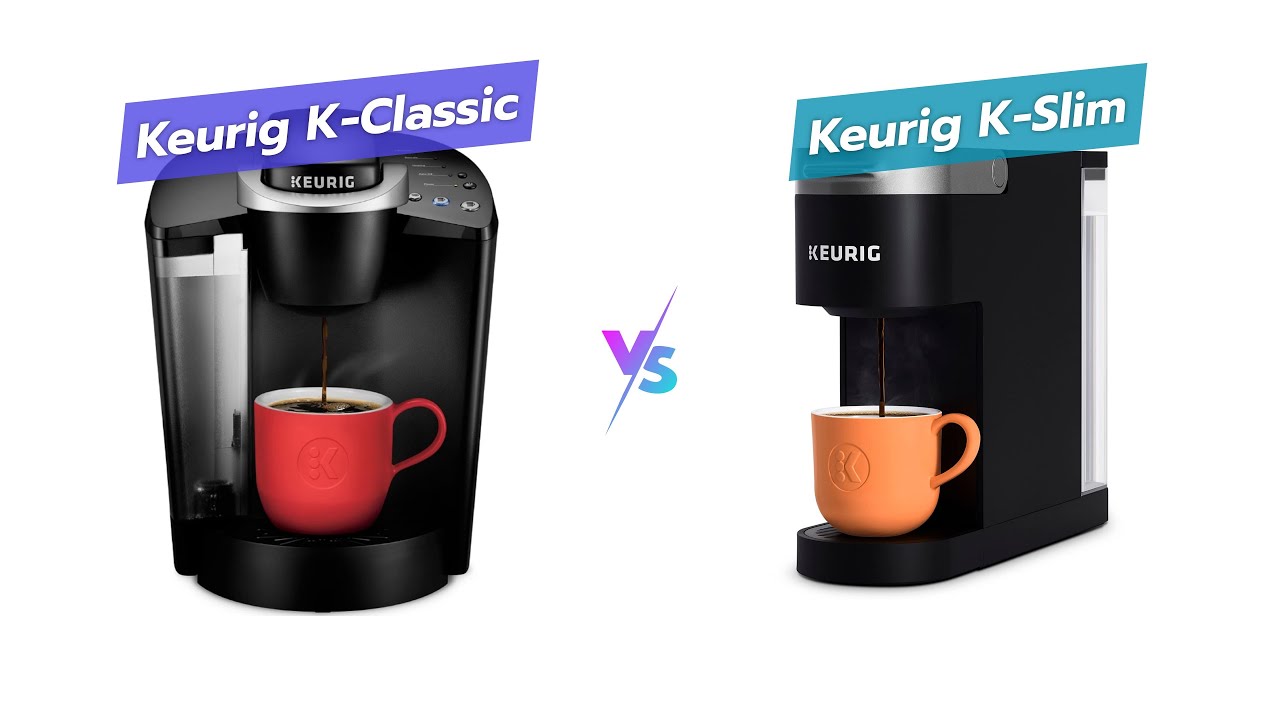
Not every Keurig uses an internal water filter. Before buying cartridges, verify your machine is compatible.
Models With Internal Filters
- Front/Rear Reservoir: K-Classic, K-Select, K-Elite, K-Cafe, K-Compact, B70 Platinum
- Side Reservoir: K-Supreme, K-Supreme Plus
These models house the filter inside the water reservoir, typically in the back corner for front/rear tanks or the rear section for side tanks.
Models Without Filters
- K-Mini, K-Mini Plus, K-Slim
The K-Slim is filter-free despite some conflicting information. Users should rely on bottled or filtered water and descale monthly to keep the machine running smoothly.
Locate the Filter Housing
- Position: Inside the reservoir, not under the drip tray or in the brew head
- Appearance: A small cylindrical cartridge holder, roughly ¼ to ½ inch above the tank floor
- Tip: Shine a flashlight into the reservoir to spot it quickly
Gather Your Supplies
Changing a Keurig water filter requires minimal tools.
What You Need
- New activated charcoal filter cartridge
- Keurig filter handle with upper and lower holders
- Clean cup for soaking
- Cold running water
- Damp cloth for optional cleaning
Filter Selection Tips
- Choose Keurig-branded long-handled filters for the best fit
- Compatible third-party filters work but verify dimensions before buying
- Never substitute refrigerator or faucet filters, as they are not designed for Keurig systems
Prepare the New Filter Properly
Skipping prep leads to cloudy brews and carbon dust in your cup. Follow these steps carefully.
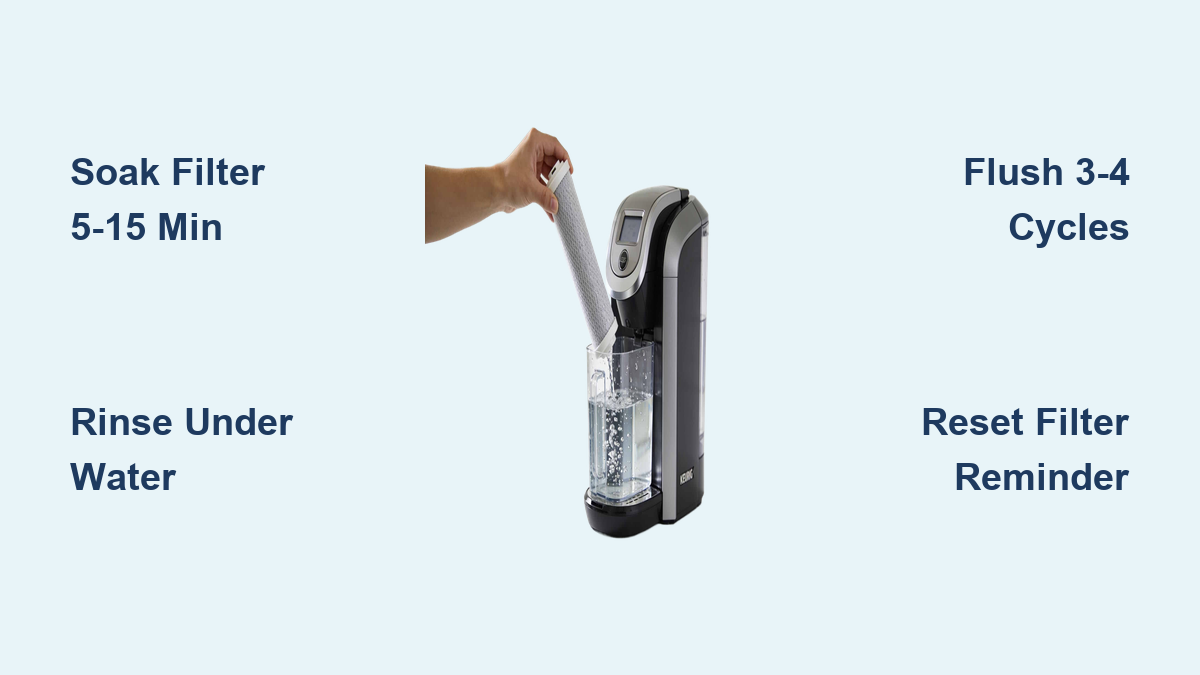
Soak the Cartridge
- Remove the new filter from its packaging
- Place it in a clean cup
- Submerge completely in cold water
- Soak for 5 to 15 minutes
This activates the charcoal and releases trapped air and dust.
Rinse Under Running Water
- Remove the filter from the soak water
- Hold under cold running tap water for 60 seconds
- Watch for dark gray water; this is normal carbon dust flushing out
- Pro Tip: Rinse the mesh screen on the lower holder separately to clear residue
Never skip this rinse. It prevents gritty coffee and potential clogs.
Remove the Old Filter by Model Type

Always unplug the machine before starting any maintenance.
Front/Rear Reservoir Models (K-Classic, K-Select, K-Elite, K-Cafe)
Pull the Housing Straight Up
- Remove the water reservoir and empty it completely
- Locate the filter housing in the back corner
- Pull straight up with firm, steady pressure
- Do not twist, as this can crack the housing
If the housing feels stuck, gently rock it side to side without forcing it.
Replace the Cartridge
- Squeeze the small tabs on the base
- Separate the top and bottom of the housing
- Discard the old charcoal filter
- Insert the new soaked and rinsed cartridge
– Flat side down
– Arrow pointing down - Snap the top compartment back on until you hear a click
Reinstall the Filter Assembly
- Align the base with the reservoir slot
- Push down firmly until it clicks into place
- Tug gently to confirm it does not move
A loose fit allows unfiltered water to bypass the charcoal entirely.
Side Reservoir Models (K-Supreme, K-Supreme Plus)
Twist Counterclockwise to Remove
- Detach the side-mounted reservoir
- Find the taller filter housing in the rear section
- Twist ¼ turn counterclockwise
- Lift straight out
Warning: Do not pull without twisting. These models use a locking mechanism that requires rotation.
Swap the Filter Cartridge
- Press the side tabs and pull the base down
- Remove the old cartridge
- Insert the new one with the flat side down
- Reattach the base until it clicks
Reinstall with a Twist
- Insert the assembly into the reservoir
- Push down and twist ¼ turn clockwise to lock
- Reattach the reservoir to the machine
Confirm it is fully seated to prevent leaks.
Flush the System After Installation
Flushing removes residual carbon dust and primes the system for clean brewing.
Run 3 to 4 Brew Cycles
- Fill the reservoir with fresh water
- Place a large mug on the drip tray
- Select the largest cup size
- Brew without inserting a K-Cup
- Repeat 3 to 4 times
- Discard all water, as it may be hot and contain black specks
This step is essential for clean-tasting coffee.
Reset the Filter Reminder on Smart Models
For Keurig machines with digital displays:
– Navigate to Settings > Water Filter Reminder
– Select “Replace Filter” or “Reset”
– The alert will reset for 2 months
For the K-Brew Plus Chill, press the dedicated rinse button after selecting hot and pressing brew.
Set a Replacement Schedule

A filter does not last forever. Timing matters for both taste and machine health.
Replace Every 2 Months or 60 Tank Refills
- Time-based: Every 8 weeks
- Usage-based: After 60 reservoir refills
- Track It: Turn the dial on the filter handle to mark the next change date
Even if the filter looks fine, replace it. Effectiveness drops sharply after 60 days.
Recognize When to Replace Early
Do not wait for the timer if you notice these warning signs.
Slow Brew or No Flow
- Water trickles out or stops mid-brew
- Likely cause: clogged or expired filter
- Fix: Replace the filter immediately
Bad Taste or Odors
- Coffee tastes flat, metallic, or bitter
- Water has a chlorine smell
- The filter has lost its purification ability
Dark Gray or Cracked Filter
- Normal carbon dust is black and flushes out during rinsing
- A uniformly dark gray filter means it is saturated
- Cracks or leaks in the housing require full replacement
Maximize Performance With Regular Maintenance
Changing the filter is just one part of caring for your water system.
Descale Every 3 to 4 Months
- Even with a filter, mineral scale builds up over time
- Use Keurig descaling solution or white vinegar
- Run a full descaling cycle per your manual
- Hard water? Descale monthly instead
Clean the Reservoir and Housing
- Wipe the inside of the tank with a damp cloth
- Rinse the filter housing during each filter change
- Prevent mold and debris from accumulating
Use Better Water
- Fill the reservoir with filtered or bottled water
- Reduces strain on the filter cartridge
- Cuts descaling needs by up to 75%
Store Spare Filters Properly
- Keep in a cool, dry place
- Avoid humidity and strong odors
- Preserves charcoal integrity until use
Troubleshoot Common Filter Issues
Filter Won’t Fit
- Cause: Wrong model or upside-down insertion
- Fix: Confirm compatibility. Insert flat side down with the arrow pointing down
Leaking Around the Filter
- Cause: Not fully locked or cracked housing
- Fix: Push down until you hear a click. Inspect for cracks from forced removal
Cloudy First Cups
- Cause: Incomplete rinsing or flushing
- Fix: Run 3 to 4 additional flush cycles using the largest cup size
Housing Stuck in Reservoir
- Straight-pull models: Gently rock side to side, do not twist
- Twist models: Ensure you are turning counterclockwise
- Mineral buildup? Soak the housing in vinegar for 15 minutes
No Water Flow After Change
- Check: Filter properly seated and locked
- Also: Descale the machine, since clogs often occur in the water line
Frequently Asked Questions About Changing Keurig Water Filters
How often should I change my Keurig water filter?
Replace your Keurig water filter every 2 months or after 60 tank refills, whichever comes first. Setting the dial on the filter handle helps you track the next change date.
Do all Keurig models have water filters?
No. Models like the K-Mini, K-Mini Plus, and K-Slim do not have internal filters. If you own one of these machines, use bottled or filtered water and descale monthly to maintain performance.
Why is my Keurig brewing slow after a filter change?
Slow brewing usually means the filter is clogged or improperly seated. Remove the filter housing, confirm it is locked in place, and run a descaling cycle if the problem persists.
Can I use third-party filters in my Keurig?
Yes, compatible third-party filters work in most models. However, verify the dimensions match your reservoir type and avoid refrigerator or faucet filters, which are not designed for Keurig systems.
Why does my first cup taste cloudy after changing the filter?
Cloudy water means carbon dust remains in the system. Run 3 to 4 flush cycles with the largest cup setting and no K-Cup inserted to clear the residue.
How do I reset the filter reminder on my Keurig?
On smart models, go to Settings > Water Filter Reminder and select “Replace Filter” or “Reset.” On the K-Brew Plus Chill, use the dedicated rinse button instead.
Key Takeaways for Changing Your Keurig Water Filter
Changing your Keurig water filter takes less than 10 minutes and dramatically improves coffee taste. Always soak and rinse new cartridges before installation, and flush the system with 3 to 4 water-only cycles afterward. Stick to the 2-month replacement schedule, and use filtered water to extend both your filter life and your machine’s lifespan.
Set a reminder on your phone today, stock up on genuine Keurig cartridges, and make filter changes part of your routine. Your next cup will taste noticeably cleaner, and your brewer will run more efficiently for years to come.