How to Remove a Reverse Osmosis System

That bulky tank and tangle of tubes under your sink may have seemed like a great idea when you installed your reverse osmosis (RO) system. Now it sits unused, collecting dust and stealing valuable cabinet space. Maybe your fridge dispenser does the job better, or the filters stopped performing months ago. Whatever the reason, removing a reverse osmosis system is a manageable project that most homeowners can finish in under two hours with basic tools and patience.
This guide covers every step of how to remove a reverse osmosis system, from shutting off water and depressurizing lines to restoring your countertop and plumbing. You’ll also learn when to call a plumber, how to avoid common mistakes, and whether a partial fix might save you from removing the whole unit.
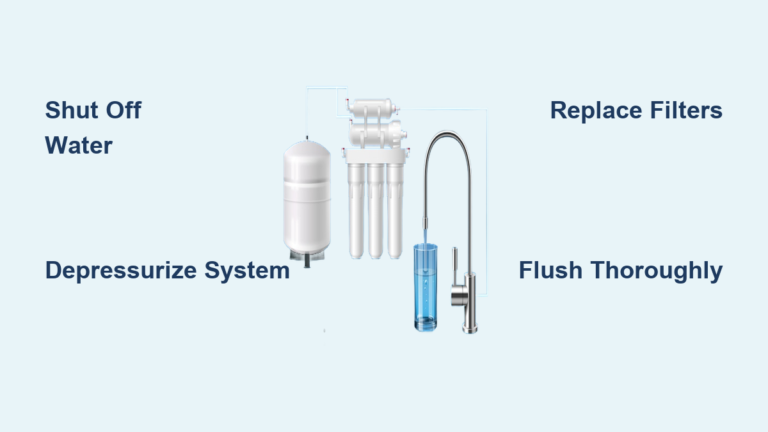
Shut Off Water and Depressurize the System

Before touching any tubing or fittings, you must isolate the system from your water supply. Skipping this step risks spraying water across your cabinet the moment you loosen a connection.
Close the Dedicated Shut-Off Valve
Look under your sink for a small valve connected to the line feeding the RO filter housing. Many setups include three valves under the sink: one for the filter, one for cold water, and one for hot water. Turn only the filter valve clockwise until it stops completely. If you cannot find a dedicated valve, shut off your home’s main water supply for added safety.
Drain the Storage Tank Completely
Open the RO faucet on your countertop and let it run until the flow stops on its own. This releases pressure from the lines and begins emptying the storage tank. Keep the faucet open for several extra minutes to extract as much water as possible. A full tank can weigh over 10 pounds, so draining it makes removal far safer and easier on your back.
Disconnect the Tubing Lines

With the system depressurized, you can now disconnect the four main tubing connections. Most modern RO systems use push-fit (quick-connect) fittings with a colored plastic collet ring, often blue or white.
Release Push-Fit Fittings Without Damage
To disconnect a quick-connect fitting, press the collet ring inward firmly on two opposite sides. While holding it down, pull the tubing straight out. Do not twist the tube, as this can damage the fitting or break the seal. If a fitting is stuck or positioned in an awkward spot, cut the tubing near the connector with a sharp utility knife or tubing cutter. You can replace that section later with new tubing and a coupling.
Identify Each Connection Before Unplugging
Label or photograph these four lines before disconnecting:
1. Supply line runs from the shut-off valve to the filter unit
2. Tank inlet line connects the filter housing to the storage tank
3. Tank outlet line carries filtered water from the tank to the faucet
4. Drain line attaches to a T-piece in the sink drain pipe
Disconnect all lines except the drain line for now.
Replace the Drain T-Piece with Straight PVC

The drain line uses a T-piece fitting that lets RO wastewater flow into your main sink drain. After removal, you must restore the drain to a straight configuration.
Remove the T-Piece Fitting
Loosen the slip nuts above and below the T-piece using an adjustable wrench. Slide the T-piece out carefully and wipe down the pipe ends to remove any debris or buildup.
Install a Straight PVC Replacement
Insert a straight section of PVC pipe matching the original diameter (typically 1/2 inch) into the gap. Reattach the slip nuts and tighten by hand first, then give a quarter-turn with the wrench. Confirm the drain maintains a slight downward slope after the P-trap to prevent future clogs. A straight PVC replacement costs around $2 at any hardware store.
Remove the Under-Sink Components
With all lines disconnected, you can now extract the main hardware from the cabinet.
Lift Out the Storage Tank
Carefully lift the empty tank out of the cabinet. Even drained, it remains bulky and awkward. Inspect it for mold or sediment buildup, which signals infrequent maintenance. Tanks can fail within 18 months, losing pressure capacity and causing low flow at the faucet.
Uninstall the Filter Housing
Remove the filter canisters (pre-filter, membrane, post-filter) if you plan to reuse them. Then lift the entire filter housing unit out. These units often collect dust and moisture, so wipe the area clean once everything is removed.
Remove the Countertop Faucet
The RO faucet leaves a visible hole in your countertop or sink deck. Removing it requires reaching a mounting nut underneath, which is often the hardest part of the entire project.
Access the Mounting Nut
Reach under the sink to find the nut securing the faucet base. In tight corner cabinets or setups with garbage disposals, this step can be nearly impossible without specialty tools. A basin wrench gives you the reach and leverage needed for awkward angles.
Unscrew and Extract the Faucet
Turn the mounting nut counterclockwise until loose. Have someone hold the faucet steady from above to prevent it from spinning. Once free, lift the faucet out from the top.
Pro Tip: If you cannot reach the nut, do not force it. Damaging surrounding pipes or injuring yourself is not worth the risk. A licensed plumber can finish this step in under 5 minutes.
Seal and Restore the Countertop Hole
After removing the faucet, cover the leftover hole for a clean, finished look.
Install a Hole Cover Plate
Choose a brushed nickel or stainless steel cover plate that matches your sink finish. Place a foam gasket over the hole, insert the cover plate from above, and secure it from below with a plastic nut. This step usually requires two people: one to hold the cover steady and one to tighten the nut underneath.
Replace with a Soap Dispenser Instead
If the hole measures 1-3/8 inches in diameter, you can install a standard soap dispenser. However, older RO faucet holes are often closer to 1 inch, which is too small for modern dispensers. Measure first, and if the hole is too small, stick with a cover plate.
Cap Unused Plumbing Lines
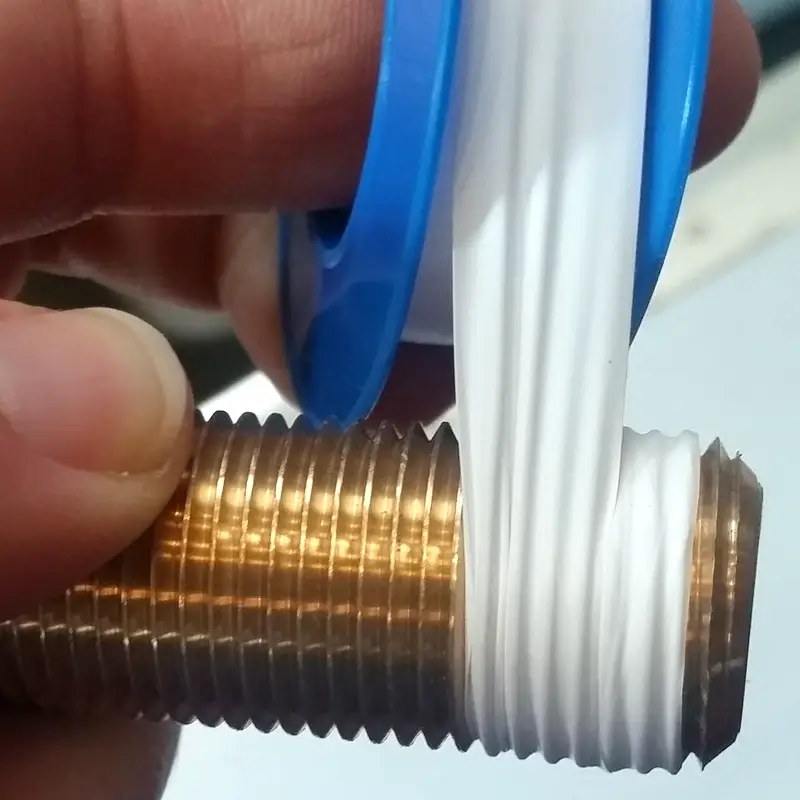
Any open connections left behind can leak or become contaminated, so secure them properly.
Plug the Water Supply Line
If you left the dedicated RO shut-off valve in place, cap the open end with a brass or plastic pipe plug. Wrap the threads with Teflon tape in a clockwise direction (2–3 wraps) before screwing on the plug. This ensures a watertight seal and prevents the tape from unraveling during installation.
Recheck the Drain Line Integrity
Confirm the new straight pipe is snug and the drain flows smoothly. Pour a cup of water down the sink and watch for leaks or slow drainage. A properly sloped drain should carry water away quickly without gurgling.
Test for Leaks and Clean Up
Before declaring the job complete, verify that everything is secure and dry.
Turn Water Back On Slowly
Open the dedicated RO shut-off valve or your main supply. Watch all former connection points, since nearby joints may have shifted during the project.
Inspect Every Joint for Moisture
Run a dry paper towel over joints, valves, and the drain repair. If you find any dampness, shut off the water immediately and re-tighten the fitting. Over-tightening can crack ports, so aim for firm but not excessive pressure.
Monitor for 24–72 Hours
Place a towel or small bowl under the cabinet for the next few days. Some leaks develop slowly, especially in pressurized lines that only show problems after repeated use. Check daily for the first week.
Troubleshoot Common Removal Problems
Even careful preparation cannot prevent every issue. Here is how to handle the most frequent challenges.
Stuck Quick-Connect Fittings
If a collet will not release, ensure you are pressing it inward fully on both opposite sides. Avoid twisting the tube, as this jams the mechanism. If the fitting remains stuck, cut the tube near the connector and plan to replace that segment later.
Cannot Reach the Faucet Nut
Tight spaces, garbage disposals, and corner cabinets all block access. A long-reach basin wrench or universal joint tool can help, but if the nut is truly unreachable, hire a plumber. This is the most common reason DIYers abandon the project halfway through.
Tank Will Not Drain Fully
If water keeps dripping after several minutes, confirm the faucet is fully open. Check that the air vent valve on the bottom of the tank is not blocked. A failing internal bladder can trap water permanently, in which case you should replace the tank entirely.
Decide Whether Removal Is Really Necessary
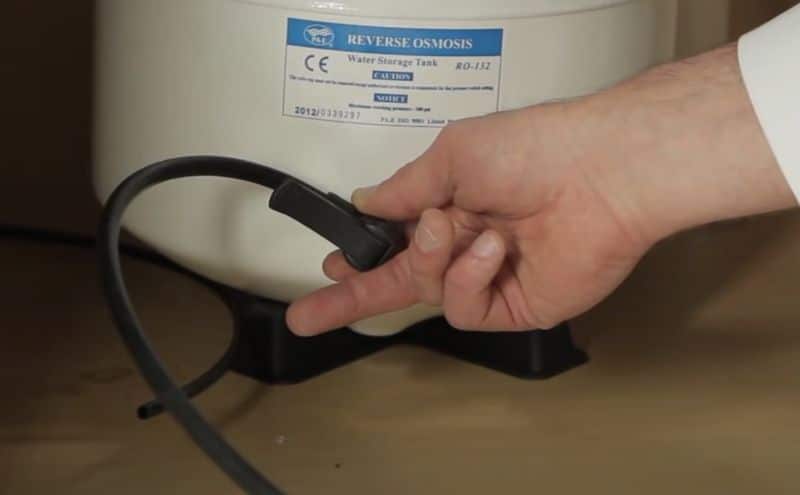
Before committing to full removal, consider whether a simpler fix might solve your problem.
Check the Tank Pressure First
If your system stalls after delivering only one cup of water, the issue is likely a failed or under-pressurized tank, not a broken system. Tanks should be pressurized to 6 PSI. You can check and adjust this with a bicycle pump and pressure gauge. Replacing just the tank costs far less than a full removal and reinstallation.
Look for Clogged Filters
Sediment buildup in pre-filters and post-filters can mimic tank failure. Replacing the filters and sanitizing the system with bleach-based cartridges (run for 15–30 minutes, then flush with clean water for 10 minutes) may restore performance without removing anything.
Consider Your Usage Patterns
Many homeowners report rarely using their RO faucet once they realize the fridge dispenser is more convenient. If that sounds like you, removal makes sense. But if you actually drink from the RO faucet daily, a targeted repair might be the better investment.
When to Call a Professional
Some situations exceed DIY skill levels. Hire a licensed plumber if you encounter:
– No access to the faucet mounting nut
– Shared plumbing lines with no clear shut-off point
– Visible corrosion or brittle pipes
– Uncertainty about reassembling the drain line correctly
A plumber can complete the difficult portions in under 30 minutes, preventing costly water damage and giving you peace of mind.
Frequently Asked Questions About Removing a Reverse Osmosis System
How long does it take to remove a reverse osmosis system?
Most homeowners complete the full removal in under two hours. Difficult access to the faucet mounting nut or tight cabinet spaces can extend the timeline. Professionals often finish in 30 minutes or less.
Do I need to turn off the main water supply?
Not always. If your RO system has a dedicated shut-off valve under the sink, closing that valve is sufficient. If no dedicated valve exists or you cannot locate it, shutting off the main water supply is the safe alternative.
What should I do with the hole left by the RO faucet?
You have two main options: install a decorative cover plate (brushed nickel or stainless steel) or replace the faucet with a soap dispenser if the hole is at least 1-3/8 inches in diameter. Older RO holes are often too small for modern soap dispensers, so measure first.
Can I remove just the tank and leave the rest?
Yes, you can remove components individually. The tank is the easiest piece to extract since you only need to disconnect two tubing lines and lift it out. However, leaving unused filter housings and tubing in place still consumes cabinet space.
What if a quick-connect fitting will not release?
Press the collet ring inward firmly on two opposite sides while pulling the tubing straight out. Do not twist the tube. If the fitting remains stuck, cut the tubing near the connector with a utility knife and replace that section later with new tubing and a coupling.
Is it worth removing the system if only the tank failed?
Probably not. A failed tank is a cheap fix compared to full removal. Tanks should be pressurized to 6 PSI. If the bladder has failed, replacing just the tank restores full function without the hassle of removing and restoring plumbing and countertops.
Key Takeaways for Removing Your Reverse Osmosis System
Removing a reverse osmosis system is a straightforward project when you follow a methodical sequence: shut off water, drain pressure, disconnect tubing, replace the drain T-piece, remove components, and restore plumbing and aesthetics. The most challenging step is usually reaching the faucet mounting nut under the sink, where tight spaces and garbage disposals can block access.
Before starting, confirm that full removal is truly necessary. A stalled system often points to a failed tank or clogged filters, both of which are cheaper fixes than complete removal. If you do proceed, prioritize leak prevention by capping open lines, wrapping threads with Teflon tape clockwise, and monitoring connections for several days after the job is done.
Your next step: gather your tools (adjustable wrench, utility knife, basin wrench, Teflon tape, and a PVC straight pipe), then block out a Saturday morning. With preparation and patience, you will reclaim that under-sink cabinet and eliminate an unused system in a single afternoon.