How to Clean Reverse Osmosis Tank
If your reverse osmosis water suddenly tastes musty, looks cloudy, or carries an off smell, the storage tank is the most likely culprit. Even though RO water is purified to nearly 0 ppm total dissolved solids, removing chlorine during filtration leaves the stored water vulnerable to bacterial growth and biofilm accumulation. Over time, microbes colonize the interior surfaces and compromise both water quality and system performance.
Cleaning your reverse osmosis tank restores safe, great-tasting drinking water and extends the life of your entire filtration system. The exact method depends on whether you have an atmospheric tank (large, open-top whole-house units) or a bladder tank (sealed, pressurized under-sink units). This guide covers both cleaning methods in detail, along with safety precautions, correct chemical ratios, and troubleshooting tips to verify your system is safe to use again.
Identify Your RO Tank Type Before Starting
Knowing your tank type determines the entire cleaning approach and prevents damage to sensitive components.
Atmospheric vs. Bladder Tanks at a Glance
- Atmospheric tanks are large (165 to 1,000+ gallons), open to air, and used with whole-house RO systems. They require full draining, physical scrubbing, and extended chemical soaking.
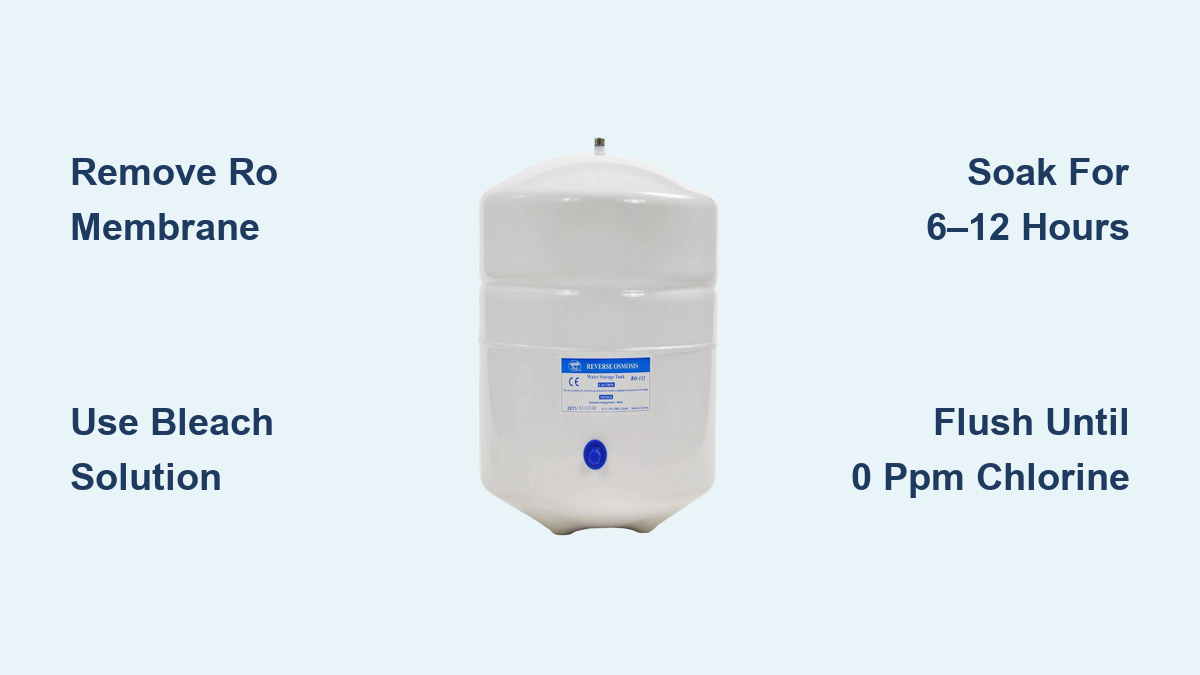
- Bladder tanks are compact (3 to 4 gallons), sealed, and pressurized. You cannot open them, so sanitization happens by circulating a disinfectant solution through the plumbing.
Identifying the correct tank type ensures you apply the right method and avoid costly mistakes like damaging the RO membrane.
Essential Safety Steps Before Cleaning Your RO Tank
Choose the Correct Sanitizer
Use only unscented household bleach containing 5% to 6% sodium hypochlorite or NSF/ANSI 60-certified potable water sanitizers. Never use bleach with dyes, fragrances, or splashless formulas because these leave harmful residues in your drinking water.
Avoid vinegar or citric acid as standalone disinfectants. While they dissolve mineral scale, they do not kill bacteria or remove biofilm.
Protect the RO Membrane from Bleach Damage
Sodium hypochlorite causes irreversible damage to thin-film composite (TFC) RO membranes, which are standard in nearly all residential systems. Always remove the RO membrane before introducing bleach into the system. Skipping this step can result in expensive membrane replacement and poor water quality.
Wear Protective Gear and Work Safely
- Wear gloves and safety goggles when handling bleach.
- Work in a well-ventilated area.
- Never mix bleach with ammonia or other cleaners, as this creates toxic chloramine gas.
- Drain chlorinated rinse water away from gardens, lawns, and septic systems to protect plants and beneficial bacteria.
How to Clean an Atmospheric Reverse Osmosis Tank
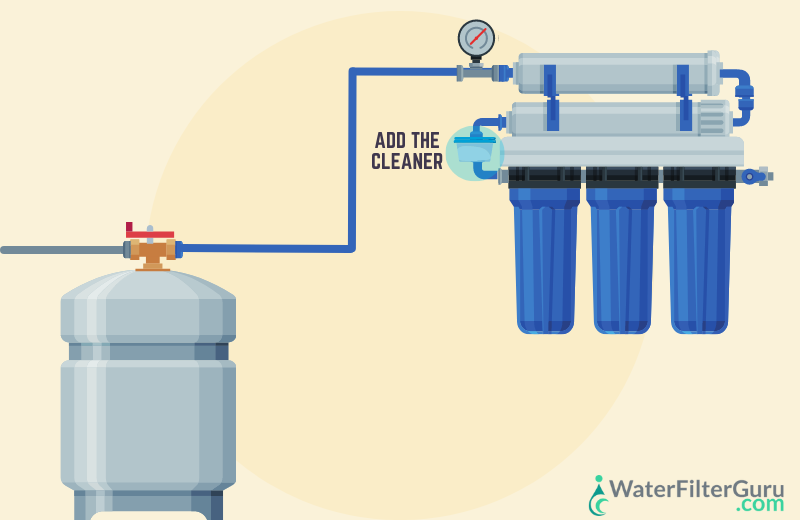
Atmospheric tanks store water for whole-house RO systems and are prone to sediment buildup and biofilm due to open-air exposure.
When to Clean Atmospheric Tanks
- Annually as routine maintenance
- After repairs or extended disuse (over 2 weeks)
- When you notice musty odors, cloudy water, or visible slime
Supplies You Will Need
- Unscented bleach (5% to 6% sodium hypochlorite)
- Long-handled brush or pressure washer
- Wet/dry vacuum or submersible pump
- Chlorine test strips
- Clean water source
Drain the Tank Completely
Turn off the water supply and power to any delivery pumps. Open the drain valve and let the tank empty fully. Use a wet/dry vacuum to remove residual water from the bottom to ensure thorough cleaning.
Remove Debris and Biofilm
Vacuum out all sediment, sludge, and biofilm flakes. This step is critical because debris shields bacteria from disinfectants. If your tank has an access port, scrub the interior walls, seams, and fittings with a long-handled brush. Rinse and vacuum the rinse water afterward.
Mix and Add the Bleach Solution
Use 2 cups (16 oz) of bleach per 100 gallons of tank capacity:
- 165-gallon tank: 3.3 cups
- 220-gallon tank: 4.4 cups
- 500-gallon tank: 11 cups
Add bleach to the empty tank, then refill with clean water. Open downstream valves periodically to circulate the solution through connected plumbing lines.
Soak for 6 to 12 Hours
Let the chlorinated water sit for at least 6 hours, though an overnight soak (12+ hours) is ideal for maximum biofilm elimination.
Flush Until Chlorine-Free
Drain the tank completely and refill with fresh water. Repeat this rinse cycle 2 to 3 times. Use chlorine test strips to confirm 0 ppm free chlorine before reconnecting the system. Smelling or tasting for bleach is unreliable, so always test.
Reconnect and Restart the System
Reattach all plumbing, turn on the water supply, and power up the pumps. Run one or two full fill cycles and discard the water. Open kitchen and bathroom taps to flush residual chlorine from household lines.
How to Sanitize a Bladder (Under-Sink) RO Tank
Bladder tanks are sealed, pressurized vessels used in under-sink RO systems. Since you cannot open them, sanitization occurs by circulating solution through the plumbing.
When to Sanitize Bladder Tanks
- Once per year
- After 2+ weeks of disuse
- At the first sign of bad taste or odor
- During annual filter changes
Prepare Your Workspace
Gather these supplies:
- Unscented bleach or RO sanitization tablets
- Funnel
- Chlorine test strips
- Bucket for waste water
- Clean towel
Turn off the water supply and open the RO faucet until flow stops to depressurize the tank.
Remove All Filters and the Membrane
Take out the sediment pre-filter, carbon pre-filter, RO membrane, and post-carbon filter. Place them on a clean towel in order for easy reassembly. Never skip removing the RO membrane because bleach will destroy it. Leave filter housings open and empty.
Mix the Sanitizing Solution
Combine 1 to 2 teaspoons of bleach into 1 gallon of clean water. Alternatively, use one RO-specific sanitization tablet dissolved in water. Pour the solution into the first pre-filter housing using a funnel to introduce sanitizer into the inlet line.
Circulate and Soak the Solution
Reattach the empty filter housings. Briefly turn on the water supply just enough to push the solution into the storage tank, then shut off immediately. Wait for the tank to fill (or stop filling in non-pump systems). Let the solution soak for 15 to 30 minutes. For better coverage, gently rock the tank if it is portable.
Drain the Tank
Open the RO faucet and drain all solution. Remove any inline sanitization adapters and reconnect the original tubing.
Flush the System Thoroughly
Refill the tank with fresh water and drain completely. Repeat 2 to 3 times. Test water at the faucet with chlorine strips and only proceed when you get 0 ppm.
Reinstall Filters and Perform a Final Flush
Install new filters and membrane. Check the flow direction arrow on the membrane housing. Turn on water and inspect for leaks. Let the tank fill completely and discard this entire first batch. Run the faucet for 2 to 3 minutes to flush carbon dust and ensure clean output.
Troubleshoot Common RO Tank Problems After Cleaning

Musty Smell Persists After Sanitizing
The most likely causes include:
- A saturated post-carbon filter that needs replacement
- A fouled RO membrane that requires testing or replacement
- Incomplete flushing, so recheck chlorine levels with test strips
Low Water Flow from the Faucet
Check the bladder tank air pressure:
- Empty the tank completely
- Use a tire gauge to measure pressure at the air valve
- Inflate to 7 to 10 psi with a bicycle pump or air compressor
Low pressure causes slow fills and short cycling.
Cloudy or Milky Water
This is usually air bubbles from recent plumbing work. Run water for 1 to 2 minutes. If cloudiness persists after 24 hours, sanitize the tank again.
Slimy Residue in the Reservoir
This indicates biofilm from dust or light exposure. Clean with bleach, scrub thoroughly, and store the tank in a dark, sealed cabinet.
Prevent Future Contamination in Your RO Tank
Sanitize Annually Without Exception
Even if water tastes fine, annual sanitization prevents biofilm from establishing. The best time to clean is during filter changes because the system is already open.
Avoid Water Stagnation
If you are away for more than 2 weeks, sanitize before returning. For shorter breaks (3+ days), run the RO faucet for 30 seconds daily to refresh stored water.
Block Light and Dust Exposure
Clear plastic reservoirs can grow algae when exposed to light. Keep tanks in dark spaces and ensure lids are tightly sealed.
Consider Sanitization Tablets for Convenience
RO-specific tablets offer precise dosing, no spills, and no risk of accidentally using scented bleach. They cost slightly more but are ideal for hassle-free maintenance.
Frequently Asked Questions About Cleaning Reverse Osmosis Tanks
Can I use vinegar instead of bleach to clean my RO tank?
No. Vinegar removes mineral scale but does not disinfect bacteria or biofilm. Use it only as a pre-treatment for heavy mineral buildup, then follow with bleach sanitization.
How often should I clean my reverse osmosis storage tank?
Once per year is standard. Sanitize immediately after extended disuse, repairs, or any taste or odor changes.
Is it safe to drink water right after cleaning the tank?
No. You must flush until chlorine test strips read 0 ppm and discard the first full tank. Always verify with test strips before drinking.
Why does my water still smell bad after cleaning the tank?
The issue is likely upstream. A saturated post-carbon filter cannot adsorb odors, or the RO membrane may be fouled. Replace the post-carbon filter first.
Do I need to sanitize if I just changed the filters?
Yes, and it is the perfect time. The system is already open and the membrane is out, so adding sanitization requires minimal extra effort.
What should I do if I see algae in a clear RO tank?
Light exposure caused the algae. Clean with bleach, scrub thoroughly, and relocate or cover the tank. Algae indicates conditions that support other microbial growth as well.
Key Takeaways for Cleaning Your Reverse Osmosis Tank

Maintaining a clean reverse osmosis tank is non-negotiable for safe, high-quality drinking water. Whether you own an atmospheric whole-house system or a bladder under-sink unit, following the correct sanitization procedure protects your health and extends equipment life.
Always remove the RO membrane before introducing bleach, flush thoroughly until chlorine is undetectable, and verify results with test strips rather than relying on smell. Schedule annual cleaning alongside filter replacements to minimize effort, and address stagnation promptly after any extended period of non-use.
Your next step: Gather your supplies, confirm your tank type, and schedule your cleaning during your next filter change for maximum efficiency.