Fix GE Refrigerator Water Dispenser Not Working
Your GE refrigerator water dispenser suddenly stops working. No water comes out, yet the ice maker still functions normally. You press the dispenser button and hear nothing, or maybe a faint click or hum. This is a common frustration, especially in side-by-side and French door models. The good news? Most causes are diagnosable and fixable without replacing the entire unit.
The most frequent culprit behind a GE refrigerator water dispenser not working is a frozen water line inside the freezer door, particularly in GSH and GSL series models. However, issues can also stem from clogged or faulty water filters, failed inlet valves, cracked internal tanks, or electrical failures in switches and control boards. Many of these problems are tied to known design limitations, such as poor door insulation or sensitivity to aftermarket filters.
In this guide, you’ll learn how to accurately diagnose the root cause using simple tools and proven steps. From thawing frozen lines to replacing critical components, we’ll walk you through every fix to save you time, money, and unnecessary service calls.
Confirm Water Supply and Pressure
Before diving into internal repairs, verify the basics. A weak or blocked water supply is often the silent cause of dispenser failure.
Check the Home Water Valve
Ensure the saddle tap valve (the connection point from your home line to the fridge) is fully open. If it’s partially closed, water pressure drops below the 20 PSI minimum required for the inlet valve to activate.
- Turn off the water supply.
- Disconnect the fridge line and test flow into a bucket.
- If flow is low, clean the copper tubing with a straightened paperclip to remove sediment or rust buildup.
- Reconnect and retest.
Pro Tip: Clean the saddle valve every 6 to 12 months, especially in older homes with galvanized pipes.
Test Water Pressure
Use a pressure gauge on the supply line. GE refrigerators require 20 to 125 PSI.
- Below 20 PSI: The valve won’t open, even if electrically functional.
- Above 125 PSI: Risk of leaks or damage.
Low pressure? Consider installing a home water pressure booster or checking for kinked lines.
Diagnose a Frozen Water Line

If the ice maker works but no water dispenses, a frozen line in the freezer door is the likely issue, especially in side-by-side models.
Identify Freezing Symptoms
- No water after pressing the dispenser.
- Brief flow followed by stoppage.
- Gurgling or groaning sounds.
- Intermittent operation (works one day, fails the next).
Perform the Zip Tie Test
Insert a zip tie into the dispenser nozzle.
- Stops at 4 to 8 inches? Ice blockage confirmed.
- Goes deeper? Likely not frozen.
Thaw the Line Quickly
Option 1: Hair Dryer Method
– Set to low heat.
– Warm the dispenser area and door edge for 10 to 15 minutes.
– Press dispenser every few minutes to check flow.
– Caution: Avoid melting plastic by keeping the dryer moving.
Option 2: Natural Thaw
– Leave the freezer door open for 3 to 6 hours.
– Or unplug the fridge and leave the door ajar for 45 minutes.
Option 3: Hot Water Injection
– Use a syringe with hot (not boiling) water.
– Inject slowly into the dispenser nozzle to melt ice from the inside.
Prevent Recurring Freezing
A frozen line often returns unless the root cause, which is poor insulation, is fixed.
Install the GE Heater Kit (WR49X10173)
This is the most reliable long-term fix for side-by-side models.
- Kit includes a heating element that wraps around the water tube.
- Prevents ice formation by maintaining line temperature.
- DIY install in under 30 minutes.
Why it’s needed: GE’s original design lacks sufficient insulation near the evaporator, allowing cold air to freeze the water line.
DIY Insulation Fix (Budget Alternative)
Cut a 10″ x 11″ piece of styrofoam and attach it with Velcro to the flat inner surface of the freezer door, behind the dispenser.
- Blocks cold air drafts.
- Proven effective in GSL25JFTA and GSF251GXB models.
- Non-permanent and easy to install.
Set Freezer Temp: Keep between 0°F and 10°F. Below 0°F increases freezing risk.
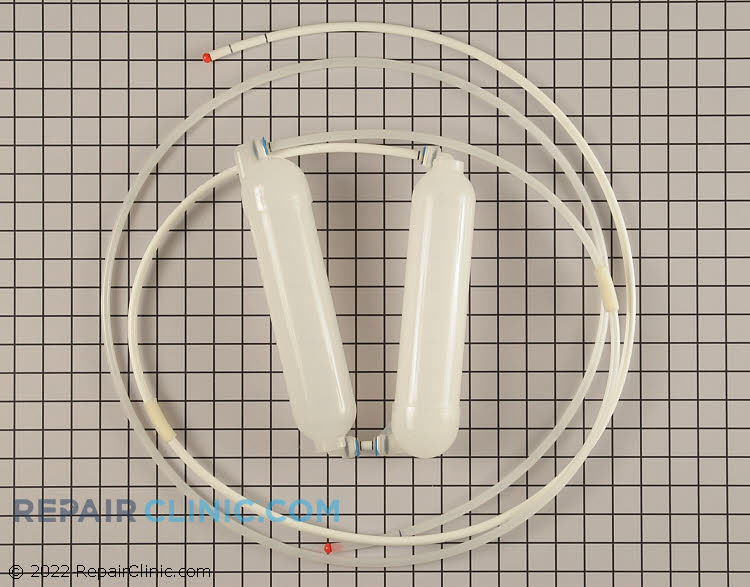
Test and Replace the Water Filter

A clogged or incompatible filter is the second most common cause of dispenser problems.
Replace Every 6 Months
GE recommends changing the filter every six months. Old filters restrict flow and cause groaning noises.
- Use only genuine GE RPWFE filters for models with RFID detection.
- Aftermarket filters often trigger false “Leak Detected” errors.
Bypass Plug Test
Remove the filter and install a bypass plug.
- Water flows? The filter or housing is the issue.
- No flow? Problem lies elsewhere (valve, line, switch).
Check the Filter Housing
Some housings have a check valve that can stick closed.
For Pin-Style Housings:
- Remove filter.
- Press the two internal pins with small screwdrivers (simulates filter insertion).
- Press dispenser. No water? Replace the housing.
For Non-Pin Models:
- Disconnect the water return line at the back.
- Press dispenser. No flow from the line? Housing is damaged.
Common Faulty Part: WR17X11920 (Water Filter Housing and Tube Assembly). Known to cause vibration during dispensing and intermittent flow.
Inspect the Water Inlet Valve
This solenoid valve controls water entry into the fridge. It is located at the back, near the floor.
Signs of Failure
- Clicking or humming with no water.
- Intermittent flow.
- No response at all.
Test with a Multimeter
- Unplug the refrigerator.
- Locate the valve (follow the water line from the back).
- Disconnect power wires.
- Set multimeter to ohms (Ω).
- Test continuity across terminals.
- Normal reading: 500 to 1,500 ohms.
- Infinite resistance: Failed solenoid; replace the valve.
Part Number: WR57X10091 ($30 to $80).
Note: Even a functional valve won’t open if water pressure is below 20 PSI.
Check for a Cracked Water Tank
If water pools under the deli drawer, the internal water tank may be cracked.
Common in PFSF and PFE28PMKGES Models
- Tank expands and cracks when water freezes.
- Often caused by freezer temps below 0°F.
Locate and Inspect the Tank
- Remove shelves and rear panel inside fridge.
- Look for WR17X12741 (Water Tank Assembly).
- Check for visible cracks, especially on the lower tank.
Replace the Assembly
- Disconnect the two hard-wired water lines.
- Route new lines carefully to avoid kinks.
- Reassemble and purge air by dispensing water for 30 to 60 seconds.
Prevention: Maintain freezer temp above 0°F and ensure the door seals tightly.
Test Electrical Components
No sound or lights? The issue may be electrical.
Dispenser Micro Switch
Located behind the paddle or control panel.
- Disconnect wires.
- Use multimeter to test continuity while pressing the button.
- No continuity? Switch is dead.
Part: WR23X10783 ($10 to $25). Easy DIY replacement.
Door Switch
Prevents dispensing when door is open.
- If dispenser only works when door is ajar, this switch may be faulty.
- Test continuity: Should close when door is shut.
Control Board (Motherboard)
Manages all dispenser functions.
Signs of Failure:
- Flickering lights.
- Clicking with no response.
- “Leak Detected” error without actual leak.
- Intermittent operation.
Visual Inspection:
- Look for bulging capacitors, burn marks, or brown residue.
- No physical damage? Still could be faulty. Test components first.
Part: WR55X10942 ($150 to $300). Replace the entire board; there are no user-serviceable parts.
Quick Troubleshooting Flowchart
Use this step-by-step process to isolate the issue fast:
-
Is water supply on and ≥20 PSI?
– No: Fix supply.
– Yes: Proceed. -
Does ice maker work?
– No: Check inlet valve, filter, or supply.
– Yes: Likely frozen line. -
Disconnect line at bottom of door hinge. Press dispenser.
– Water flows: Line is frozen in door.
– No flow: Check valve, filter, or board. -
Bypass filter.
– Works: Replace filter or housing.
– No: Move to valve or switch test. -
Test inlet valve continuity (500 to 1,500 Ω).
– Failed: Replace valve.
– Good: Check switches and board. -
Inspect for water under deli drawer.
– Present: Replace WR17X12741 water tank.
Prevent Future Failures
Follow This Maintenance Plan
| Task | Frequency | Notes |
|---|---|---|
| Replace filter | Every 6 months | Use genuine GE only |
| Clean condenser coils | Every 6 months | Improves efficiency 30% |
| Inspect door seal | Monthly | Prevent cold air leaks |
| Check saddle valve | Every 6–12 months | Clear sediment buildup |
| Verify freezer temp | Weekly | Keep between 0°F and 10°F |
Best Practices
- Use genuine parts, especially for RPWFE models.
- Keep fridge 75% full for thermal stability.
- Avoid overcooling; don’t set freezer below 0°F.
- Seal ice chute: a faulty flapper lets cold air freeze water lines.
Frequently Asked Questions About GE Refrigerator Water Dispensers
Why does my GE refrigerator water dispenser not work but the ice maker does?
This almost always points to a frozen water line in the freezer door. The ice maker uses a different supply path that is less prone to freezing. Thaw the line with a hair dryer or install heater kit WR49X10173 to prevent recurrence.
How do I thaw a frozen water line in my GE refrigerator?
Use a hair dryer on low heat for 10 to 15 minutes, leave the freezer door open for several hours, or inject hot water with a syringe into the dispenser nozzle. For permanent prevention, install the WR49X10173 heater kit.
What causes a GE refrigerator water dispenser to stop working suddenly?
Common causes include a frozen water line, clogged water filter, failed inlet valve, cracked water tank, or faulty dispenser switch. Start by checking the filter and supply pressure before inspecting internal components.
Why does my GE fridge say “Leak Detected” when there is no leak?
This error often appears when using aftermarket water filters in RPWFE models. The RFID chip in genuine GE filters communicates with the fridge. Replace the aftermarket filter with a genuine GE RPWFE filter to clear the error.
How often should I replace the water filter in my GE refrigerator?
Replace the water filter every 6 months. Old filters restrict water flow, cause groaning noises, and can trigger false error messages on the display.
Can a frozen water line in a GE refrigerator fix itself?
Sometimes a partially frozen line may thaw on its own, leading to intermittent operation. However, the issue will return unless you address the root cause by installing a heater kit or improving insulation around the freezer door.
Key Takeaways for Fixing Your GE Refrigerator Water Dispenser
A GE refrigerator water dispenser not working is rarely a death sentence for your appliance. In most cases, the fix is straightforward: thaw a frozen line, replace a clogged filter, or install a heater kit. With basic tools and this guide, you can diagnose and repair the issue yourself and save over $150 in service fees.
Start with the isolation test at the door hinge. If water flows there but not at the dispenser, it is frozen. If not, work upstream: filter, valve, switch, board. Keep genuine GE parts on hand, maintain proper temperatures, and install the WR49X10173 heater if you own a side-by-side model.
Your water will flow again: fast, cold, and reliable.