How to Clean Water Dispenser
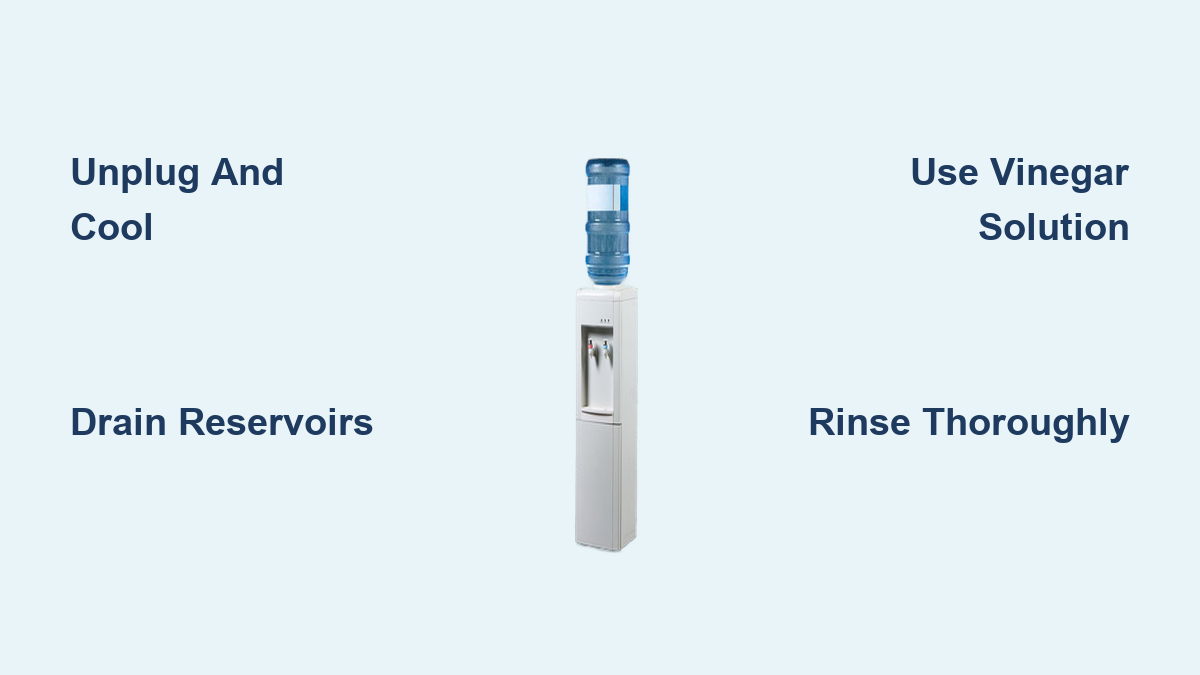
If your water tastes stale, smells off, or dispenses slowly, your dispenser likely needs a deep clean. Over time, mineral buildup, bacteria, and biofilm accumulate inside the tanks, spigots, and tubing, especially in the hot and cold reservoirs. Left unchecked, this contamination affects water quality and can shorten your unit’s lifespan. The good news? You can sanitize your dispenser thoroughly in under an hour using common household items.
This guide walks you through a complete cleaning process using safe, accessible methods. You’ll learn how to drain, disinfect, scrub, and flush your water dispenser to restore fresh-tasting water and reliable performance.
Essential Safety Steps Before Cleaning Your Water Dispenser
Before touching any water or cleaning solution, protect yourself and your appliance with these critical safety measures.
Power Down and Cool Off Completely
Always unplug the dispenser from the wall outlet before starting. Even if the unit appears off, electrical components near water tanks pose a shock risk. Turn off any energy-saving or temperature switches on the back panel. If your model has a hot water tank, switch it off and wait at least 30 minutes to let it cool completely. Attempting to drain hot water risks scalding and can warp internal plastic parts.
Prevent Spills and Leaks During Cleaning
Place a towel or shallow tray under the base to catch drips during draining. Move the unit away from walls to access rear drain valves and the power cord. For top-load models, carefully remove the water bottle and set it upright on a flat surface. For bottom-load units, disconnect the water line using the quick-release valve if applicable.
Avoid Dangerous Chemical Mixes
Never mix vinegar and bleach, as this creates toxic chlorine gas. Choose one sanitizing agent per cleaning session. When using 3% food-grade hydrogen peroxide, wear gloves and eye protection. Store all cleaning solutions out of reach of children and pets.
Required Tools and Cleaning Supplies
Gather everything you need before starting to keep the process efficient and effective.
Choose Your Cleaning Agent
- White vinegar (distilled): Best for removing limescale and general sanitizing. Use a 1:1 mix with water or 2 cups per 5-gallon bottle.
- Bleach (unscented): For strong disinfection. Mix 1 tablespoon per gallon of water.
- Hydrogen peroxide (3% food grade): Non-toxic alternative. Use 4 oz per cycle.
- Baking soda paste: For scrubbing stubborn deposits without harsh chemicals.
- Mild dish soap: For washing removable parts like drip trays and baffles.
Gather Cleaning Tools
- Empty 5-gallon water bottle or 1-gallon jug
- Buckets or pitchers for draining
- Soft microfiber cloths or sponges
- Soft-bristled brush or scrub pad
- Cotton swabs for spigots and crevices
- Screwdriver (for removing back drain plugs on models like Primo)
- Nitrile gloves and eye protection, especially with peroxide
Use a Pre-Measured Cleaning Kit (Optional)
Pre-measured kits include sanitizing solution, scrub pad, gloves, and instructions. They’re ideal for first-time users who want foolproof dosing. Most are designed for top-load models.
Draining the Water Reservoirs
Emptying the internal tanks is the first physical step in the cleaning process.
Turn Off and Drain Front Taps
With the unit unplugged and cooled, open both the hot and cold spigots. Let water flow into a bucket until no more comes out. This clears the main lines and reduces the amount of liquid you’ll need to drain later.
Open the Rear Drain Valve
Many models have a back drain plug. Remove the plastic cap and pull out the red silicone plug (use a screwdriver if stuck). Let any remaining water and sediment drain into a container. This step removes buildup from the lowest point of the tank, where sludge often collects.
Confirm Complete Drainage
Tilt the unit slightly forward (if safe) to help residual water escape. Check that both front spigots and the rear valve stop dripping. If water still flows after several minutes, leave the valves open until fully drained.
Sanitize Interior With Vinegar

Vinegar is the go-to solution for most users due to its safety and effectiveness against limescale and microbes.
Mix the Cleaning Solution
Combine 2 cups of distilled white vinegar with hot tap water in an empty 5-gallon bottle. Alternatively, pour a 1:1 vinegar-water mix directly into the reservoir if your model allows access.
Install and Circulate the Solution
Place the solution bottle on a top-load dispenser or pour the mix into the reservoir. Plug the unit back in and turn on both hot and cold switches. The hot tank helps sanitize more effectively. Let the solution fill the internal system.
Soak for 10–30 Minutes
Allow the vinegar mixture to sit in the tanks for at least 10 minutes. For heavy mineral buildup or units not cleaned in months, extend to 30 minutes. Do not exceed this time, as prolonged exposure can degrade seals.
Drain the Used Solution
Turn off the unit, unplug it, and drain the vinegar mix through both front spigots and the rear drain valve. Dispose of the liquid safely.
Alternative: Peroxide or Bleach Cleaning Methods
For stronger disinfection or specific models, use hydrogen peroxide or bleach instead.
Use Hydrogen Peroxide (ReadyRefresh Method)
Pour 4 oz of 3% food-grade hydrogen peroxide into the reservoir. Avoid the left side and hot water inlet to prevent damage. Dispense about 1 oz through the cold tap, then scrub the interior with a soft pad. Let sit for 10 minutes before draining.
Apply Bleach Solution Safely
Mix 1 tablespoon of unscented bleach per gallon of water. Pour into the reservoir. Circulate by turning the unit on for 5 minutes, then let sit for 10 minutes. Never mix with vinegar. Drain completely afterward.
Choose the Right Method for Your Needs
- Vinegar: Best for routine cleaning and hard water areas.
- Peroxide: Ideal for non-toxic sanitizing and compatible with most plastics.
- Bleach: Use only for persistent bacteria, and requires thorough rinsing.
Scrub Removable Components
While the interior soaks, clean all detachable parts to eliminate biofilm and mold.
Clean Drip Tray and Baffle
Remove the drip tray, water guard, baffle, and spill-proof adapter. Wash with warm, soapy water and a soft brush. Use cotton swabs to clean around the puncturing needle and spigot openings, which are common spots for bacteria.
Wipe Interior Surfaces
Dip a microfiber cloth or melamine sponge in vinegar solution and wipe the inside walls of the reservoir. Focus on the “smart seat” (where the bottle rests) and corners where moisture collects.
Inspect and Clean Drain Plugs
Wash the red silicone plug and plastic cap with soap and water. Check for cracks or debris that could cause leaks. Reinstall only when dry and clean.
Bottom-Load Specific Care
Vacuum the bottom compartment to remove dust. Inspect the internal lifting mechanism for mineral buildup. Wipe down the water line connection point.
Flush and Rinse Thoroughly
Rinsing removes all traces of cleaning agents, which is critical to avoid chemical taste.
First Rinse Cycle
Fill the reservoir with clean, hot tap water. Turn the unit on and dispense through both hot and cold taps. Drain completely through the front and rear valves.
Repeat Until Odor-Free
Perform a second rinse with fresh water. Continue until no vinegar, bleach, or peroxide smell remains. In stubborn cases, a third or fourth rinse may be needed. For peroxide cleans, flush only through the cold spigot initially to avoid cross-contamination.
Final Back Valve Flush
Open the rear drain valve one last time to purge any trapped solution from the tank’s lowest point.
Reassemble and Test the Unit
Now that everything is clean and rinsed, it’s time to put it back together.
Reinstall All Parts
Replace the baffle, spill-proof adapter, drip tray, and drain plugs. Ensure the red buoy in the drip tray moves freely. This indicates proper alignment and overflow protection.
Refill and Power On
Place a fresh water bottle on top or reconnect the bottom water line. Plug the unit in and turn on all switches, including energy-saving and heating/cooling modes.
Discard First Gallon
Run 0.5 to 1 gallon of water through all taps and discard it. This clears any residual particles. Taste the water. If it still has an off-flavor, repeat the rinse cycle.
Wait for Temperature Stabilization
Allow 20–25 minutes for the water to reach proper hot and cold temperatures before use.
Model-Specific Cleaning Tips
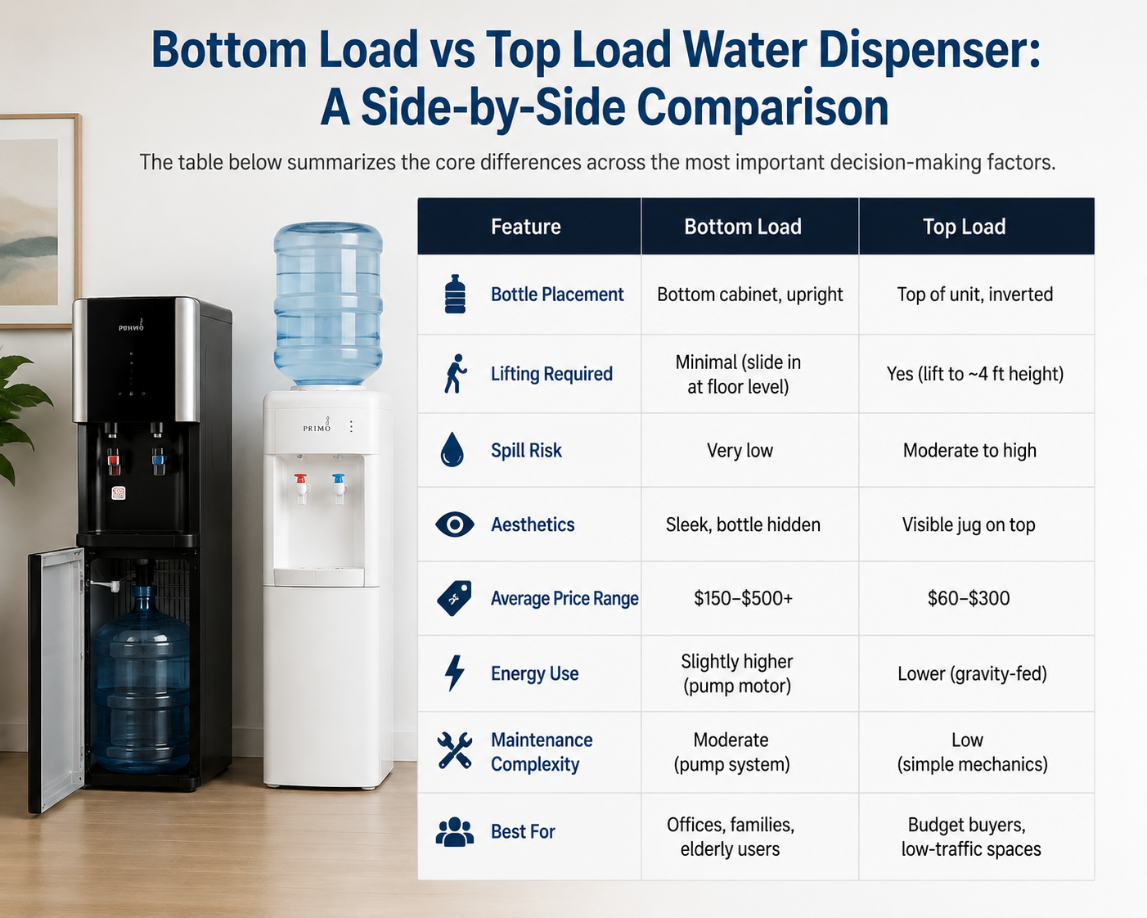
Different dispenser types require slight adjustments to the standard process.
Top-Load Dispensers
These are most vulnerable to airborne contaminants. Wipe the puncturing needle and bottle seat weekly. Use proprietary kits designed for top-fill access. Check for spills around the top hole that can lead to mold.
Bottom-Load Dispensers
Focus on cleaning the internal pump and lifting mechanism. Vacuum the cabinet monthly. Some models use replaceable cartridges. Swap the entire cold-water contact system instead of deep cleaning.
Bottleless (POU) Models
In addition to sanitizing the tank, replace the internal filter every 6–8 months. Follow the same cleaning steps, then install a new filter set. These units connect directly to your water line, so filter maintenance is crucial.
Set a Cleaning Schedule
Regular cleaning prevents buildup and extends your dispenser’s life.
Clean Every 3 Months
For average home or office use, deep clean every 90 days. Mark it on your calendar or set a phone reminder.
Adjust for Usage and Water Quality
- High use or hard water: Clean every 1–2 months.
- Low use or soft water: Can extend to every 6 months.
- After long idle periods: Clean before first use.
Daily and Weekly Maintenance
- Daily: Wipe exterior, buttons, and handles with a damp cloth.
- Weekly: Empty and clean the drip tray.
- Monthly: Inspect the top cavity or bottom compartment for dust.
Troubleshoot Common Post-Clean Issues
Even after cleaning, problems can arise. Here’s how to fix them fast.
Bad Taste or Smell Persists
Likely cause: incomplete rinsing. Flush with 2–3 additional gallons of water. If the issue continues, perform a second vinegar cycle or contact a professional service.
White or Brown Residue Returns
This indicates mineral buildup. Use undiluted vinegar or a baking soda paste on affected areas. Increase cleaning frequency if you have hard water.
Slow Water Flow
Check for clogs in spigots or tubing. Clean with a cotton swab or small brush. Open the rear drain valve to release trapped sediment.
Leaking After Cleaning
Ensure the drip tray is aligned and the red buoy moves freely. Check that the back drain plug is tightly sealed. Verify the water bottle is properly seated.
No Hot or Cold Water
Confirm the unit is plugged in and switches are on. Wait 25 minutes post-cleaning for temperature recovery. If still not working, consult the manual or a technician.
Frequently Asked Questions About Water Dispenser Cleaning
How often should I clean my water dispenser?
For average home or office use, deep clean your water dispenser every 3 months. If you have hard water or heavy usage, clean it every 1–2 months instead. Low-usage households can extend to every 6 months.
Can I use vinegar to clean my water dispenser?
Yes, distilled white vinegar is the most popular and safest cleaning agent for water dispensers. Mix 2 cups of vinegar with hot water in a 5-gallon bottle, circulate for 10–30 minutes, then rinse thoroughly. It effectively removes limescale and kills bacteria.
Is it safe to use bleach in a water dispenser?
Yes, but only unscented household bleach at the correct dilution: 1 tablespoon per gallon of water. Never mix bleach with vinegar, and rinse the unit thoroughly with at least 2–3 gallons of fresh water afterward to remove any chemical residue or taste.
Why does my water dispenser taste bad after cleaning?
A bad taste after cleaning usually means incomplete rinsing. Flush the system with additional gallons of clean water until the vinegar, bleach, or peroxide smell disappears. If the taste persists, run a second sanitizing cycle.
How do I clean a bottom-load water dispenser?
Follow the same draining, sanitizing, and rinsing steps as a top-load model. Pay extra attention to the bottom cabinet by vacuuming dust and inspecting the internal pump and lifting mechanism for mineral buildup. Some models use replaceable cartridges instead of deep cleaning.
What is the red plug on the back of my water dispenser?
The red silicone plug covers the rear drain valve. Removing it allows complete drainage of the internal tank, including sediment that collects at the lowest point. Use a screwdriver if the plug is stuck, and clean it with soap and water before reinstalling.
Key Takeaways for a Clean, Safe Water Dispenser
A well-maintained water dispenser delivers better-tasting water and lasts significantly longer. The three most important habits are: unplug and cool the unit before any cleaning, choose one sanitizing agent and rinse thoroughly, and deep clean every 3 months (or more often in hard water areas).
Your next step: Set a recurring calendar reminder for quarterly cleaning, gather your supplies today, and follow the steps above. Consistency is the single biggest factor in preventing bacteria, mineral buildup, and mechanical issues. Your health and hydration depend on it.