How to Make Distilled Water at Home
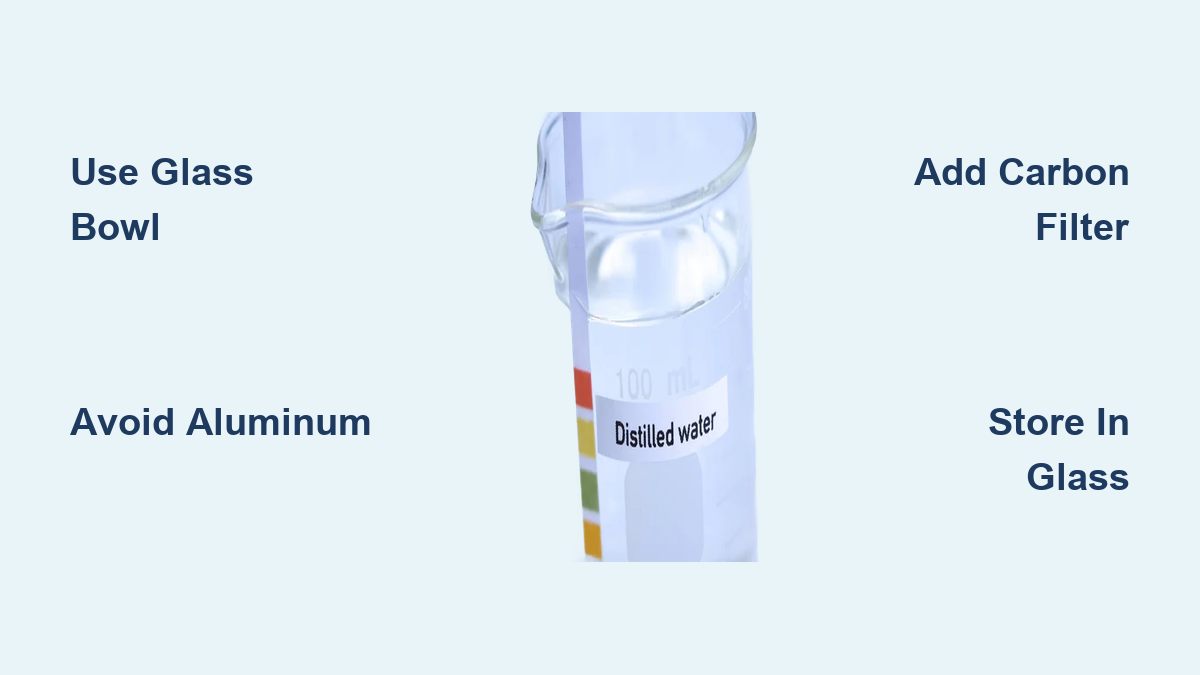
You’ve probably noticed distilled water in stores, sold in plastic jugs for irons, CPAP machines, or baby formula. But what if you could make it yourself in under an hour using just a kitchen pot and a bowl? Making distilled water at home is a practical, cost-effective alternative to buying bottled versions, and it gives you full control over the purity of the final product.
This guide walks you through every reliable method for producing distilled water at home, from a simple stovetop setup to electric units. You’ll learn which materials to use, which to avoid, how to troubleshoot common problems, and where this pure water actually makes a difference in your daily life.
Choose the Right Distillation Method for Your Needs
Not all home distillation methods produce the same results. Your choice depends on your budget, available tools, and how often you need distilled water.
Stovetop Pot-in-Pot Method

This is the most accessible DIY approach, requiring only items most people already have in their kitchen.
Gather Your Equipment
You will need:
– A large stainless steel or glass pot (4–6 quarts)
– A smaller heat-safe bowl made of glass or stainless steel
– Ice cubes
– Tap water
– Oven mitts
– A clean storage container
Avoid aluminum pots or plastic bowls. Distilled water is highly reactive and can leach metals or chemicals from these materials.
Set Up the Pot and Bowl
Fill the large pot with about 8–10 cups of tap water, roughly 2–3 inches deep. Place the smaller bowl inside so it floats above the water level. If it sinks, set it on a trivet or a small heat-safe rack.
The bowl must stay above the waterline so only steam enters it, not splashing liquid.
Heat to a Gentle Simmer
Bring the water to a boil, then immediately reduce the heat to a steady simmer. A rolling boil wastes energy and risks splashing impurities into your collection bowl.
Position the Lid Upside Down and Add Ice
Place the pot lid upside down so the handle points downward into the pot. This creates a sloped surface that channels condensation toward the center, directly above your collection bowl.
Immediately pile ice cubes on top of the inverted lid. The cold surface causes rising steam to condense rapidly into droplets that drip into the floating bowl.
Collect and Store Your Distilled Water
After 30–60 minutes, you will collect 1–2 cups of distilled water. Turn off the heat and use oven mitts to remove the lid and the collection bowl.
Let the water cool completely before transferring it to a sealed glass or BPA-free container. Replace melted ice every 20–30 minutes to keep the process efficient.
External Tubing Condenser Method

This setup lets you collect distilled water in a separate vessel, which is safer and more efficient for larger batches.
Assemble the Condensation Path
You will need:
– A large pot
– Food-grade silicone tubing (6–12 inches)
– A funnel
– A glass jar
– Duct tape
– An ice pack or cold water bath
Connect the tubing to the funnel spout, then insert the other end into the glass jar. Seal the funnel-to-jar connection with duct tape to prevent steam from escaping.
Position the Funnel and Cool the Collector
Place the funnel over the pot opening (or through a hole in the lid) so steam flows directly into the tubing. Wrap the glass jar in an ice pack or submerge it in a cold water bath to promote condensation.
Run the Cycle
Heat the water to a simmer. Steam travels through the tubing, cools, condenses, and drips into the jar. This method is slower but allows for unattended operation.
Once complete, disconnect and seal the jar immediately to prevent CO₂ absorption.
Collect Natural Precipitation
Rain and snow are nature’s own distilled water, formed through evaporation and condensation in the atmosphere.
Gather and Settle the Water
Use a clean bucket to collect rainwater directly from the sky, not from rooftops or gutters. Let it sit for 24–48 hours so sediment can settle to the bottom.
Important: Atmospheric pollutants like acid rain or industrial fallout can contaminate precipitation. For drinking or medical use, always re-distill collected rainwater using the stovetop method.
Check your local laws, as some areas restrict rainwater harvesting.
Invest in an Electric Distiller
For frequent use, electric units automate the process with minimal effort.
Understand What to Look For
Electric distillers range from $100 to $1,000 and typically include:
– A 304-grade stainless steel boiling chamber
– Automatic shut-off
– A cooling fan or condenser coil
– An optional carbon post-filter
They produce about one gallon in 4–6 hours, making them slow but consistent.
Maintain Your Unit
Minerals build up in the boiling chamber after each cycle. Descale monthly with white vinegar or a commercial cleaner like Lumen. With proper care, some units last over 30 years.
Always use the carbon filter if available, as it removes VOCs that simple distillation misses.
Prevent Contamination from VOCs and Poor Materials
Even with proper technique, the wrong materials or oversight can compromise your water’s purity.
Address Volatile Organic Compounds
VOCs like chlorine, chloramines, and certain pesticides have low boiling points and can vaporize alongside water.
Why This Matters
These chemicals may re-condense into your distilled water, affecting taste and safety, especially if your source water contains pesticides or industrial runoff.
Use Carbon Filtration
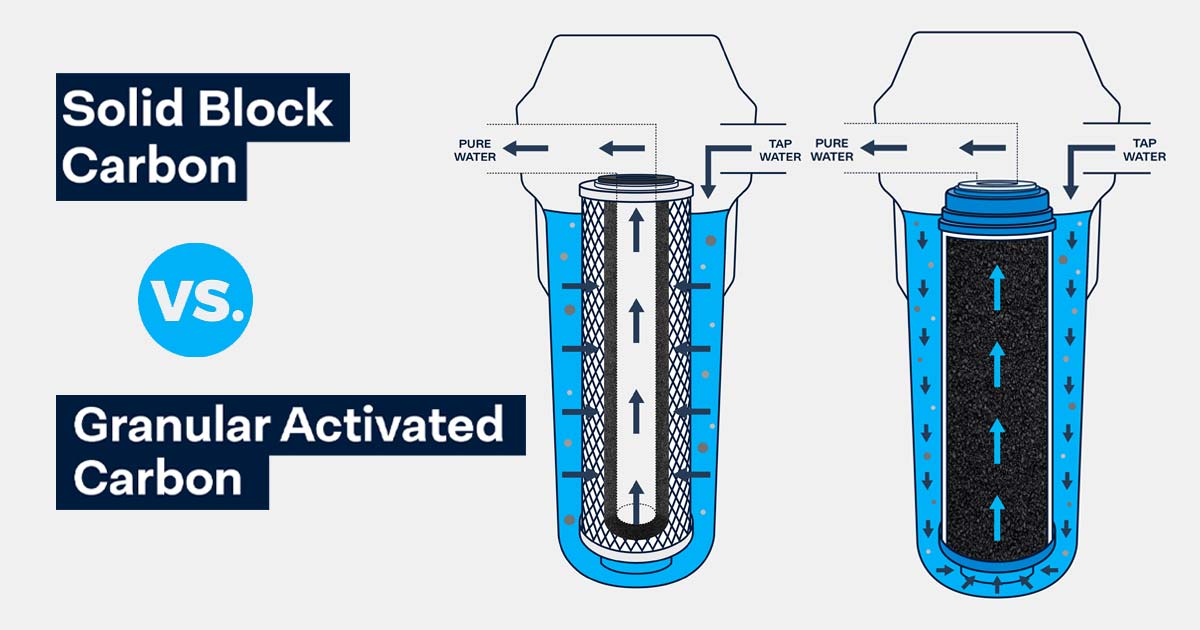
Pair distillation with a Granular Activated Carbon (GAC) filter to trap VOCs before or after the process. Electric units with built-in carbon filters offer the highest purity.
For DIY methods, run your source water through a carbon filter before distilling.
Choose Safe Materials
Distilled water is highly reactive and can leach substances from improper containers.
Stick to Stainless Steel or Glass
Use 304-grade stainless steel pots and glass bowls. These materials are inert and will not contaminate your water.
Avoid Aluminum and Plastic
Aluminum leaches ions into distilled water, giving it a metallic taste and posing health risks. Plastic can release chemicals when exposed to heat or prolonged storage.
Never store hot distilled water in plastic, even BPA-free types.
Know Where Distilled Water Actually Helps
Its purity makes distilled water ideal for specific applications, though not all uses are equal.
Power Medical Devices Safely
CPAP Humidifiers
Tap water causes mineral buildup that clogs tubes and reduces efficiency. Distilled water prevents scaling and ensures you inhale clean vapor.
Neti Pots and Sinus Rinses
Only distilled, sterile, or previously boiled water should be used. Distilled water eliminates the risk of introducing harmful microbes into nasal passages.
Baby Formula Mixing
Many pediatricians recommend it to avoid contaminants. However, consult your doctor, since distilled water lacks minerals important for infant development.
Extend Appliance Lifespan
Humidifiers and Steam Irons
Tap water leaves mineral deposits that clog vents and create “white dust.” Distilled water prevents scaling and keeps appliances running efficiently.
Car Batteries
Use only distilled water to refill lead-acid batteries. Tap water minerals degrade battery plates and shorten lifespan.
Coffee Makers and Kettles
Prevents limescale buildup, keeping heating elements efficient and preserving coffee flavor.
Improve Skincare and Haircare
For Sensitive Skin
Distilled water rinses away soap residue without chlorine or minerals that can irritate acne-prone or reactive skin.
For Softer Hair
Reduces mineral buildup from hard water, improving moisture retention and shine.
Understand Health and Safety Concerns
Distilled water is safe, but its unique properties affect long-term use and handling.
Is It Safe to Drink Daily?
Short-Term: Yes
Distilled water is free of pathogens, heavy metals, and chemicals, making it one of the safest drinking waters available.
Long-Term: With Caveats
It lacks calcium, magnesium, and other minerals found in tap water. Relying on it exclusively may contribute to deficiencies, especially if your diet is low in these nutrients.
Studies link long-term distilled water consumption to increased risk of osteoporosis, hypertension, and heart issues due to mineral depletion.
Solution: Eat a mineral-rich diet or consider supplementing if you drink distilled water daily.
Manage Acidity and Reactivity
Why Distilled Water Turns Acidic
When exposed to air, it absorbs CO₂ and forms carbonic acid, lowering the pH to around 5.5–6.0.
Impact on Cooking
Acidity affects food chemistry. Green vegetables turn olive-gray because chlorophyll breaks down, and baked goods may have altered texture.
Fix: Add a pinch of baking soda when cooking greens, or use tap water for boiling vegetables.
Leaching Risk
Due to its purity, distilled water pulls ions from metals more aggressively than mineralized water.
Never store it in aluminum, copper, or unlined metal containers. Use glass or food-grade plastic instead.
Store Properly to Maximize Shelf Life
Improper storage can undo all your purification efforts.
Use Airtight Glass Containers
Distilled water absorbs odors, gases, and airborne particles quickly.
Best Practices
- Use clean, sterilized glass jars with tight seals
- Fill to the top to minimize air exposure
- Label with the date
Plastic is acceptable if BPA-free and used short-term.
Keep Cool and Dark
Store in a pantry or cupboard away from sunlight and heat sources. UV light can promote microbial growth if any organic matter is present.
Shelf Life Guidelines
When stored properly:
– Unopened: Up to one year
– Opened: Use within 1–2 weeks, since re-exposure to air degrades quality
For medical or lab use, prepare fresh batches weekly.
Troubleshoot Common Problems
Even small adjustments can improve your yield and purity.
Boost Yield and Speed
- Maintain a steady simmer rather than a rolling boil
- Replenish ice every 20–30 minutes
- Use only 8–10 cups of base water for faster heating
Fix Typical Issues
| Problem | Likely Cause | Solution |
|---|---|---|
| Low yield | Weak heat or melted ice | Increase simmer slightly; add fresh ice |
| Metallic taste | Aluminum cookware | Switch to glass or stainless steel |
| Cloudy water | Dirty equipment or airborne particles | Sterilize all parts; cover during cooling |
| Slow process | Poor cooling | Ice the lid heavily; use an external ice bath |
| Vegetable discoloration | Water acidity | Add baking soda or use tap water |
Compare Costs and Environmental Impact
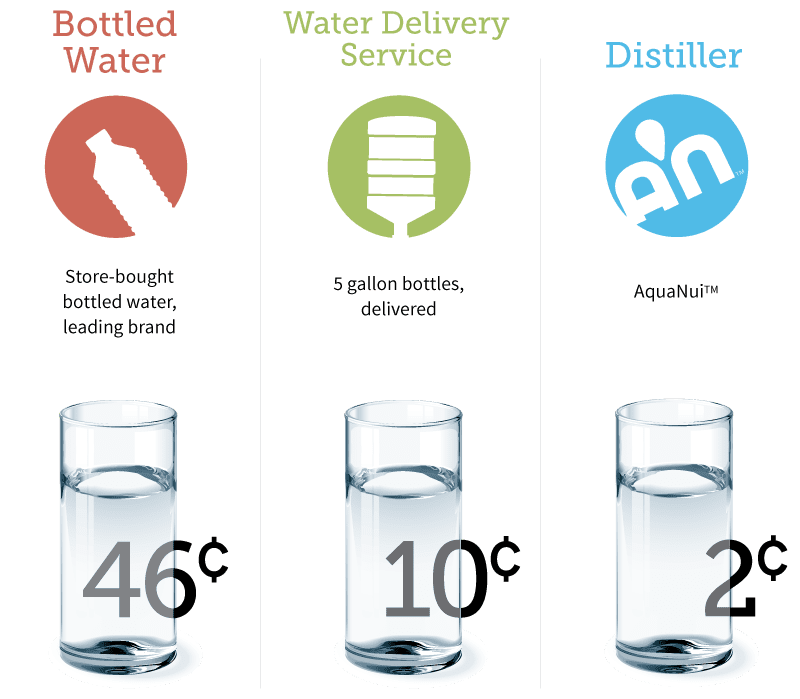
Making distilled water at home saves money and reduces waste over time.
Save Money Long-Term
| Method | Upfront Cost | Ongoing Cost | Output |
|---|---|---|---|
| Stovetop | $0–$20 (ice) | Gas/electricity | 1–2 cups/hour |
| Electric Unit | $100–$1,000 | Electricity | 1 gallon/4–6 hours |
Bottled distilled water costs $1–$2 per gallon. Home distillation cuts that to cents per gallon.
Reduce Plastic Waste
One electric distiller eliminates hundreds of plastic bottles over its lifetime. Even stovetop methods reduce store trips and packaging waste.
Consider Energy Use
Distillation requires continuous heat, about 3–4 kWh per gallon. If your electricity comes from fossil fuels, this adds a carbon footprint.
Tip: Run distillation during off-peak hours or use solar-powered induction stoves when possible.
Frequently Asked Questions About Making Distilled Water at Home
How long does it take to make distilled water on the stovetop?
The stovetop pot-in-pot method typically takes 30–60 minutes to produce 1–2 cups of distilled water. Yield depends on heat consistency and how often you replenish the ice on the lid.
Can I use a plastic bowl for collecting distilled water?
No. Avoid plastic bowls for collection, especially when hot. Plastic can leach chemicals into the highly reactive distilled water. Use glass or stainless steel bowls instead.
Is distilled water the same as boiled water?
No. Boiling kills bacteria but does not remove minerals, salts, or chemical contaminants. Distillation removes both biological and chemical impurities by converting water to steam and condensing it back to liquid.
Why does my distilled water taste flat?
Distilled water lacks the minerals (like calcium and magnesium) that give tap water its flavor. This neutral taste is normal and actually preferred for appliances and medical devices.
Can I drink distilled water every day?
Short-term use is safe, but long-term exclusive consumption may lead to mineral deficiencies. If you drink it daily, ensure you get adequate calcium and magnesium through diet or supplements.
How do I remove VOCs from homemade distilled water?
Use a Granular Activated Carbon (GAC) filter before or after distillation. Electric units with built-in carbon filters offer the most convenient solution for VOC removal.
Key Takeaways for Making Distilled Water at Home
Making distilled water at home is simple, affordable, and practical for a wide range of uses, from powering CPAP machines to protecting your steam iron. The stovetop pot-in-pot method works with everyday kitchen tools, while electric units offer hands-free convenience for frequent users.
Remember these essentials: use only stainless steel or glass, avoid aluminum entirely, and consider adding carbon filtration to remove VOCs. While safe to drink short-term, do not rely on distilled water as your sole source without ensuring adequate mineral intake through diet.
Store your finished water in sealed glass containers and use it within weeks for best quality. With this guide, you are ready to produce pure, contaminant-free water anytime, saving money, reducing waste, and protecting your health and appliances.